Replacing accessory belts is essential for car maintenance. These belts keep your engine running smoothly.
An accessory belt, also known as a drive belt, powers vital car parts like the alternator, power steering pump, and air conditioner. Over time, these belts wear out and can snap, causing major issues. Knowing how to replace them can save you from costly repairs and breakdowns.
In this guide, we’ll explain the importance of these belts, signs they need replacing, and a step-by-step method to do it yourself. It’s simpler than you think and can keep your car running efficiently. Let’s dive into why and how you should replace accessory belts.
Tools And Materials
Replacing your car’s accessory belts doesn’t have to be complicated. Having the right tools and materials is crucial. This guide will help you gather everything you need to get started. Let’s dive into the essentials!
Essential Tools
First, you need a basic set of tools. A socket set is necessary. Make sure it includes various sizes. You will also need a wrench. A standard one will do. Pliers are useful for holding and manipulating parts. A belt tensioner tool is vital. It helps to loosen and tighten the belt. Finally, a flashlight will be handy. It helps you see in tight spaces.
Required Materials
Start with the new accessory belts. Double-check their size and type. Ensure they fit your car model. A belt tension gauge is useful. It checks the belt tension. Belt dressing spray can be helpful. It extends the belt’s life. Keep a clean cloth nearby. It helps to wipe away dirt and grease.
Preparation
Preparing to replace accessory belts in your vehicle is crucial. Proper preparation ensures safety and efficiency. This section will guide you through the necessary steps.
Safety Precautions
Always prioritize safety. Begin by disconnecting the battery. This prevents electrical shocks. Wear safety gloves and goggles. They protect you from potential injuries. Ensure you have all the necessary tools. Missing tools can delay your work. Keep a fire extinguisher nearby. It’s better to be safe than sorry.
Vehicle Positioning
Positioning your vehicle correctly is essential. Park on a flat, stable surface. Engage the parking brake. This prevents the vehicle from moving. Use wheel chocks for added safety. They keep the vehicle stationary. Raise the car if needed. Use a jack and jack stands. Never rely on the jack alone. Double-check the stability before starting work.
Locating The Accessory Belts
Locating the accessory belts in your vehicle is the first step in replacing them. These belts are crucial for the functioning of various engine components. They power the alternator, power steering pump, and air conditioning compressor. Knowing where to find them can save you time and effort.
Engine Layout
Open the hood of your vehicle to access the engine compartment. The engine layout varies between different car models. Locate the front of the engine. This is where the belts are usually found. Most engines have a transverse or longitudinal layout. In a transverse engine, the belts are on the side. In a longitudinal engine, they are at the front.
Belt Configuration
Identify the belt configuration in your engine. Most modern vehicles use a serpentine belt. This single, continuous belt drives multiple components. Older vehicles may have multiple V-belts. Each belt drives a specific component. Look for a belt routing diagram. This is often found on a sticker near the radiator or on the underside of the hood. The diagram shows the path of the belts around the pulleys. This helps you understand the belt configuration.

Credit: www.wikihow.com
Removing The Old Belt
Replacing an accessory belt can feel daunting. But with the right guide, it’s manageable. This section will help you remove the old belt step-by-step. Follow these steps to ensure a smooth process.
Loosening Tension
Before you can remove the old belt, you need to loosen the tension. This step is crucial. Here’s how:
- Locate the tensioner pulley. It’s usually spring-loaded.
- Use a wrench to rotate the tensioner. This will release tension from the belt.
- Keep the wrench in place to hold the tensioner in position.
Belt Removal Steps
With the tension loosened, you can now remove the belt. Follow these steps:
- Slide the belt off the tensioner pulley first.
- Carefully remove the belt from the other pulleys. Take note of the belt’s path.
- Inspect the removed belt. Look for signs of wear or damage. This helps in identifying issues with the new belt.
Remember, taking your time with these steps ensures you do not damage any components. Now, you’re ready for the next stage in replacing your accessory belt.
Installing The New Belt
Replacing your accessory belt is a key part of vehicle maintenance. Installing the new belt correctly ensures your vehicle runs smoothly. Follow these steps to install it properly.
Aligning The Belt
First, ensure that the belt is aligned. A misaligned belt can cause severe damage. Use a straightedge or ruler to check the alignment.
Place the belt on the pulleys. Make sure it fits into the grooves properly. Check all pulleys to ensure the belt is seated correctly.
Tension Adjustment
Next, adjust the tension of the belt. Proper tension prevents slipping and ensures the longevity of the belt.
Use a tension gauge to measure the belt tension. Refer to the vehicle’s manual for the correct tension specifications.
| Vehicle Type | Tension (lbs) |
|---|---|
| Compact Car | 70-90 |
| SUV | 90-110 |
| Truck | 110-130 |
Adjust the tensioner pulley to achieve the correct tension. Tighten the adjustment bolt to secure the pulley. Recheck the tension with the gauge to ensure it is within the specified range.
Finally, start the engine and observe the belt. It should run smoothly without any wobbling or noise. This confirms the belt is installed correctly.
Final Checks
Final checks are essential after replacing accessory belts. Ensure everything works as expected and prevent future issues. This section covers key areas to focus on. Follow these steps to guarantee your belts function properly.
Belt Tension
Proper belt tension is vital. It ensures efficient operation and reduces wear. Use a tension gauge for accuracy. Adjust the tensioner if the belt feels too tight or loose. A well-tensioned belt prolongs the life of your components.
Proper Alignment
Check the alignment of the accessory belts. Misaligned belts can cause noise and damage. Ensure the belts run straight along the pulleys. Use a straight edge to check alignment. Proper alignment helps in smooth operation and longevity.
Maintenance Tips
Maintaining your vehicle’s accessory belts is crucial for its smooth operation. These belts drive essential components like the alternator and water pump. Proper maintenance ensures your car runs efficiently and safely. Here are some valuable tips for maintaining your accessory belts.
Regular Inspections
Inspect the accessory belts regularly. Look for visible signs of damage. Check for cracks, fraying, or glazing. A worn-out belt can break suddenly. This can cause engine failure. A quick visual check every month can help spot issues early.
Signs Of Wear
Listen for unusual noises from the belts. Squealing or chirping sounds indicate wear. Slipping belts also produce noise. Pay attention to engine performance. A failing belt may cause overheating. It can also affect the battery charge. Replace worn belts promptly to avoid bigger problems.
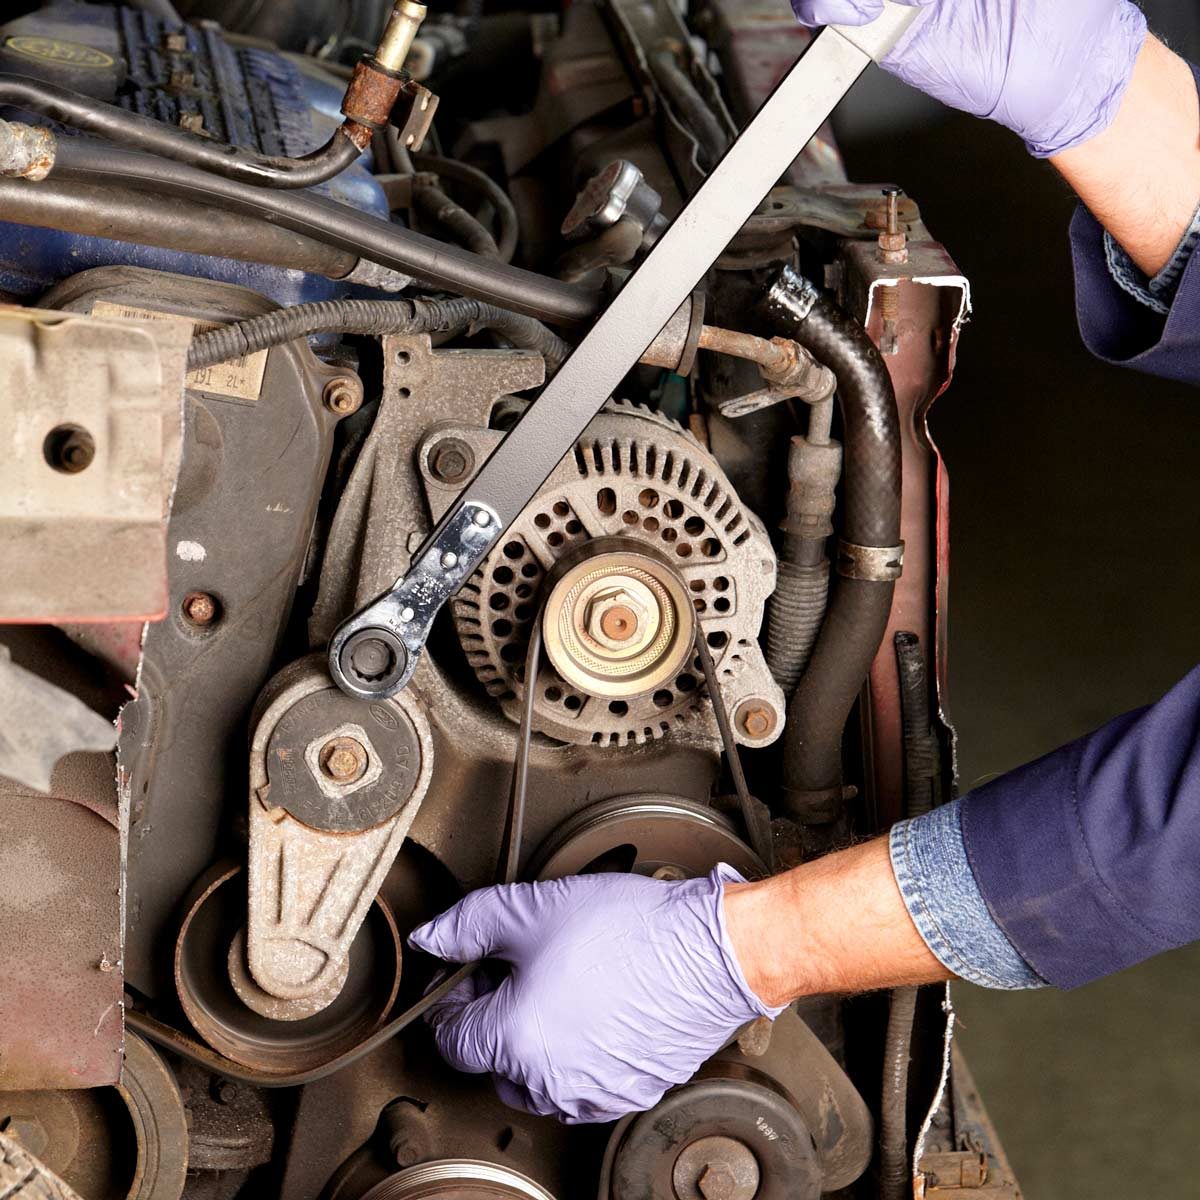
Credit: www.familyhandyman.com
Credit: www.napaonline.com
Frequently Asked Questions
How Often Should I Replace Accessory Belts?
Accessory belts should be replaced every 60,000 to 100,000 miles. Check your vehicle’s manual for specifics.
What Are The Signs Of A Bad Accessory Belt?
Signs include squealing noises, cracks, fraying, or a loss of power to accessories like the alternator or AC.
Can I Replace An Accessory Belt Myself?
Yes, you can. With basic tools and a guide, it’s doable. But, professional help ensures safety.
What Happens If An Accessory Belt Breaks?
If it breaks, your car may lose power steering, battery charging, or AC. Immediate replacement is needed.
How Much Does It Cost To Replace An Accessory Belt?
The cost varies. Usually between $100 and $200, including parts and labor. Prices may vary by vehicle type.
Conclusion
Replacing accessory belts ensures your car runs smoothly. Regular checks help avoid breakdowns. Neglecting belts can lead to costly repairs. Always use quality belts for better performance. Visit a trusted mechanic for belt replacement. Your car’s health depends on these small parts.
Keep them in good shape. Drive safely and enjoy a smoother ride. Proper maintenance saves you time and money. Stay proactive with your car care.


