Is your GMC Sierra’s third brake light not working? This can be a serious safety issue.
A non-functioning third brake light on your GMC Sierra can cause accidents and fines. It’s essential to fix it promptly. This blog post will guide you through common causes and simple fixes. Whether it’s a blown fuse, faulty wiring, or a burnt-out bulb, we will help you troubleshoot the issue.
You don’t need to be a car expert to understand these steps. Just follow along and ensure your vehicle stays safe and legal on the road. Ready to get started? Let’s dive in!
Common Causes
Is your GMC Sierra’s third brake light not working? This can be frustrating. Knowing common causes can help you fix the problem. Below are some typical reasons.
Blown Fuse
A blown fuse is a common cause. The fuse protects the electrical circuit. If the fuse is damaged, the brake light will not work. Check the fuse box. Look for any broken fuses. Replace any that are damaged. This simple fix can often solve the problem.
Faulty Bulb
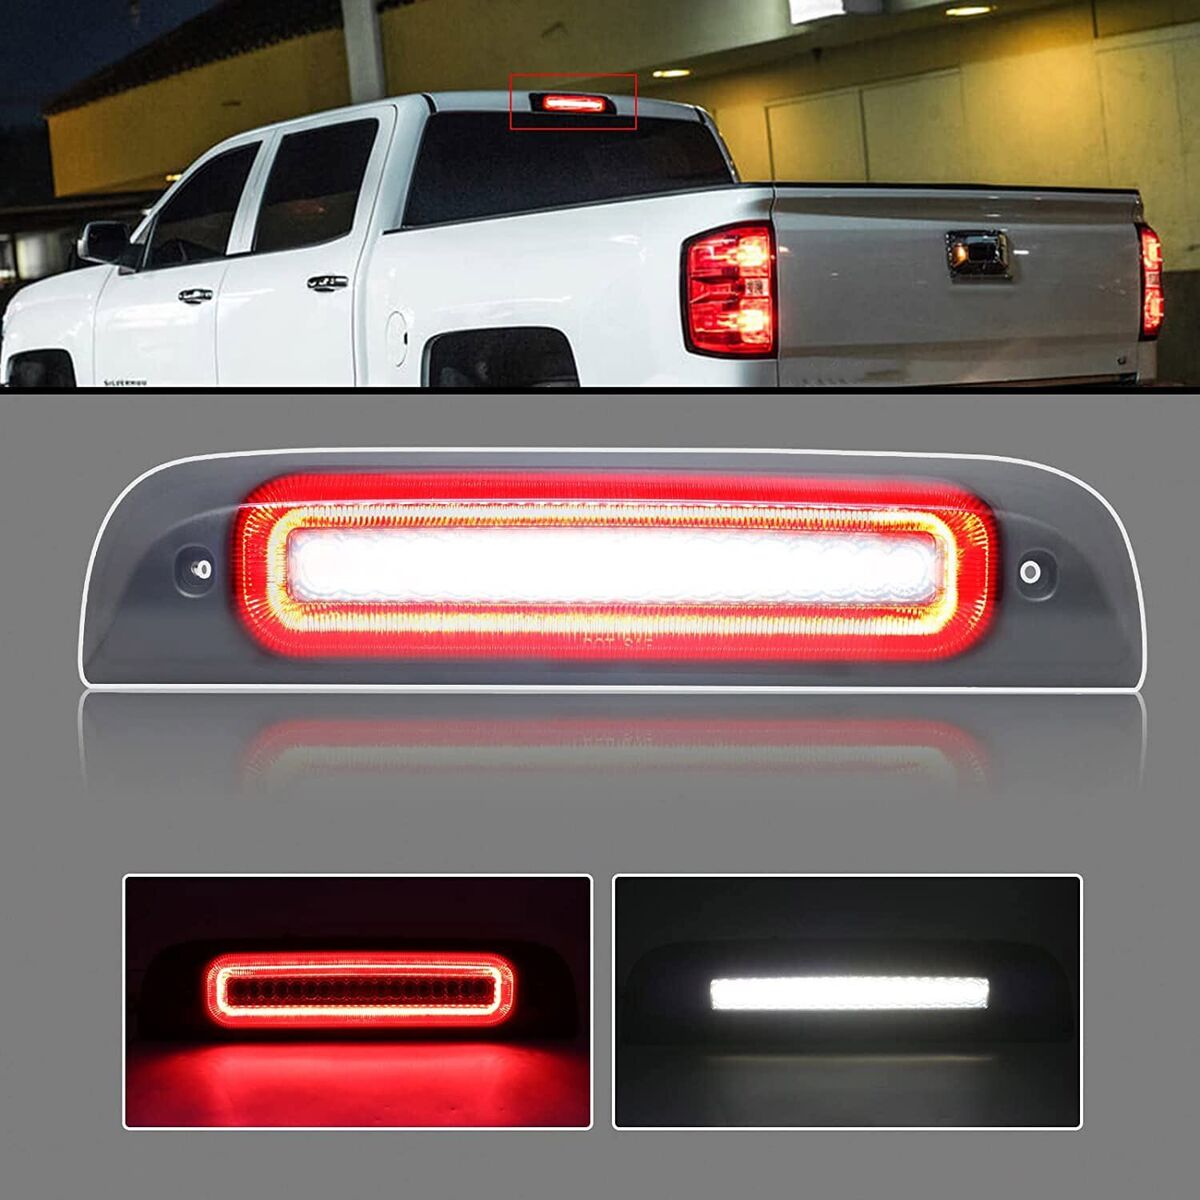
A faulty bulb is another frequent cause. Over time, bulbs can burn out. This is easy to check. Remove the third brake light cover. Inspect the bulb. If the filament is broken, replace the bulb. Always use the correct type of bulb for your vehicle. This ensures proper function and safety.

Credit: www.amazon.com
Safety Precautions
Ensuring your GMC Sierra’s third brake light works is crucial for safety. Before you start, follow these safety precautions to avoid accidents or injuries.
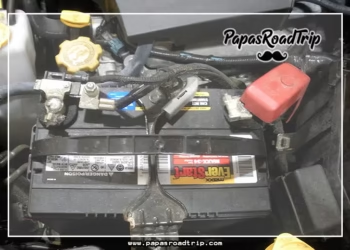
Disconnect Battery
Before working on the brake light, disconnect the battery to prevent electric shock. This step is essential to ensure your safety.
- Locate the battery under the hood.
- Use a wrench to loosen the negative terminal.
- Remove the cable from the terminal.
This process stops electrical currents, making it safe to work on the brake light.
Wear Safety Gear
Always wear safety gear when working on your vehicle. Proper gear protects you from potential hazards.
- Gloves: Protect your hands from sharp edges and debris.
- Safety glasses: Shield your eyes from dust and particles.
- Long sleeves: Prevent skin contact with any harmful substances.
With the right gear, you reduce the risk of injuries.
Tools Needed
To fix the GMC Sierra third brake light not working, you need the right tools. Without the right tools, you may face difficulties. Here are the essential tools you need:
Screwdriver Set
A screwdriver set is essential for removing the brake light cover. You will need different sizes. Here are some tips:
- Use a Phillips head screwdriver for most screws.
- A flathead screwdriver may be needed for prying.
- Ensure the screwdrivers have comfortable grips.
Having a quality screwdriver set makes the process smoother.
Multimeter
A multimeter helps you check the electrical connections. This tool ensures there is no break in the circuit. Here’s what you need to know:
- Set the multimeter to the correct setting.
- Check the voltage at the brake light connection.
- Ensure all wires are properly connected.
Using a multimeter helps identify if the problem is electrical.
Credit: www.ebay.com
Checking The Fuse
Experiencing issues with the third brake light on your GMC Sierra? It might be a blown fuse. Checking the fuse is a simple process. Let’s walk through the steps.
Fuse Location
The fuse box in your GMC Sierra can be found in two places. First, under the hood. Second, inside the cabin. Look for a black box with a lid near the battery under the hood. Inside the cabin, it’s usually on the driver’s side near the dashboard.
Fuse Testing
Once you have located the fuse box, find the fuse map. This map helps identify the fuse linked to the third brake light. Remove the fuse using a fuse puller or tweezers. Inspect the fuse to see if the metal strip inside is broken. A broken strip means the fuse is blown and needs replacing.
| Step | Action |
|---|---|
| 1 | Locate the fuse box. |
| 2 | Find the fuse map. |
| 3 | Identify the brake light fuse. |
| 4 | Remove the fuse. |
| 5 | Inspect the fuse. |
If the fuse is intact, use a multimeter for further testing. Set the multimeter to continuity mode. Touch the probes to the fuse terminals. The multimeter should beep if the fuse is good. If it does not, replace the fuse.
Always replace a blown fuse with one of the same amperage rating. Using a fuse with a higher rating can cause damage. Keeping spare fuses in your vehicle is a good practice. It ensures you are prepared for such issues.
Replacing The Bulb
Is your GMC Sierra third brake light not working? A faulty brake light can be a safety hazard. It might be a simple issue like a burnt-out bulb. Replacing the bulb is a task you can do yourself. Let’s walk you through the process step by step.
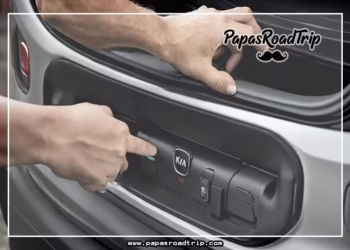
Accessing The Light
First, you need to access the third brake light. Open the truck bed and locate the light. It’s at the top, center of the rear cab. Use a screwdriver to remove the screws holding the light cover. Gently pull the cover off. Be careful not to damage the wiring or the cover.
Installing New Bulb
With the cover off, you will see the bulb. Twist the old bulb counterclockwise to remove it. Take the new bulb and insert it into the socket. Twist it clockwise until it is secure. Make sure it fits snugly. Replace the light cover and screw it back in place. Test the brake light to ensure it works.
Inspecting The Wiring
The third brake light in your GMC Sierra is crucial for safety. If it stops working, the issue may lie in the wiring. Inspecting the wiring can help identify the problem. Follow these steps to check the wiring and ensure the brake light works properly.
Visual Inspection
Start by performing a visual inspection of the wiring. Look for any obvious signs of damage. Check for frayed wires, loose connections, or burnt areas. Pay attention to the wire harness connecting the brake light to the vehicle.
Use a flashlight to inspect hard-to-see areas. If you find any damaged wires, they need repair or replacement. Look for corrosion on connectors, which can cause poor contact.
Testing With Multimeter
If the visual inspection doesn’t reveal the issue, use a multimeter to test the wiring. A multimeter measures electrical current, helping you find any breaks in the circuit.
- Set the multimeter to measure voltage.
- Touch the probes to the brake light’s power and ground wires.
- Press the brake pedal and check the reading. You should see around 12 volts.
If there is no voltage, the issue may be with the power supply. Check the fuse and relay related to the brake light. Replace any faulty components.
Sometimes, a ground wire may be the culprit. Test the ground wire separately. Set the multimeter to continuity mode. Touch one probe to the ground wire and the other to a known ground point on the vehicle. The multimeter should beep, indicating a good ground.
If there is no beep, the ground connection is faulty. Clean the contact points or replace the ground wire.
Cleaning The Contacts
One common reason for the Gmc Sierra third brake light not working is dirty or corroded contacts. Cleaning these contacts can restore the light’s functionality. This section will guide you through the steps to clean the contacts effectively.
Removing Corrosion
First, locate the third brake light assembly. Remove it carefully to expose the contacts. Check for any visible signs of corrosion or dirt. Use a small wire brush to gently scrub the corroded areas. Be thorough but gentle to avoid damaging the contacts. This step ensures a good electrical connection.
Applying Contact Cleaner
Next, apply a contact cleaner spray to the contacts. Spray a small amount directly onto the area. Use a clean cloth to wipe away any residue. The cleaner removes dirt and improves conductivity. Wait a few minutes for the cleaner to dry completely. Then, reassemble the brake light and test it. Your third brake light should now work properly.

Credit: www.youtube.com
Final Testing
Final testing is crucial after fixing your GMC Sierra’s third brake light. This ensures everything works perfectly. Follow these steps for a smooth process.
Reconnect Battery
First, reconnect the battery. This restores power to the vehicle. Make sure the connection is secure. Use a wrench to tighten the terminals. Double-check for a firm connection.
Test The Brake Light
Next, test the brake light. Start the vehicle. Press the brake pedal. Check if the third brake light illuminates. If it works, great! If not, revisit the previous steps. Ensure all connections are correct.
Testing the light ensures safety on the road. It confirms your efforts were successful. Don’t skip this step. It is essential for vehicle safety.
Frequently Asked Questions
Why Is My Gmc Sierra Third Brake Light Not Working?
The bulb might be burnt out. Check the fuse and wiring for issues too.
How Do I Replace The Third Brake Light On A Gmc Sierra?
Remove the old light. Install a new one in the same spot. Simple process.
What Tools Do I Need To Fix The Third Brake Light?
A screwdriver and a new light bulb. Maybe pliers if needed.
Where Is The Fuse For The Third Brake Light Located?
Check the fuse box under the hood. Refer to your manual for exact location.
Can A Faulty Third Brake Light Affect My Vehicle Inspection?
Yes, it can. Make sure all lights work before inspection.
Conclusion
Fixing the GMC Sierra’s third brake light can be simple. Check fuses and bulbs first. Clean connections to avoid corrosion issues. Replace the bulb or wiring if needed. Regular maintenance prevents future problems. Proper brake lights ensure safety on the road.
Keep tools handy for quick fixes. Always drive safely and stay aware. Thank you for reading and good luck!


