Brake lights are crucial for safe driving. They signal to other drivers when you stop.
But what if your brake light stops working after changing the bulb? This situation can be frustrating and even dangerous. Understanding why this happens is important. Several factors could cause this issue. It might be a problem with the bulb, the socket, or even the car’s electrical system.
Identifying the reason quickly ensures your safety on the road. In this blog post, we’ll explore common causes and solutions. You’ll learn how to troubleshoot and fix the problem efficiently. Stay tuned to ensure your brake lights work correctly after a bulb change.
Common Causes
Experiencing a brake light not working after changing the bulb can be frustrating. Several common causes could be behind this issue. Understanding these can help you troubleshoot and fix the problem quickly.
Faulty Bulb
Sometimes, the new bulb you installed might be defective. Even new bulbs can be faulty due to manufacturing defects. Always inspect the bulb before installation. Check for any visible signs of damage. A faulty bulb will not light up, even if installed correctly.
Incorrect Installation
Improper installation is another common cause. The bulb might not be seated correctly in the socket. Ensure the bulb is fitted snugly and aligned with the socket. A loose bulb will not complete the circuit, causing it to fail. Double-check the installation if your brake light is not working.
Blown Fuse
A blown fuse can also cause the brake light to fail. Each car has a fuse box that controls electrical components. Locate your fuse box and check the brake light fuse. If the fuse is blown, replace it with a new one of the same rating. This simple fix often restores the brake light’s function.
Tools Needed
Changing a brake light bulb can sometimes lead to unexpected problems, such as the brake light not working. To troubleshoot and fix this issue, you’ll need a few essential tools. These tools will help you diagnose the problem and ensure the brake light functions correctly. Let’s explore the tools needed for this task.
Screwdrivers
Screwdrivers are essential for accessing the brake light assembly. You’ll need both flathead and Phillips screwdrivers. These will help you remove the screws holding the light assembly in place. A good set of screwdrivers ensures you can handle any type of screw you encounter.
Multimeter
A multimeter is crucial for checking electrical connections. It helps you measure voltage and continuity. This tool will let you determine if there’s an issue with the wiring or the socket. Ensure your multimeter is set to the correct settings before testing.
| Tool | Purpose |
|---|---|
| Flathead Screwdriver | Remove flathead screws |
| Phillips Screwdriver | Remove Phillips screws |
| Multimeter | Measure voltage and continuity |
Replacement Bulbs
Ensure you have the correct replacement bulbs. Check your vehicle’s manual or the old bulb for specifications. Using the wrong bulb type can cause further issues. Always keep spare bulbs handy for future replacements.
- Check bulb type
- Refer to vehicle manual
- Keep spares
Check The Bulb
Experiencing a brake light not working after changing the bulb? Check the bulb installation and electrical connections for faults. Ensure the new bulb is compatible with your vehicle.
Is your brake light not working after changing the bulb? The issue might not be as complex as you think. Often, the problem lies within the bulb itself. Let’s explore how to properly check the bulb to ensure it’s functioning correctly.Inspect Filament
First, take a close look at the bulb. Inspect the filament. The filament is the tiny wire inside the bulb. If it’s broken or burned out, the bulb won’t work. Use a magnifying glass if needed. Look for any signs of damage.Test With Multimeter
If the filament looks fine, you should test the bulb. Use a multimeter for this task. Set the multimeter to the continuity setting. Touch the multimeter probes to the bulb’s contacts. A reading on the screen indicates the bulb is good. No reading means the bulb is faulty. By following these steps, you can ensure that the bulb is not the source of your brake light issue. “`
Credit: www.wikihow.com
Inspect The Socket
Inspecting the socket is critical if your brake light isn’t working after changing the bulb. A faulty socket can prevent the new bulb from making a proper connection. This can lead to your brake light still not functioning correctly. Let’s dive into some areas to check when inspecting the socket.
Corrosion Signs
Check the socket for any signs of corrosion. Rust or greenish deposits can build up over time. These deposits can block the electrical connection. Use a flashlight to look inside the socket. Clean any visible corrosion gently with a small brush. Ensure the socket is dry before installing the bulb.
Loose Connections
Loose connections can cause your brake light to malfunction. Inspect the wires connected to the socket. Gently tug on each wire to check if any are loose. Tighten any loose wires and ensure they are secure. This will help the bulb make a proper connection. Confirm the socket holds the bulb snugly in place.
Examine The Fuse
If your brake light isn’t working after changing the bulb, it might be a fuse issue. Fuses protect the electrical system of your car from overloads. A blown fuse can stop the brake light from working. So, it’s important to check the fuse.
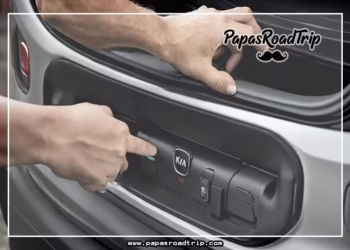
Locate Fuse Box
First, find the fuse box in your car. It’s usually under the dashboard or in the engine bay. Check your car’s manual to know the exact location. Once you find it, open the fuse box cover. Inside, you’ll see many fuses.
Replace Blown Fuse
Identify the fuse for the brake light. The fuse box cover or car manual will help with this. Look for a broken wire inside the fuse. If it’s broken, the fuse is blown and needs to be replaced. Use a fuse puller or tweezers to remove the blown fuse. Insert a new fuse of the same rating in its place. Close the fuse box cover after replacing the fuse.
Check if the brake light works now. If it does, the problem was the blown fuse. If not, there might be another issue. Consider seeking professional help.
Wiring Issues
Wiring issues can cause your brake light to stop working after changing the bulb. Faulty wiring can be tricky to identify and fix. It’s important to address these issues to ensure your brake light works properly.
Check For Damage
Start by inspecting the wires connected to your brake light. Look for any visible damage. Check for frayed, cracked, or broken wires. These can disrupt the electrical flow.
Examine the connections for any corrosion. Corrosion can prevent proper electrical contact. Use a flashlight to get a better look. Ensure all wires are securely connected.
Repair Or Replace Wires
If you find damaged wires, you need to repair or replace them. For minor damage, use electrical tape to cover the exposed parts. This can restore the connection.
For severe damage, replacing the wires might be necessary. Purchase new wires from an auto parts store. Follow the vehicle’s manual for guidance on wire replacement.
Ensure all connections are tight and secure. Test the brake light to see if it’s working now. This process can help resolve wiring issues effectively.
Brake Light Switch
Is your brake light not working after changing the bulb? The issue could be the brake light switch. This switch is crucial for the proper functioning of your brake lights. Located near the brake pedal, it signals the lights to turn on when you press the pedal. Let’s dive into how you can test and replace this switch if necessary.
Test Switch Functionality
To determine if the brake light switch is faulty, follow these simple steps:
- Locate the brake light switch near the brake pedal.
- Press the brake pedal and check if the switch activates the lights.
- Use a multimeter to test for continuity.
- If there is no continuity, the switch is likely faulty.
Testing the switch ensures you are addressing the right component. It’s a quick way to diagnose the issue without additional tools.
Replace If Necessary
If testing reveals the switch is faulty, replace it. Here’s how:
- Purchase a new brake light switch compatible with your vehicle model.
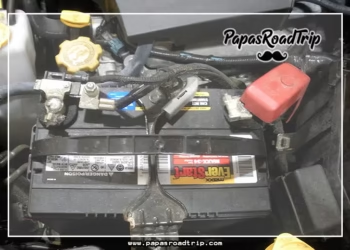
- Disconnect the battery to ensure safety.
- Remove the old switch by unscrewing it from its mount.
- Install the new switch and secure it in place.
- Reconnect the battery and test the brake lights.
Replacing the switch is a straightforward process. It can restore your brake lights to full functionality. Ensure you follow these steps carefully to avoid any mishaps.

Credit: www.reddit.com
Professional Help
Changing a brake light bulb seems easy. But sometimes, the light still does not work. This can be frustrating. Seeking professional help might be the best solution. Experts can quickly diagnose and fix the problem. Avoiding further headaches.
When To Consult A Mechanic
There are several signs you need a mechanic:
- The new bulb does not light up.
- Other electrical issues arise.
- You hear unusual sounds from the brake light area.
- Fuses keep blowing after replacing them.
These issues might indicate deeper electrical problems. A mechanic has the tools and knowledge to fix them. Ensuring your brake lights work perfectly.
Cost Considerations
Worried about the cost? Here is a simple breakdown:
| Service | Estimated Cost |
|---|---|
| Basic Inspection | $20 – $50 |
| Electrical Diagnostics | $50 – $100 |
| Brake Light Wiring Repair | $50 – $200 |
| Labor Charges | $50 – $100 per hour |
These costs are estimates. Prices can vary based on your location and the mechanic. Investing in professional help can save you time and ensure safety on the road.

Credit: www.youtube.com
Frequently Asked Questions
Why Is My Brake Light Not Working After Changing The Bulb?
The socket or wiring might be damaged. Check connections and fuses.
Can A Faulty Fuse Cause Brake Lights Not To Work?
Yes, a blown fuse can stop brake lights from working. Check and replace the fuse.
How Do I Check Brake Light Wiring?
Inspect the wires for any visible damage. Use a multimeter to test connections.
Could The Brake Light Switch Be The Issue?
Yes, a malfunctioning brake light switch can cause brake lights to fail. Test and replace if needed.
How Can I Fix A Brake Light Not Working?
Check the bulb, fuse, wiring, and switch. Replace any faulty components.
Conclusion
Fixing a brake light can be tricky, even after changing the bulb. Check connections and fuses. Sometimes, the problem lies in wiring or switches. Don’t ignore it; brake lights are crucial for safety. Consult a mechanic if the issue persists.
Regular maintenance helps avoid such problems. Keep your car’s lights in top shape. It ensures safe driving for you and others. Simple steps can make a big difference. Stay safe on the road!


