Have you ever finished a Plasti Dip project, only to find overspray stubbornly clinging to areas you didn’t intend to cover? That unwanted residue can be frustrating and tricky to remove, but don’t worry—you’re not stuck with it.
Whether it’s your car, rims, or any other surface, removing Plasti Dip overspray doesn’t have to be a headache. In this guide, you’ll discover simple, effective methods to clean up that overspray quickly and safely. Ready to get your surface looking flawless again?
Let’s dive into the best ways to remove Plasti Dip overspray and restore your project to perfection.
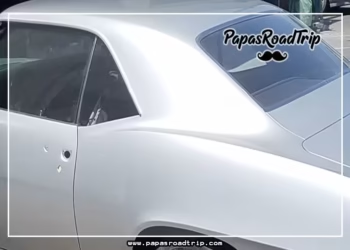
Peeling Off Plasti Dip
Removing Plasti Dip overspray often starts with peeling the dried layer from the surface. This method works best when the Plasti Dip has fully dried and formed a solid coating. Peeling is simple and effective, saving time and avoiding harsh chemicals. It helps protect the original surface beneath the dip. Follow these steps for the best peeling results.
Find An Edge To Start
Look closely for a loose edge or corner on the Plasti Dip layer. This edge is your starting point. Use your fingernail or a plastic tool to lift it gently. Avoid using metal tools as they may scratch the surface underneath. Once you have a good grip on the edge, slowly pull the Plasti Dip away. Pull steadily to keep the layer intact and prevent tearing.
Peeling Dry Surfaces
Ensure the Plasti Dip is completely dry before peeling. Wet or tacky dip will tear easily and cause frustration. Dry dip peels off in larger pieces and comes away smoothly. Peel slowly and steadily to avoid leaving small patches behind. If the layer breaks, find another edge and repeat the process. Clean the surface after peeling to remove any leftover residue.

Credit: www.reddit.com
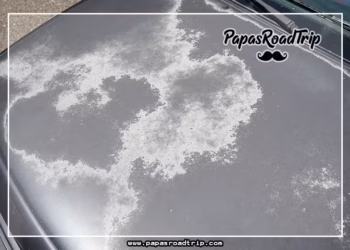
Using Solvents For Thin Layers
Removing Plasti Dip overspray can be tricky, especially with thin layers. Solvents work well to dissolve and lift thin coats without damaging the surface underneath. Using the right solvent makes the process faster and less messy. Always apply gently and test on a small area first.
Dip Dissolver Benefits
Dip dissolver is designed specifically for Plasti Dip removal. It breaks down thin layers quickly. This product makes cleaning easier and reduces scrubbing. It is safe for most surfaces and helps protect paint underneath. Dip dissolver works best on fresh or light overspray.
Wd-40 Application
WD-40 can soften thin Plasti Dip layers effectively. Spray it on the affected area and let it sit for a few minutes. Then, wipe the residue off with a microfiber cloth. WD-40 is easy to find and gentle on many surfaces. Repeat the process for stubborn spots.
Goo Gone Usage
Goo Gone removes sticky residues, including thin Plasti Dip layers. Apply a small amount and let it soak briefly. Use a soft cloth to rub the overspray away. Goo Gone is safe for many surfaces but always test first. It works well on small patches or edges.
Kerosene And Mineral Spirits
Kerosene and mineral spirits are strong solvents for removing thin Plasti Dip. Apply with a cloth and rub gently to dissolve the coating. These solvents evaporate slowly, giving time to work on the dip. Use outdoors or in well-ventilated spaces due to fumes.
Gasoline As A Quick Option
Gasoline can melt thin Plasti Dip layers rapidly. Apply carefully with a cloth and rub the area to remove overspray. This method works fast but needs caution. Use only in open areas and keep flames away. Gasoline can harm paint, so test on a hidden spot first.
Pressure Washer Technique
The pressure washer technique is a powerful method to remove Plasti Dip overspray. It uses strong water pressure to blast away the loosened dip. This method works best after softening the Plasti Dip. It saves time and effort compared to manual scrubbing. Proper use protects the surface underneath while clearing the unwanted overspray.
Softening Plasti Dip First
Start by applying a solvent to soften the Plasti Dip. Products like Dip Dissolver or WD-40 work well. Spray the solvent generously on the overspray. Let it sit for 10 to 15 minutes. This breaks down the dip’s grip on the surface. Softened Plasti Dip is easier to remove with the pressure washer.
Effective Washing Tips
Use a pressure washer with a medium spray nozzle. Hold the nozzle about 12 inches from the surface. Avoid using the highest pressure to prevent damage. Spray in smooth, sweeping motions. Focus on areas with thick overspray first. Rinse the area thoroughly after removing the dip. Repeat the process if some residue remains. Dry the surface with a clean microfiber cloth to finish.

Credit: www.youtube.com
Safety Precautions
Removing Plasti Dip overspray requires careful attention to safety. Using chemicals and tools without caution can harm your health or damage your vehicle. Follow essential safety steps before starting the removal process. These precautions keep you safe and protect your car’s finish.
Ensure Good Ventilation
Work outdoors or in a well-ventilated space. Chemical solvents release strong fumes that can irritate your eyes and lungs. Open windows and doors or use fans to circulate fresh air. Avoid breathing in vapors for long periods to prevent dizziness or headaches.
Test Solvents On Hidden Areas
Always try solvents on a small, hidden part first. This test shows if the product harms your vehicle’s paint or surface. Wait a few minutes after applying to check for discoloration or damage. If the solvent causes harm, choose a gentler product instead.
Avoid Surface Damage
Use soft cloths or microfiber towels to wipe away overspray. Harsh scrubbing or abrasive tools can scratch or dull your finish. Apply solvents gently and avoid soaking the surface too much. Take your time to protect the original paint beneath the Plasti Dip.
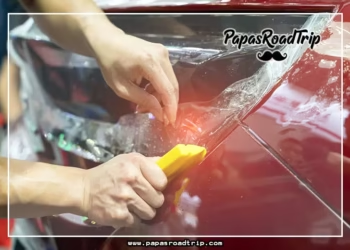
Troubleshooting Removal Issues
Removing Plasti Dip overspray can sometimes present challenges. Some layers peel off easily, while others resist removal. Troubleshooting removal issues helps tackle these stubborn spots. Understanding the texture and thickness of the dip is key. Different methods work better depending on the situation. This section covers common problems and solutions for difficult Plasti Dip removal.
Thicker Coats Ease Removal
Applying thicker coats of Plasti Dip helps with removal. Thick layers form a solid film that peels off cleanly. Thin coats often break apart and stick to the surface. This causes patches that are hard to remove. Multiple layers create a stronger bond within the dip itself. It allows you to peel the entire film instead of small bits. For future projects, aim for at least three coats. Each coat should dry completely before adding the next. This practice saves time and effort during removal.
Handling Unpeelable Plasti Dip
Sometimes Plasti Dip will not peel off, no matter what you try. In these cases, solvents can help dissolve the material. Use products like Plasti Dip remover or Goo Gone for softening the dip. Spray or apply the solvent evenly over the affected area. Let it sit for a few minutes to break down the dip layer. Afterward, use a soft cloth or scraper to remove the softened dip. Avoid harsh scrapers that might damage the surface underneath. Rinse the area with water and dry it completely. Repeat the process if needed until all residue is gone.

Credit: www.reddit.com
Removing Plasti Dip From Wheels
Removing Plasti Dip from wheels requires care and the right approach. Wheels have curves and crevices that make removal tricky. Using the proper methods protects the wheel finish. It also saves time and effort. Below are simple and effective ways to remove Plasti Dip overspray from your wheels.
Cheap And Fast Methods
Peeling is the easiest way to remove Plasti Dip. Start at an edge and pull the film slowly. This works well if the Plasti Dip is thick and dry. For thin layers or leftover residue, use household items like WD-40. Spray it on the affected area and let it soak for a few minutes. Then wipe with a microfiber cloth. Another option is to use kerosene or mineral spirits carefully. These solvents break down the Plasti Dip, making it easy to wipe off. Always test a small area first to avoid damage.
Special Tips For Rims
Rims require gentle handling to avoid scratches. Avoid using sharp tools or harsh chemicals. Use a soft brush to clean tight spots after peeling. Applying a dip dissolver product helps soften stubborn spots without harming the rim’s finish. After applying any solvent, rinse the wheels with water to remove residue. Dry the wheels well to prevent corrosion. Work in a shaded, ventilated area to keep solvents from drying too fast or harming your skin.
Common Mistakes To Avoid
Removing Plasti Dip overspray can be tricky. Many people make common mistakes that damage their surfaces or waste time. Avoiding these errors ensures a smooth removal process. Use the right methods and tools. Work carefully and patiently for best results.
Using Gasoline Safely
Gasoline can dissolve Plasti Dip quickly. Use it with great care. Always work outdoors or in a well-ventilated area. Avoid open flames or sparks nearby. Wear gloves to protect your skin. Never inhale gasoline fumes directly. Apply gasoline sparingly on a cloth, not directly on the surface. Test a small area first. Rinse the area well after removal. Dispose of gasoline-soaked cloths safely to prevent fire hazards.
Avoiding Damage During Removal
Plasti Dip removal may harm paint or plastic if done roughly. Avoid scraping hard with metal tools. Use plastic scrapers or your fingers instead. Do not use harsh chemicals without testing first. Always test solvents on a hidden spot. Avoid excessive pressure from power washers. Work gently and remove in small sections. Allow solvents to soak in before wiping. Patience helps prevent scratches and discoloration.
Frequently Asked Questions
What Solvent Removes Plasti Dip?
Use specialized Dip Dissolver, WD-40, Goo Gone, kerosene, or mineral spirits to remove Plasti Dip effectively. Always test solvents first.
Will Wd-40 Remove Plasti Dip?
WD-40 can help remove thin Plasti Dip layers. Spray it, let it soak, then wipe off with a microfiber towel.
Does Goo Gone Remove Plasti Dip?
Goo Gone can help remove thin Plasti Dip layers or residue. For thicker coats, peeling or specialized dissolvers work better. Always test Goo Gone on a small area first to avoid surface damage.
What Removes Overspray From Plastic?
Use specialized dip dissolvers, WD-40, Goo Gone, or mineral spirits to remove overspray from plastic. Peel off thicker layers. Always test solvents on a small area first and work in a well-ventilated space.
How Can I Easily Remove Plasti Dip Overspray?
Peel from an edge if thick. For thin coats, use solvents like WD-40 or dip dissolvers.
Conclusion
Removing Plasti Dip overspray takes patience and the right tools. Start by peeling edges when possible for easy removal. Use solvents carefully to soften thin layers without damaging surfaces. Always test products on a small area first. Pressure washers help remove softened residue quickly.
Work in a well-ventilated space to stay safe. With these steps, your surface will look clean and smooth again. Taking time ensures the best results without harm. Keep these tips in mind for a hassle-free Plasti Dip cleanup.


