Finding oil in your coolant reservoir can be alarming. Yet, your car isn’t overheating.
What does this mean? Oil in the coolant reservoir hints at a potential issue within your car’s engine system. It might suggest a leak or a seal failure. While your car isn’t overheating now, this could still lead to serious problems if ignored.
Understanding the cause of this contamination is vital to prevent future engine damage. In this blog post, we will explore why oil might be present in the coolant reservoir, even if your car is not overheating. We will also discuss the steps you should take to address this issue. Stay with us to learn more about this common automotive concern and how to handle it effectively.
Credit: www.reddit.com
Common Causes
Finding oil in the coolant reservoir can be alarming, yet the car is not overheating. This could signal several underlying issues. Understanding these common causes can help in diagnosing the problem.
Head Gasket Issues
The head gasket seals the engine block and cylinder head. A damaged or blown head gasket can allow oil and coolant to mix. This is often a result of engine wear or overheating. Common symptoms include:
- White smoke from the exhaust
- Loss of engine power
- Milky oil consistency
Even if the car is not overheating, the head gasket may still be compromised. Regular inspections can prevent severe damage.
Oil Cooler Failure
The oil cooler keeps the engine oil at a safe temperature. If it fails, oil can leak into the coolant system. This failure can happen due to:
- Corrosion
- Wear and tear
- Blockages
Signs of oil cooler failure include:
- Visible oil in the coolant reservoir
- Decreased engine performance
- Unusual engine noise
Regular maintenance and checks can identify issues early. This prevents further engine damage.
Symptoms To Watch For
Finding oil in your coolant reservoir but no overheating can be puzzling. It’s important to know the symptoms. Catching them early can prevent serious damage to your car. Below are key symptoms to watch for.
Discolored Coolant
Check the coolant’s color. It should be bright green, orange, or yellow. If it looks dark or milky, you may have a problem. Oil mixed with coolant changes its color. This is a sign of contamination. Discolored coolant means you should investigate further.
Oil Residue
Look inside the coolant reservoir. If you see a dark, oily substance, that’s oil residue. It can form a layer on top of the coolant. This residue indicates that oil is leaking into the coolant. Oil residue is a clear sign of a problem. Address it promptly to avoid further issues.
Initial Checks
Finding oil in your coolant reservoir can be alarming. But if your car isn’t overheating, it might not be as bad as you think. Let’s start with some initial checks to understand the issue better.
Coolant Level
The first step is to check the coolant level. Ensure the car is cool before opening the reservoir. Look at the markings on the side of the reservoir. The coolant should be between the “min” and “max” marks. If it’s low, you might have a leak.
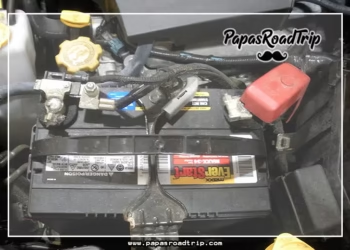
Oil Level
Next, check the oil level. Use the dipstick to see how much oil is in the engine. Make sure the car is on a level surface. Pull the dipstick out, wipe it clean, then reinsert it. Pull it out again to check the oil level. It should be between the “min” and “max” marks. If it’s too high or low, you may have a problem.
After checking both levels, note any unusual findings. This can help you or your mechanic diagnose the issue faster. These initial checks are crucial for understanding why oil is in your coolant reservoir but the car isn’t overheating.

Credit: www.reddit.com
Inspecting The Head Gasket
Finding oil in the coolant reservoir but your car is not overheating can be puzzling. One crucial component to inspect is the head gasket. This part helps seal the engine and keeps fluids separate. A damaged head gasket can cause oil to mix with coolant. Below, we dive into the steps for inspecting the head gasket.
Visual Examination
Begin with a visual examination of the head gasket. Look for signs of damage or leaks. Check for oil stains around the gasket. Also, look for coolant leaks. Examine the engine oil and coolant for contamination. If either fluid appears milky, this may indicate a head gasket issue.
Compression Test
A compression test helps check the engine’s health. Use a compression gauge to measure the pressure in each cylinder. Follow these steps:
- Warm up the engine.
- Remove the spark plug from the first cylinder.
- Insert the compression gauge.
- Turn the engine over a few times.
- Record the pressure reading.
Compare the readings for all cylinders. If one or more readings are low, the head gasket may be faulty. This test can help confirm whether the head gasket needs replacement.
Inspecting the head gasket is essential to diagnose issues. If you find oil in the coolant reservoir, start with a visual examination. Follow up with a compression test for a thorough check.
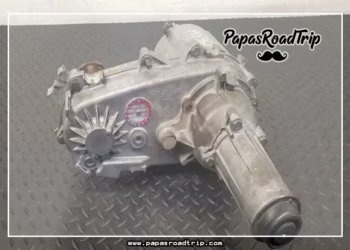
Evaluating The Oil Cooler
Finding oil in your coolant reservoir can be alarming. Yet, if your car isn’t overheating, the issue might lie with the oil cooler. This part helps keep engine oil at the right temperature. If it fails, oil can leak into the coolant.
Understanding how to evaluate the oil cooler is crucial. It helps in determining if it is the source of the problem. Let’s dive into the process of evaluating the oil cooler.
Leak Test
A leak test is the first step. It helps to identify if the oil cooler is leaking. To perform this test, you need to pressure test the coolant system. If the pressure drops, a leak might be present. Check the oil cooler for any visible cracks or damage.
Sometimes, leaks are not visible. You might need to remove the oil cooler for a closer inspection. This step ensures you don’t miss any small cracks.
Cooler Replacement
If the leak test confirms a faulty oil cooler, replace it. Draining the coolant and oil is necessary before removal. Follow the vehicle’s manual for specific instructions. Install the new cooler and ensure all connections are secure.
Refill the coolant and oil. Start the engine and let it run for a few minutes. Check for any leaks. If none are found, the replacement was successful.
Checking Engine Seals
Oil in the coolant reservoir can be concerning. The first step is to check the engine seals. The engine seals keep oil and coolant separate. A damaged seal can cause oil to leak into the coolant. This can happen without causing the engine to overheat. Let’s look at some key seals to check.
Valve Cover Gaskets
The valve cover gaskets seal the top of the engine. They prevent oil from leaking out. If these gaskets fail, oil can seep into the coolant passages. This can cause oil to appear in the coolant reservoir. Check the gaskets for any signs of wear or damage. If the gaskets are leaking, they need to be replaced.
Timing Cover
The timing cover seals the timing chain or belt. It prevents oil from leaking out. A damaged timing cover can allow oil to enter the cooling system. This can cause oil to appear in the coolant reservoir. Inspect the timing cover for any cracks or leaks. Replace it if you find any damage. Proper sealing is crucial for engine health.
Flushing The Cooling System
Flushing the cooling system is an essential step if you find oil in your coolant reservoir but your car isn’t overheating. This process helps remove any contaminants and ensures the cooling system works efficiently. Let’s explore the steps involved in flushing the cooling system.
Drain And Refill
First, park your car on a level surface and let the engine cool down. Open the radiator cap to release any pressure. Place a container under the radiator drain plug. Carefully open the drain plug and let the coolant flow into the container. This step might take a few minutes.
Once the coolant has drained completely, close the drain plug. Then, refill the radiator with distilled water. Distilled water helps to avoid mineral deposits. Start the engine and let it run for about 10 minutes. This helps to circulate the water and flush out any remaining contaminants. Turn off the engine and let it cool again. Open the drain plug and allow the water to drain completely.
Using A Flush Product
After draining the water, it’s time to use a flush product. Choose a quality radiator flush product from your local auto parts store. Follow the instructions on the product label. Usually, you need to pour the flush product into the radiator and fill it with distilled water.
Start the engine and let it idle for the specified time on the product instructions. This allows the flush product to work through the cooling system and remove any oil or contaminants. After the time is up, turn off the engine and let it cool. Drain the mixture of flush product and water from the radiator.
Finally, refill the radiator with the appropriate coolant mixture. Ensure all connections are secure and there are no leaks. This completes the flushing process and helps maintain your car’s cooling system in good condition.

Credit: mechanics.stackexchange.com
Preventive Measures
Finding oil in the coolant reservoir can be alarming. Even if your car isn’t overheating, it’s essential to address this issue. Implementing preventive measures can help avoid severe engine damage. Below are key steps to maintain your car’s health.
Regular Maintenance
Scheduling regular maintenance checks is crucial. It ensures that your car remains in good condition. Mechanics can spot early signs of problems. Fixing minor issues can prevent them from becoming serious.
Follow your car’s maintenance schedule. Regular oil changes, coolant checks, and inspections can keep your engine running smoothly. This practice can also help detect any leaks or contamination early.
Monitoring Fluid Levels
Regularly check your car’s fluid levels. Low coolant or oil levels can indicate a problem. Keep an eye on the coolant reservoir and oil dipstick. If you notice any contamination, take action immediately.
Use the correct type of coolant and oil. Mixing different types can cause chemical reactions. This can lead to contamination and damage. Always refer to your car’s manual for the recommended fluids.
| Fluid | Recommended Check Frequency |
|---|---|
| Coolant | Monthly |
| Oil | Every 3,000 to 5,000 miles |
By keeping an eye on these fluids, you can prevent significant issues. If you find oil in the coolant, it’s crucial to address it quickly. This can help avoid engine damage and costly repairs.
Frequently Asked Questions
What Causes Oil In The Coolant Reservoir?
Oil in the coolant reservoir is often caused by a blown head gasket, cracked engine block, or damaged cylinder head.
Is It Safe To Drive With Oil In The Coolant?
No, driving with oil in the coolant can cause engine damage. Fix the issue immediately to avoid costly repairs.
How Do I Fix Oil In The Coolant Reservoir?
The fix usually involves replacing the head gasket or repairing the engine block. Consult a mechanic for an accurate diagnosis.
Can A Bad Radiator Cause Oil In The Coolant?
No, a bad radiator typically doesn’t cause oil to mix with coolant. Look for engine-related issues instead.
How Can I Prevent Oil From Mixing With Coolant?
Regular maintenance and timely repairs can help prevent oil from mixing with coolant. Check your vehicle regularly for leaks.
Conclusion
Oil in the coolant reservoir can be a confusing issue. Your car may not overheat, but it still needs attention. Check for gasket problems or leaks. Regular maintenance is key. Addressing these issues early can save you from costly repairs.
Don’t ignore the signs. Consult a mechanic if unsure. Your car’s health depends on timely action. Stay proactive and keep your car running smoothly.


