Are you looking for a simple, effective way to protect and transform your plastic items? Plasti Dip Plastic offers a versatile solution that sticks well to many plastic surfaces, giving you a fresh look while adding a durable, protective layer.
Whether you want to restore faded plastic trim on your car or customize household items, Plasti Dip lets you do it yourself with ease. But to get the best results, you need to know how to prepare your plastic surface and apply Plasti Dip correctly.
Keep reading, and you’ll discover insider tips to make your Plasti Dip project stick perfectly and look professional every time. Your plastic items are about to get a whole new lease on life!

Credit: www.youtube.com
Plasti Dip Basics
Understanding the basics of Plasti Dip is important for anyone interested in protective coatings. This versatile product offers a simple way to change the look and feel of surfaces. It provides a flexible, rubber-like coating that peels off without damage.
Plasti Dip works well on many materials, including plastic. It can protect, color, and add grip. Below are key points to help you get started with Plasti Dip.
What Is Plasti Dip?
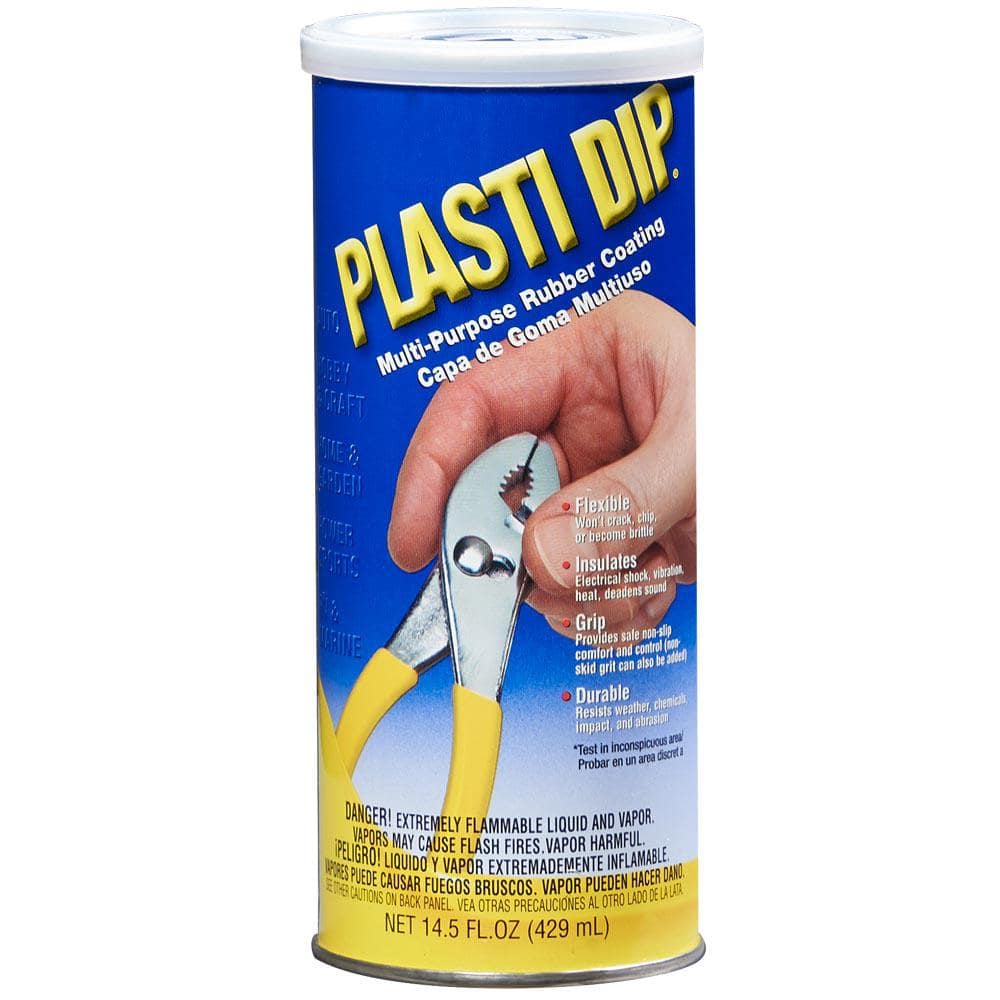
Plasti Dip is a synthetic rubber coating sprayed or brushed on surfaces. It forms a thin, flexible layer that protects against moisture, dirt, and abrasion. This coating can be peeled off easily when needed. It comes in liquid form and dries quickly to a smooth finish.
Types Of Plasti Dip Products
Plasti Dip offers many product types for different uses. Aerosol sprays are popular for quick and even coverage. There are also brush-on versions for detailed work. Specialty products include metallic colors, fluorescents, and textures. Some Plasti Dip formulas provide extra durability or UV resistance.
Common Uses For Plasti Dip
Many people use Plasti Dip for automotive parts like wheels and emblems. It also works well on household items such as tools and furniture. Artists and crafters use it to add color and texture to projects. Plasti Dip offers a protective layer that is easy to remove or change.
Preparing Plastic Surfaces
Preparing plastic surfaces is crucial for applying Plasti Dip effectively. Proper preparation ensures the coating sticks well and lasts longer. It also helps avoid peeling and uneven finishes. Follow these steps carefully to get the best results on your plastic items.
Cleaning And Degreasing
Start by cleaning the plastic surface thoroughly. Use soap and water to remove dirt and dust. After drying, apply a degreaser to remove oils and grease. Avoid harsh chemicals that can damage the plastic. Use a lint-free cloth to wipe the surface clean. A clean surface helps Plasti Dip adhere better and last longer.
Choosing The Right Primer
Select a primer designed for plastics to improve adhesion. Some plastics, like UPVC, need special primers for a strong bond. Apply the primer in thin, even coats. Let each coat dry completely before adding the next. Using the right primer prevents peeling and improves durability of the Plasti Dip coating.
Surface Testing Tips
Test the Plasti Dip on a small hidden area first. This helps check how well it sticks and how it looks. Wait for the test spot to dry fully. If it peels or bubbles, try cleaning again or use a different primer. Surface testing avoids wasting time and materials on a poor finish.
Applying Plasti Dip On Plastic
Applying Plasti Dip on plastic surfaces transforms their look and feel easily. This rubber coating provides protection and a fresh finish. Proper application ensures strong adhesion and a smooth appearance. Follow key steps for best results.
Tack Coats And Layering
Start with thin tack coats to build a base layer. These light coats help Plasti Dip stick well to plastic. Wait a few minutes between coats for tackiness. Apply several layers to get even coverage. Multiple thin layers prevent drips and bubbles. Each layer adds durability and thickness.
Spray Techniques For Even Coverage
Hold the spray can about 6-8 inches from the surface. Move the can steadily in a side-to-side motion. Avoid spraying too close to stop runs or pooling. Overlap each pass slightly for consistent coverage. Use light, even sprays rather than heavy bursts. This method creates a smooth, uniform finish.
Drying And Curing Time
Allow each coat to dry for about 15-30 minutes before the next. Drying time depends on temperature and humidity. After the final coat, let the Plasti Dip cure for 24 hours. Curing strengthens the bond and improves flexibility. Avoid handling the item until fully cured for best results.
Credit: www.homedepot.com
Plasti Dip On Specific Plastics
Plasti Dip works well on many plastic surfaces. It adds protection and a fresh look. Some plastics need special care for better adhesion. Cleaning and prepping the surface helps Plasti Dip stick longer. Different plastics react differently to the coating. Understanding these differences improves results.
Smooth And Shiny Plastics
Smooth plastics like ABS and acrylic hold Plasti Dip well. These surfaces need thorough cleaning to remove oils and dust. Light sanding can help the coating stick better. Plasti Dip creates a flexible, rubbery layer that resists scratches. It also prevents fading and protects from UV rays.
Pvc And Upvc Surfaces
PVC and UPVC plastics are common in pipes and windows. These materials are less porous, so Plasti Dip can peel off easily. Using a primer designed for UPVC improves adhesion. Clean the surface with alcohol or a degreaser before applying. Multiple thin coats work better than one thick coat.
Faded Plastic Restoration
Old plastics lose color and become dull over time. Plasti Dip can restore their look and add a protective layer. It covers scratches and hides discoloration well. Before dipping, clean and dry the plastic completely. This process extends the life of plastic parts and refreshes their appearance.
Benefits Of Plasti Dip Coating
Plasti Dip coating offers many advantages for plastic surfaces. It creates a protective layer that guards against damage. This coating is easy to apply and removes without leaving residue. These benefits make Plasti Dip a popular choice for DIY projects and professional uses.
Durability And Protection
Plasti Dip forms a tough, rubber-like barrier on plastic. It protects against scratches, chips, and minor impacts. The coating also resists water, chemicals, and UV rays. This protection helps extend the life of plastic items. It keeps surfaces looking new longer.
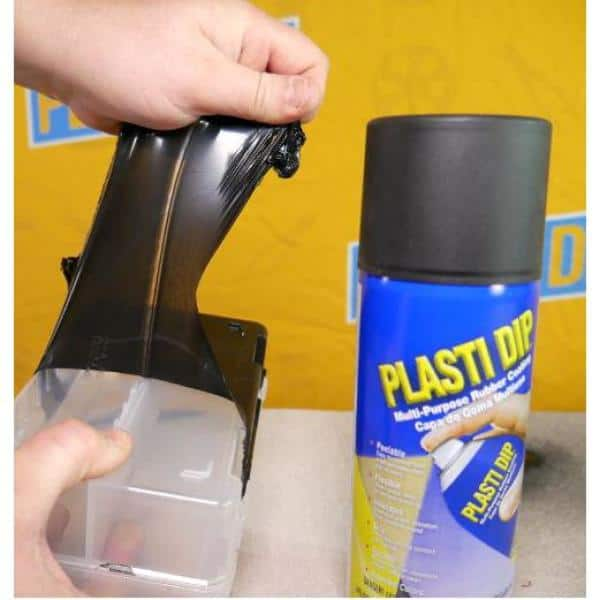
Flexibility And Peelability
The coating stays flexible and moves with the plastic. It does not crack or peel under normal use. If needed, you can easily peel off Plasti Dip. This makes it ideal for temporary protection or design changes. No damage occurs to the original plastic surface.
Color Customization Options
Plasti Dip comes in many colors and finishes. You can choose from matte, glossy, or metallic looks. This variety allows for creative and unique designs. Changing colors is simple by peeling and reapplying a new coat. It is a cost-effective way to refresh plastic items.
Credit: www.homedepot.com
Common Challenges And Solutions
Applying Plasti Dip on plastic surfaces offers great customization. Yet, some common problems may arise during the process. Understanding these challenges helps improve results. Solutions keep your project smooth and successful.
Adhesion Issues
Plasti Dip may not stick well on some plastics. Dirt, oil, or grease block adhesion. Clean the surface with soap and water. Use rubbing alcohol to remove grease. For plastics like UPVC, apply a primer first. This creates a better bond. Dry the surface completely before spraying.
Avoiding Runs And Drips
Spraying too much Plasti Dip causes runs and drips. Hold the can about 6-8 inches from the surface. Spray in thin, even coats. Move your hand steadily side to side. Allow each coat to dry before the next. Several light layers work better than one thick coat. This method prevents sagging and uneven texture.
Removing Plasti Dip Safely
Plasti Dip peels off when you want to remove it. Start by lifting a corner gently with your fingernail. Slowly peel the coating away. Use a plastic scraper for stubborn areas. Avoid metal tools to prevent damage. Clean the surface with soap and water after removal. This keeps the plastic safe and ready for new use.
Tools And Supplies
Preparing to use Plasti Dip on plastic requires the right tools and supplies. Having these items ensures a smooth application and a durable finish. Every project benefits from proper sprays, primers, and accessories. Below, discover the key materials needed for your Plasti Dip project.
Recommended Sprays And Primers
Choose Plasti Dip spray cans made for plastic surfaces. These sprays provide even coverage and strong adhesion. Some plastics need a primer to improve grip. Use a plastic-specific primer for tricky surfaces like UPVC. Primers help Plasti Dip stick better and last longer. Always select sprays labeled for flexible, rubber coatings. This prevents cracking and peeling over time.
Essential Accessories
Accessories make the application easier and cleaner. Use painter’s tape to protect areas you do not want to coat. A respirator mask protects lungs from spray fumes. Gloves keep hands clean and safe from chemicals. A drop cloth or newspaper covers the workspace from overspray. Sandpaper helps roughen smooth plastics for better paint grip. A spray can handle offers comfort and control during spraying.
Where To Buy Plasti Dip
Plasti Dip products are widely available in stores and online. Home Depot, Walmart, and Ace Hardware often stock a variety of colors and primers. AutoZone carries specialty colors and large cans for bigger jobs. Online retailers like Amazon offer convenience and a broad selection. Choose suppliers with clear product information and customer reviews. Buying locally lets you see the product before purchase.
Creative Plasti Dip Projects
Plasti Dip offers endless creative possibilities for many projects. Its flexible, peelable coating makes it ideal for customizing and protecting various surfaces. People use it to add color, texture, and protection without permanent changes.
It works well on plastic, metal, and even fabric. The easy application and removal let you experiment freely. Below are some popular uses that show how versatile Plasti Dip can be.
Automotive Applications
Car enthusiasts use Plasti Dip to change the look of wheels, grilles, and trim. It protects against scratches and rust while giving a fresh style. Applying Plasti Dip on badges or emblems lets you create a unique design.
It also helps protect headlights and mirrors from damage. Removing Plasti Dip is simple and does not harm the original paint. This makes it perfect for temporary color changes or seasonal styles.
Home Decor Ideas
Plasti Dip transforms everyday home items like vases, lamps, and frames. It adds a smooth, colorful finish that resists water and dirt. You can refresh old furniture or create custom art pieces.
Use Plasti Dip to coat drawer handles or switch plates for a modern look. The coating provides grip and prevents scratches on surfaces. It peels off easily if you want a new color later.
Outdoor Gear Protection
Outdoor gear like tools, bike parts, and camping equipment benefit from Plasti Dip coatings. It guards against weather, rust, and accidental drops. The rubbery texture improves grip and comfort during use.
Coating handles or tool heads helps avoid slips and damage. Plasti Dip also protects plastic parts from UV rays and fading. This extends the life of your gear without adding bulk.
Frequently Asked Questions
Does Plasti Dip Work On Plastic?
Yes, Plasti Dip works on many plastics. Clean and degrease surfaces first. Use primer on smooth or UPVC plastics for better adhesion. Apply light coats before heavier layers for a strong, flexible, and protective finish.
How Long Does Plasti Dip Last On Plastic?
Plasti Dip lasts on plastic for 1 to 3 years, depending on exposure and surface preparation. Proper cleaning and priming extend durability.
Why Is Plasti Dip Illegal?
Plasti Dip is illegal in some areas due to harmful chemicals that violate environmental and safety regulations. It can emit toxic fumes and cause pollution.
Can I Go Through A Carwash With Plasti Dip?
You can use a carwash with Plasti Dip, but avoid high-pressure washers and harsh chemicals. Hand washing is safer.
What Is Plasti Dip And How Does It Work On Plastic?
Plasti Dip is a rubber coating that sticks well to plastic surfaces for protection and color change.
Conclusion
Plasti Dip works well on many plastic surfaces with proper care. Clean the plastic fully before applying. Use a primer on smooth plastics for better grip. Apply thin layers to build even coverage. This flexible coating protects and changes the look of plastic easily.
It’s a simple, affordable way to refresh plastic items. Try it out to see how it can improve your plastic projects.


