Thinking about giving your truck bed liner a fresh new look? If you’ve used Herculiner before or have it already applied, you might wonder: can you paint over Herculiner?
The answer isn’t as simple as yes or no. You want a finish that lasts, looks great, and won’t peel or crack after a few weeks. You’ll discover the best way to paint over Herculiner, what prep work is crucial, and which paints work best to ensure your project stands the test of time.
Keep reading, and you’ll be ready to transform your truck bed liner with confidence and ease.
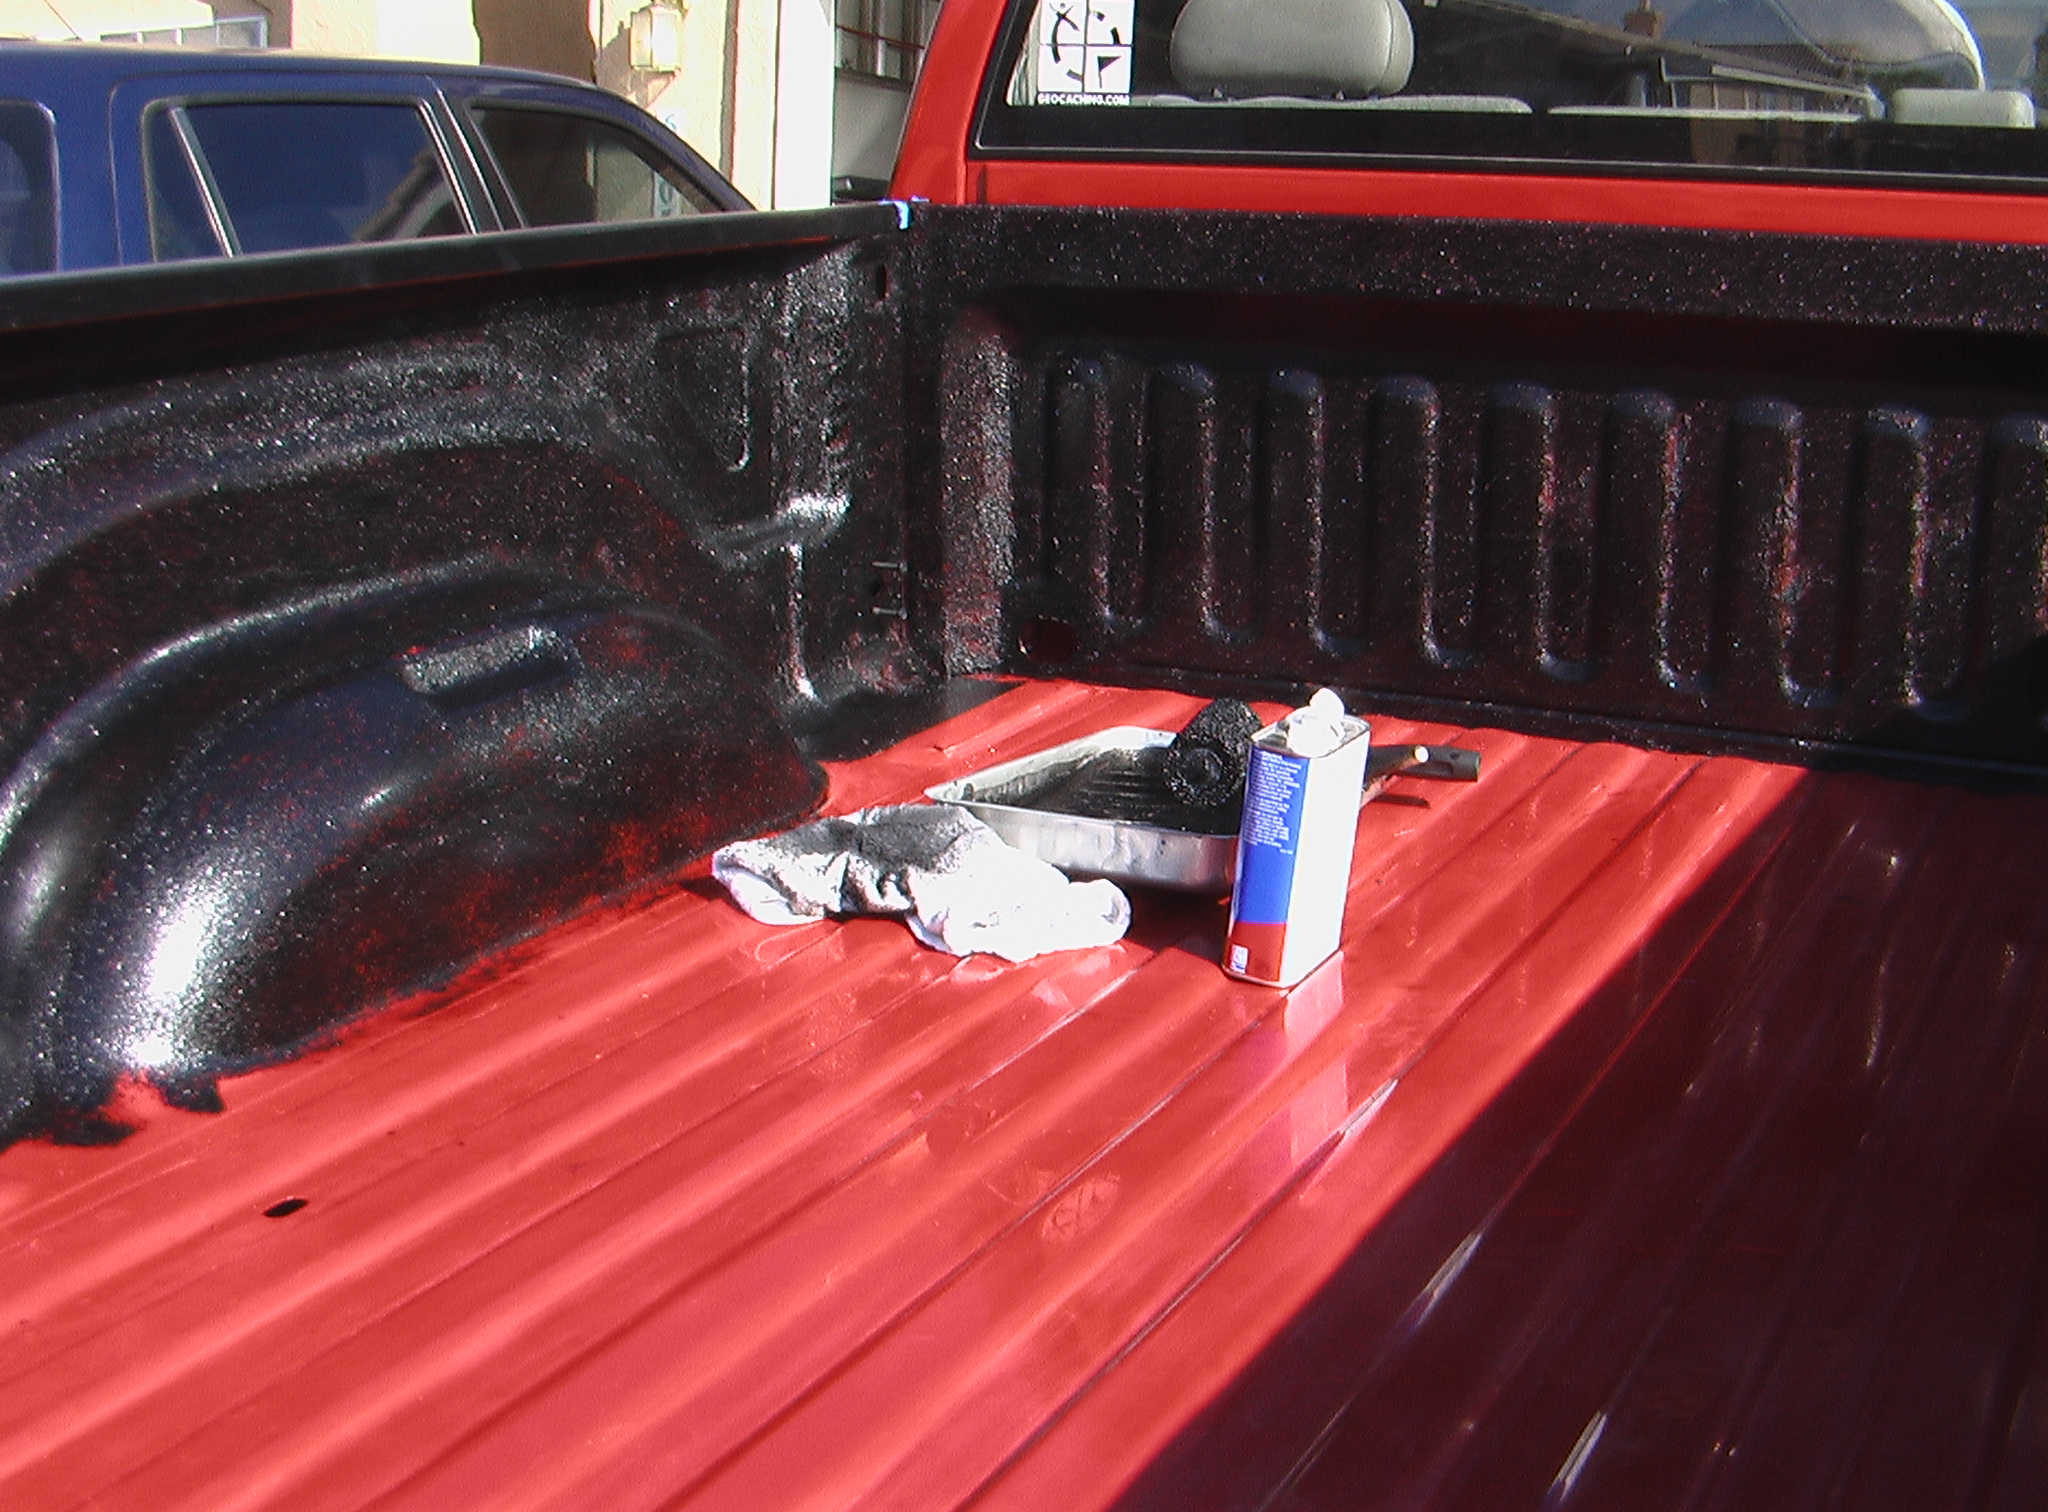
Credit: trucks.pcwize.com
Herculiner Basics
Understanding the basics of Herculiner helps you decide if it fits your project. This tough coating protects surfaces from damage and wear. Many use it on trucks, trailers, and outdoor equipment. It creates a strong, textured layer that lasts long.
Knowing what Herculiner is and its common uses makes application easier. Its benefits go beyond simple protection. It improves grip and hides scratches well. Here is a closer look at Herculiner basics.
What Is Herculiner
Herculiner is a spray-on or roll-on protective coating. It is thick and rubberized, designed for truck beds. This coating forms a durable, non-slip surface. It resists water, chemicals, and UV rays. Herculiner can be applied at home with simple tools. It dries to a tough finish that resists chipping and peeling.
Common Uses And Benefits
Herculiner is mostly used on truck beds to prevent rust and damage. It also works well on trailers, toolboxes, and steps. Many apply it on outdoor furniture for weather resistance. The coating adds a textured grip that helps prevent slipping. It protects metal, wood, and plastic surfaces from wear. Herculiner also hides scratches and dents effectively. It extends the life of surfaces exposed to rough use. Applying Herculiner is cost-effective and saves repair costs later.
Credit: herculiner.com
When To Paint Over Herculiner
Knowing when to paint over Herculiner helps keep your truck bed looking fresh. Herculiner is durable, but it can wear down over time. Painting over it can restore its appearance and protect the surface. Understanding the right time to paint ensures long-lasting results and avoids damage.
Signs You Need A New Coat
Look for cracks or chips on the Herculiner surface. Fading color or dull areas also show wear. Peeling or flaking means the coating has lost its grip. Rough patches or scratches may allow rust to form. These signs mean a new paint coat is needed soon.
Color Change Considerations
Changing the color of your truck bed liner requires good preparation. Clean the surface well to remove dirt and oils. Sand the Herculiner lightly to help paint stick better. Use paint designed for plastic or textured surfaces. Choose a color that matches your style and truck design.
Preparing The Surface
Preparing the surface is the first and most important step before painting over Herculiner. A clean and smooth surface helps the paint stick better. It also prevents peeling and cracking later. Taking time to prepare the surface will improve the final look and durability of your project.
Cleaning And Degreasing
Start by washing the surface thoroughly. Use soap and water to remove dirt and dust. Then, apply a degreaser to get rid of oils and grease. Oils stop the paint from sticking properly. Rinse the surface well and let it dry completely before moving on.
Sanding Techniques
Sanding roughens the Herculiner surface. This helps the new paint bond tightly. Use medium-grit sandpaper, around 120 to 150 grit. Sand evenly across the entire area. Avoid sanding too hard, which can damage the liner. After sanding, wipe away dust with a clean cloth.
Repairing Imperfections
Check for cracks, chips, or holes in the liner. Fill small holes with a flexible filler made for plastics. For larger damage, use a patch or replace the section if possible. Smooth the filled areas with fine sandpaper after drying. Clean the surface again to remove dust before painting.
Choosing The Right Paint
Choosing the right paint to apply over Herculiner is important for durability and appearance. Not every paint will stick well or last long on this textured surface. It is key to pick paints that can handle rough and flexible surfaces. Proper paint choice ensures your project looks good and stays protected.
Best Paint Types For Herculiner
Acrylic latex paints work well over Herculiner because they are flexible and adhere properly. They resist cracking when the liner moves or bends. Oil-based paints can also be used but may require more prep. Some prefer epoxy paints for their strong bond and chemical resistance. Always use paint designed for exterior or heavy-duty use. Flat or satin finishes hide imperfections better than glossy ones.
Polyurethane Vs. Other Options
Polyurethane paint offers excellent durability and a tough finish. It forms a hard coat that resists scratches and UV damage. Compared to acrylic or oil paints, polyurethane lasts longer in harsh conditions. It can be clear or tinted, allowing for color customization. Polyurethane is often pricier but worth it for heavy-use areas. Other paints may be easier to apply but do not protect as well over time.
Painting Process
Painting over Herculiner requires a clear plan and careful steps. The painting process ensures the new paint sticks well and looks smooth. Preparation is key before starting. Follow the right steps to get the best results. Let’s explore the tools, application tips, and drying times needed for this job.
Tools And Materials Needed
Gather all tools before starting. You will need sandpaper to roughen the Herculiner surface. Clean cloths help remove dust. Use a primer made for textured surfaces. Choose a paint suitable for bed liners or tough surfaces. A paint sprayer or high-quality brush ensures even application. Gloves and a mask protect your skin and lungs.
Application Tips For Smooth Finish
Start by sanding the Herculiner lightly. This helps the paint hold better. Wipe away all dust with a clean cloth. Apply a thin primer coat and let it dry fully. Use smooth, even strokes with your brush or sprayer. Avoid thick layers; thin coats dry better and prevent cracking. Multiple thin coats build a durable finish. Let each coat dry before applying the next.
Drying And Curing Times
Allow primer to dry for at least 1 to 2 hours. Paint coats usually dry to touch in 30 minutes. Full curing may take 24 to 48 hours. Avoid heavy use or washing during this time. Proper curing strengthens paint adhesion and durability. Patience during drying ensures a long-lasting finish.
Common Mistakes To Avoid
Painting over Herculiner can refresh the look of your truck bed or other surfaces. Many people make mistakes that ruin the finish or cause paint to peel. Avoiding these common errors saves time and effort. Here are key mistakes to watch out for.
Skipping Surface Prep
Surface preparation is the first and most important step. Dirt, grease, and loose particles stop paint from sticking. Always clean the surface thoroughly with soap and water. After drying, sand the Herculiner lightly to create a rough texture. This helps the new paint bond well. Skipping this step leads to uneven paint and peeling.
Using Incompatible Paints
Not all paints work on Herculiner. Use paint designed for plastic or rubber surfaces. Standard paints may crack or peel quickly. Check the product label to confirm compatibility. Using the wrong paint causes poor adhesion and shortens the lifespan of your paint job.
Ignoring Curing Time
Herculiner needs time to cure fully before painting over it. Painting too soon traps moisture and weakens the bond. Wait at least 48 hours or follow the manufacturer’s instructions. Ignoring curing time results in bubbles, cracks, or peeling paint. Patience ensures a smooth and lasting finish.
Maintaining Painted Herculiner
Maintaining painted Herculiner helps keep your truck bed or surface looking fresh and durable. Proper care preserves the protective coating and extends its life. Regular upkeep prevents damage and maintains the paint’s appearance. Follow simple steps to clean and repair painted Herculiner effectively.
Cleaning Tips
Use mild soap and water to clean painted Herculiner surfaces. Avoid harsh chemicals that can damage the paint or liner. Rinse thoroughly with clean water to remove soap residue. Use a soft brush or cloth to prevent scratches. Clean regularly to avoid dirt buildup and stains. Dry the surface with a clean towel after washing. This keeps the paint vibrant and the liner protected.
Touch-up Techniques
Inspect painted Herculiner for chips or scratches often. Lightly sand the damaged area with fine-grit sandpaper. Clean the spot to remove dust and grease. Use matching paint designed for Herculiner to cover the damaged area. Apply thin coats and let each dry completely before adding more. Avoid thick layers to prevent peeling or cracking. Touch-ups keep the surface smooth and extend its life.
Credit: www.homedepot.com
Frequently Asked Questions
How Long Does It Take Herculiner To Cure?
Herculiner typically cures within 24 to 48 hours. Full hardness and durability develop after 5 to 7 days. Avoid heavy use during this period.
Will Paint Stick To Bedliner?
Yes, paint can stick to bedliner if the surface is clean, dry, and properly sanded before application.
Can You Paint Over An Old Bed Liner?
Yes, you can paint over an old bed liner after thorough cleaning and sanding. Use primer for better adhesion.
Can You Paint Over Epoxy Coating?
Yes, you can paint over epoxy coating after thorough cleaning and proper surface sanding to ensure good adhesion. Use compatible paint for best results.
Can You Paint Directly Over Herculiner Bed Liner?
Yes, you can paint over Herculiner with proper surface cleaning and sanding for better adhesion.
Conclusion
Painting over Herculiner is possible with proper preparation and care. Make sure the surface is clean and fully cured before applying paint. Use suitable primers to help paint stick better and avoid peeling. Choose paint designed for flexible surfaces to prevent cracking.
Taking these steps helps your paint job last longer and look better. This approach keeps your vehicle or project protected and refreshed. Simple prep and the right materials make a big difference.


