You want your car’s paint to look perfect and stay that way for years. But before you apply Paint Protection Film (PPF), there’s a crucial step you can’t skip: paint correction.
Why? Because PPF acts like a clear shield that seals in whatever is underneath it—good or bad. If your paint has scratches, swirls, or any imperfections, the film will lock those flaws in place, making them impossible to fix later.
By correcting your paint first, you create a smooth, flawless surface that lets the PPF lay perfectly flat and stick better. This means your car not only looks stunning but also gets the best protection possible. Keep reading to discover why paint correction before PPF is a smart move that will keep your ride looking showroom fresh.
Why Paint Correction Matters
Paint correction plays a crucial role before applying Paint Protection Film (PPF). It removes surface defects like swirl marks, scratches, and oxidation. These imperfections can become trapped under the film, ruining the final look and reducing protection quality.
Correcting the paint first creates a smooth, clean surface. This step ensures the PPF fits perfectly and performs well over time. Skipping paint correction can lead to poor adhesion and visible flaws under the film.
Locking In Imperfections
Paint correction removes and minimizes imperfections on the paint surface. Without this step, scratches and blemishes remain visible under the PPF. These flaws may worsen or become more noticeable after the film is applied. Correcting the paint locks in a flawless finish that stays clear and smooth beneath the protective layer.
Enhancing Appearance
Paint correction improves the overall shine and clarity of the paint. It restores the original color and depth, making the car look newer. A clear, polished surface enhances the PPF’s appearance. The film showcases the corrected paint, giving the vehicle a glossy and vibrant look.
Boosting Ppf Adhesion
A clean, smooth paint surface helps the PPF stick better. Paint correction removes contaminants and rough spots that can weaken adhesion. Strong adhesion prevents peeling or bubbling of the film over time. This ensures long-lasting protection and a flawless finish on the vehicle’s surface.
Assessing Paint Condition
Assessing the paint condition is the first step before applying Paint Protection Film (PPF). This step ensures the surface is clean, smooth, and ready. Proper assessment helps achieve a flawless finish and long-lasting protection. It prevents trapping imperfections under the film. Take time to inspect the paint carefully. Use good lighting and tools for best results.
Identifying Swirls And Scratches
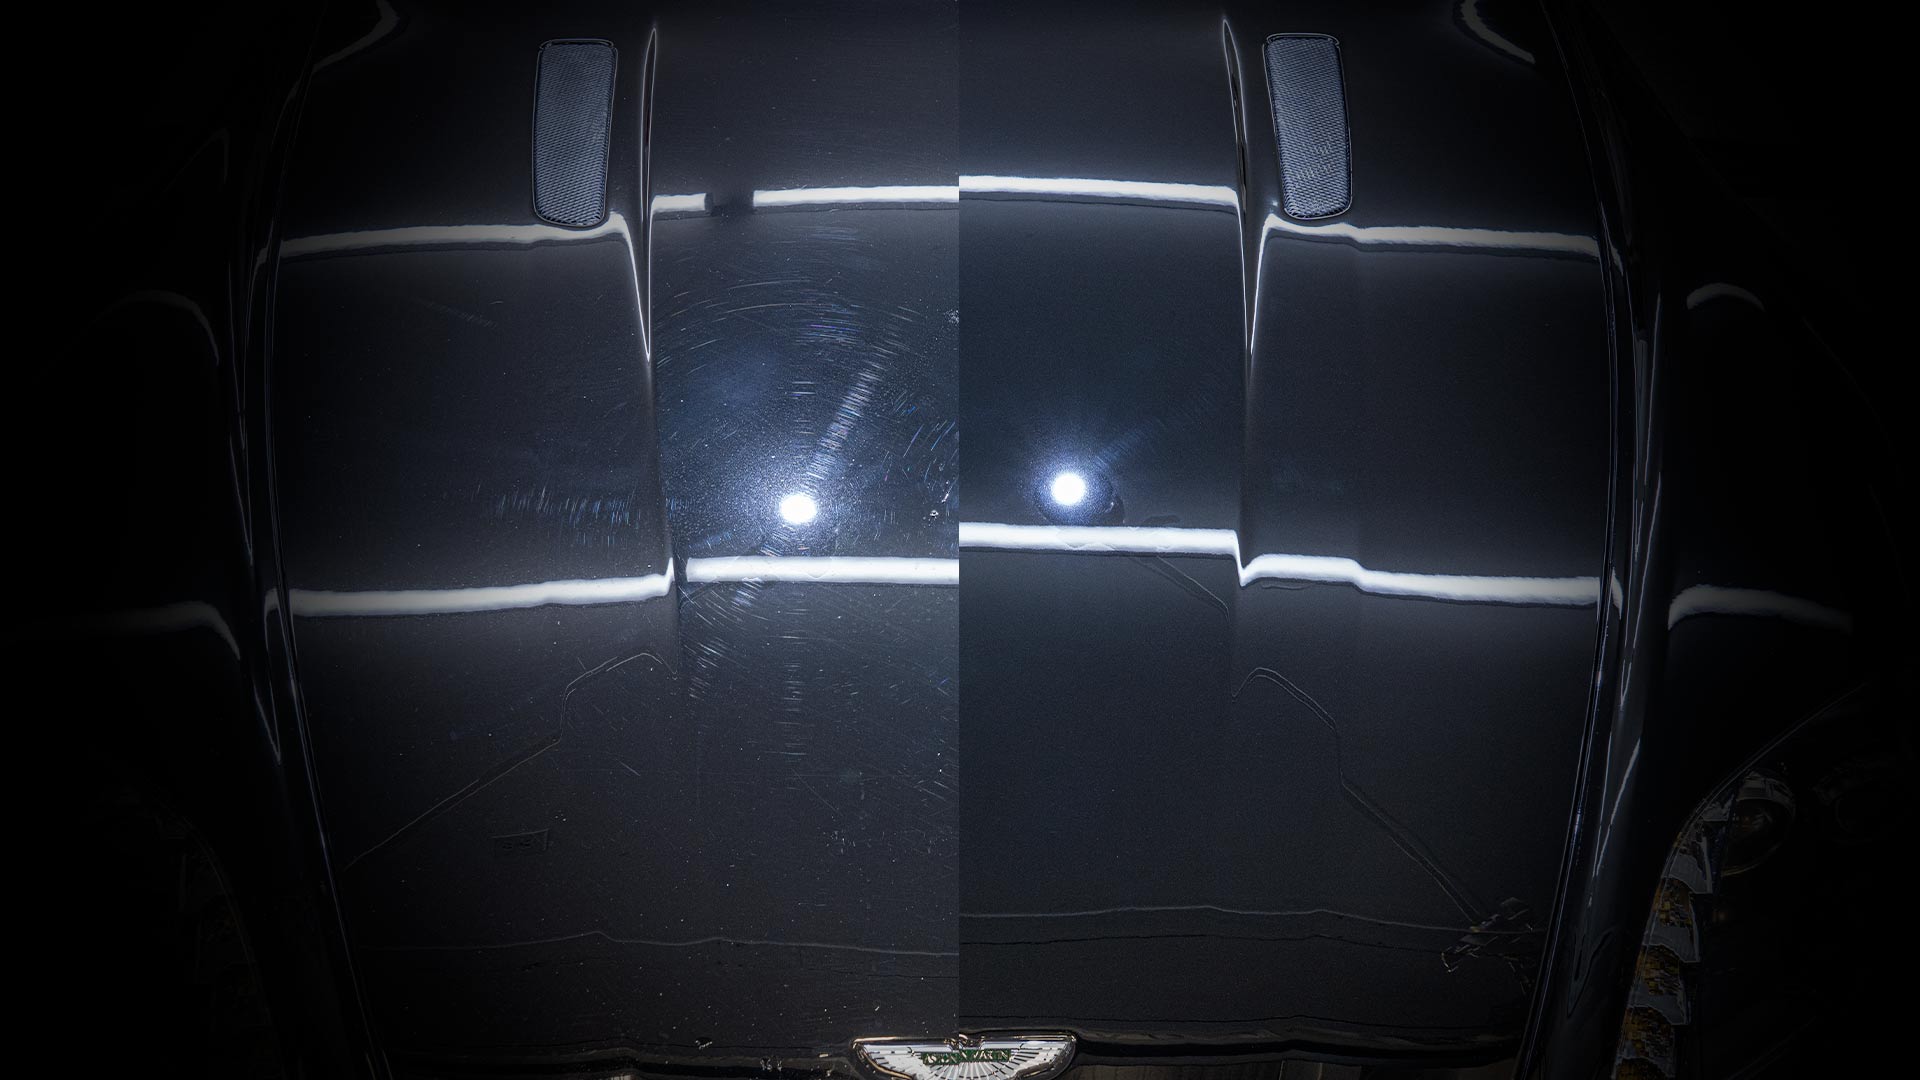
Look closely for swirls and scratches on the paint surface. Swirls are small circular marks caused by improper washing. Scratches can be shallow or deep, affecting the paint quality. Use a bright light or flashlight at an angle. This reveals hidden defects easily. Mark areas that need correction to focus your work.
Checking For Contaminants
Contaminants like dirt, tar, or tree sap can stick to the paint. These particles create bumps and prevent smooth film adhesion. Wash the car thoroughly and use a clay bar to remove bonded contaminants. Run your hand over the surface to feel any rough spots. Clean paint ensures a better bond with the PPF.
Evaluating Clear Coat Health
The clear coat protects the paint and adds shine. Check for dullness, peeling, or oxidation signs. These issues weaken the surface and reduce protection. Use a paint thickness gauge if available. Healthy clear coat is essential for paint correction and PPF. Fix any damage before moving to the next step.
Key Paint Correction Steps
Paint correction is essential before applying Paint Protection Film (PPF). It removes imperfections and creates a smooth surface. This process ensures the film adheres properly and looks flawless. Follow these key steps to prepare your vehicle’s paint perfectly for PPF.
Each step plays a crucial role in achieving a clean, polished finish. Skipping any can cause issues with film bonding or appearance. Understanding the process helps you get the best results.
Washing And Decontamination
Start by washing the car thoroughly to remove dirt and grime. Use a high-quality car shampoo designed for automotive finishes. Rinse well to avoid soap residue. Next, use a paint-safe decontamination product to eliminate embedded contaminants. This step clears iron particles and road tar that washing cannot remove.
Claying To Remove Embedded Particles
Claying is vital to remove tiny particles stuck in the paint surface. Use a clay bar with lubricant to gently glide over the paint. This process lifts off bonded debris, leaving the surface smooth. A clean surface prevents scratches and helps the polish work better.
Polishing Techniques
Polishing removes swirl marks, scratches, and oxidation from the paint. Use a dual-action or rotary polisher for even results. Work in small sections and apply consistent pressure. Multiple polishing steps may be necessary to restore clarity and depth. This step enhances the paint’s gloss and prepares it for film application.
Using The Right Compounds And Pads
Choose the correct polishing compounds and pads for your paint type and condition. Cutting compounds remove heavy defects, while finishing polishes refine the surface. Use foam or microfiber pads depending on the polish and desired finish. Matching tools and products ensures effective correction without damaging the paint.
Credit: www.simonsshineshop.com
Preparing Surface For Ppf
Preparing the surface for Paint Protection Film (PPF) is a crucial step. It ensures the film adheres perfectly and looks flawless. This process starts after paint correction, focusing on cleaning and inspection. Every detail matters to avoid imperfections under the film. The surface must be spotless, smooth, and free from any residues. A well-prepared surface extends the film’s life and enhances the vehicle’s appearance.
Final Cleaning And Inspection
After paint correction, the surface needs a thorough cleaning. Use a gentle cleaner to remove dust and dirt. Inspect the paint under bright light for any remaining imperfections. Small scratches or swirl marks can affect the film’s look. Fix any issues before moving to the next step. This final check ensures the paint is ready for PPF application.
Removing Oils And Residues
Oils from polishing compounds or skin contact must be removed. Use a solvent-based cleaner or isopropyl alcohol to wipe the surface. This step removes invisible residues that can stop the film from sticking. Clean in small sections for best results. Make sure the surface feels dry and clean to the touch.
Ensuring A Smooth Finish
The surface must be perfectly smooth for the PPF to lay flat. Any bumps or rough spots will show under the film. Use a microfiber cloth to check for smoothness by running your hand gently. If you feel any imperfections, polish those areas again. A smooth finish provides the best protection and a sleek appearance once the film is installed.
Common Mistakes To Avoid
Paint correction is a crucial step before applying Paint Protection Film (PPF). Many car owners make avoidable mistakes that reduce the quality of the finish. These errors can affect how well the film bonds and how good the car looks afterward.
Understanding common mistakes helps you protect your car better. Focus on these pitfalls to get the best results from paint correction and PPF.
Skipping Correction On New Cars
New cars often have minor paint flaws from the factory. Skipping correction leaves swirl marks and scratches under the film. These imperfections become more visible once PPF is applied. Correcting paint on new cars ensures a smooth surface and a flawless finish.
Over-polishing Risks
Polishing too much can damage the paint layer. It thins the clear coat and causes heat build-up. This damage reduces paint durability and affects film adhesion. Use gentle polishing and avoid aggressive compounds to protect your car’s paint.
Ignoring Surface Contaminants
Dirt, tar, and other contaminants hide in the paint’s surface. Ignoring these leads to poor film adhesion and bumps under the PPF. Thoroughly clean and decontaminate the paint before correction. This step creates a clean base for polishing and film application.
Credit: www.capitolshine.com
Benefits Of Proper Prep Before Ppf
Preparing your car’s paint before applying Paint Protection Film (PPF) is essential. Proper prep work enhances the overall quality of the film application. It helps the PPF bond better and last longer on your vehicle. Paint correction removes imperfections, making the surface smooth and ready for the film. This step ensures that the PPF looks great and performs well over time.
Longer Film Durability
Paint correction removes scratches and swirls that can weaken the film. A clean, smooth surface helps the PPF stick firmly. This strong bond prevents lifting or peeling. The film can resist damage from weather and debris better. Proper prep means your PPF lasts longer and protects better.
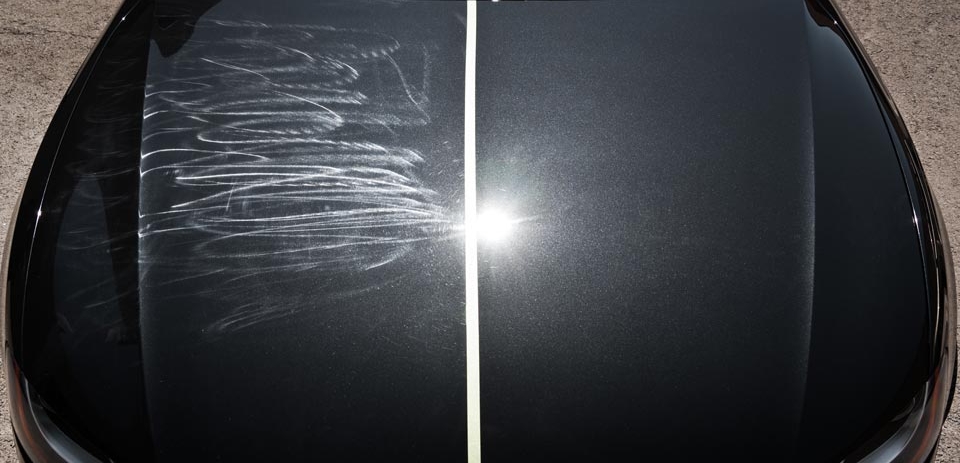
Flawless Film Appearance
Imperfections under the PPF show through easily. Paint correction creates a smooth, uniform surface. This prevents bubbles or distortions in the film. The result is a clear, glossy finish that looks factory new. Your car’s paint shines through with no flaws visible.
Easier Maintenance
A well-prepped surface makes cleaning simple. Dirt and grime have fewer places to stick. The PPF stays clear and smooth after washes. Maintenance takes less time and effort. Proper prep keeps your car looking fresh and protected longer.

Credit: www.youtube.com
Frequently Asked Questions
Should I Get Paint Correction Before Ppf?
Yes, get paint correction before PPF to remove imperfections. It ensures smooth adhesion, flawless appearance, and long-lasting protection. Most installers require correction first.
What Is Paint Correction Under Ppf?
Paint correction under PPF smooths and cleans the paint surface. It removes imperfections, ensuring flawless film adhesion and lasting protection.
How To Prep Paint Before Ppf?
Thoroughly wash and dry the vehicle. Perform paint correction to remove scratches and swirls. Clean the surface with isopropyl alcohol. Ensure the paint is smooth and defect-free. This prep maximizes PPF adhesion and provides a flawless, long-lasting finish.
Should I Detail My Car Before Ppf?
Detail your car before applying PPF to remove scratches and contaminants. This ensures better adhesion and a flawless finish.
Why Is Paint Correction Important Before Applying Ppf?
Paint correction removes scratches and swirl marks, ensuring the PPF adheres smoothly and looks flawless.
Conclusion
Proper paint correction before applying PPF ensures a smooth, flawless finish. It removes imperfections that can show through the film. Clean, even surfaces help PPF stick better and last longer. Skipping correction might cause bubbles or dull spots under the film.
Taking time to prep your paint adds value and protects your car’s look. A well-prepared surface means your PPF performs at its best. Simple steps now save you from future headaches and repairs. Paint correction is a smart choice before PPF installation.


