Replacing a brake light is simpler than you think. It ensures safety and avoids traffic tickets.
Brake lights are crucial for alerting drivers behind you. A faulty brake light can lead to accidents or fines. Replacing it yourself saves time and money. In this guide, you’ll learn the steps to replace a brake light, even if you’re not a car expert.
With basic tools and a little patience, you can do it. This task doesn’t require a mechanic. Follow along, and you’ll have a new brake light in no time. Ready to get started? Let’s dive in and make your car safer today.
Credit: www.tiktok.com
Tools And Materials Needed
Replacing a brake light is a simple DIY task. But, you need the right tools and materials. This section will guide you through the essential tools and recommended materials required for the job.
Essential Tools
- Screwdriver – A flathead or Phillips screwdriver, depending on your car model.
- Socket Wrench – For removing bolts that secure the light assembly.
- Gloves – To protect your hands from sharp edges and dirt.
- Multimeter – Useful for checking the electrical connections.
Recommended Materials
- Replacement Bulb – Ensure it matches your car’s specifications.
- Dielectric Grease – Helps prevent corrosion on electrical contacts.
- Cleaning Cloth – To clean the light assembly area.
Having these tools and materials ready will make the job easier and quicker. Make sure to double-check your car’s manual for any specific requirements.
Credit: haynes.com
Safety Precautions
Replacing a brake light is a straightforward task, but safety is crucial. Knowing how to handle electrical components and observing vehicle safety measures will keep you safe.
Working With Electrical Components
When working with electrical components, always disconnect the car battery. This prevents any accidental electric shocks. Use insulated tools to avoid short circuits. Check the car manual to locate the brake light assembly. Handle the light bulb carefully to avoid breakage.
Wear gloves to protect your hands from sharp edges and glass shards. Ensure your workspace is well-lit. This makes it easier to see the components and reduces the risk of errors.
Vehicle Safety Measures
Before starting, park your car on a flat surface. Engage the parking brake to prevent the car from moving. Place wheel chocks behind the tires for extra safety. These steps ensure the car remains stationary during the process.
Use a jack stand if you need to lift the car. Never rely solely on a car jack as it can fail. Keeping a fire extinguisher nearby is also a good practice. Electrical issues can sometimes lead to sparks, so be prepared.
It’s important to let someone know you are working on your car. This is especially true if you are working alone. In case of any accidents, immediate help will be available.
Following these safety precautions ensures a smooth and safe process. Your safety is paramount, so never skip these steps.
Locate The Brake Light
Knowing how to replace a brake light can save you time and money. Before you can replace the brake light, you need to locate it. This might seem tricky, but it’s actually quite simple. Let’s break it down step-by-step.
Finding The Brake Light Assembly
First, identify the brake light assembly. This is usually located at the rear of your vehicle. Check both sides, as some cars have brake lights on both the left and right. The brake light assembly is part of the tail light cluster. It’s typically red and lights up when you press the brake pedal.
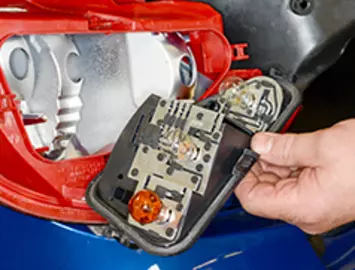
Accessing The Light Bulb
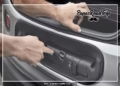
Next, you need to access the brake light bulb. Open your trunk or hatchback to get to the light assembly. Some cars have a panel that you need to remove. This panel might be secured with screws or clips. Use a screwdriver or a flat tool to remove it. Once the panel is off, you should see the brake light bulb. Gently twist the bulb socket to remove it from the assembly. Now, you can replace the old bulb with a new one.
Remove The Old Brake Light
Replacing a brake light is important for safety. First, you need to remove the old brake light. Follow these steps to do it right.
Disconnect The Battery
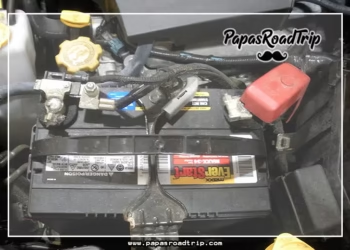
Before starting, disconnect the battery. This will prevent any electrical shock. Locate the battery in your car. Use a wrench to loosen the negative terminal. Carefully remove the cable. Set it aside so it doesn’t touch the battery.
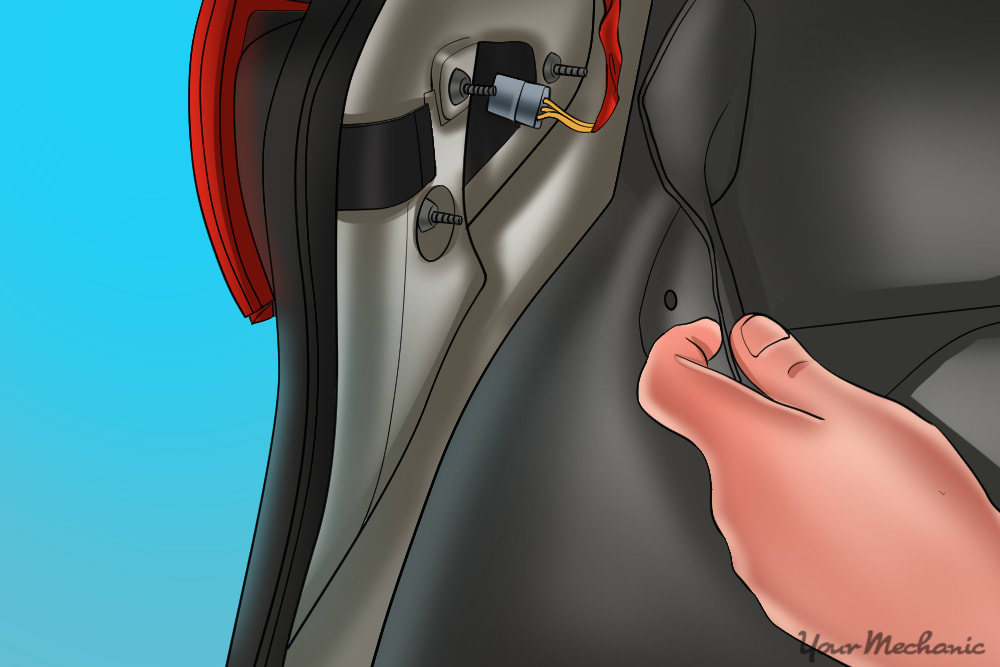
Unscrew The Light Assembly
Next, find the screws holding the light assembly. They are usually inside the trunk or on the car’s body. Use a screwdriver to unscrew them. Keep the screws in a safe place. Gently pull out the light assembly. Be careful not to damage any wires.
Remove The Bulb
Now, find the bulb holder. Twist it counterclockwise to remove it. Pull the old bulb out of the holder. Be gentle to avoid breaking it. Dispose of the old bulb properly. You are now ready to install the new brake light.
Install The New Brake Light
Replacing a brake light is essential for vehicle safety. The process is simple and requires only a few tools. Follow these steps to install the new brake light without hassle.
Insert The New Bulb
First, ensure you have the correct bulb for your vehicle. Refer to your car’s manual for the exact specifications. To insert the new bulb, follow these steps:
- Hold the new bulb by its base to avoid touching the glass.
- Align the bulb with the socket.
- Gently insert the bulb into the socket and twist it clockwise until it locks in place.
Check that the bulb is secure and properly aligned. A loose bulb can cause problems.
Reattach The Light Assembly
With the new bulb in place, it’s time to reattach the light assembly:
- Align the light assembly with the mounting points on the vehicle.
- Secure the assembly with screws or clips.
- Tighten the screws or clips to ensure the assembly is firm.
Test the brake light by pressing the brake pedal. Ensure it illuminates correctly. This step is crucial for safety.
If everything is working, replace any covers or panels you removed. Congratulations! You have successfully installed a new brake light.
Test The New Brake Light
Testing the new brake light is a crucial step. It ensures your car is safe on the road. This step helps you verify that the new brake light is working correctly.
Reconnect The Battery
Before testing, make sure to reconnect the battery. This step is simple but essential. Follow these steps:
- Open the car hood.
- Locate the battery.
- Reconnect the negative terminal first, then the positive.
- Tighten the terminals with a wrench.
Your car should now have power. This will allow you to check the new brake light.
Check The Brake Light Function
Once the battery is reconnected, you need to check the brake light function. Follow these steps to ensure the light works properly:
- Start the car engine.
- Press the brake pedal.
- Ask a friend to stand behind the car.
- Have them check if the brake light illuminates.
If the light works, you have successfully replaced the brake light. If not, you may need to check the connections or the bulb.
Troubleshooting
When your brake light stops working, it is essential to troubleshoot the problem. This can help you identify the issue quickly and fix it efficiently. Proper troubleshooting ensures safety and keeps you compliant with road regulations. Let’s dive into common issues and when you should seek professional help.
Common Issues
There are several reasons why your brake light may not work. The bulb might be burnt out. This is the most common issue and the easiest to fix. Check if the filament inside the bulb is broken. If it is, replace it with a new one.
Another issue could be a blown fuse. Fuses protect your car’s electrical circuits. If a fuse blows, the brake light will not function. Check your car’s manual to locate the fuse box. Replace the blown fuse with a new one of the same rating.
Wiring problems can also cause brake light failure. Inspect the wires connected to the brake light for any signs of damage. If you see any frayed or broken wires, they need to be repaired or replaced.
Sometimes, the brake light switch could be faulty. This switch is located near the brake pedal. It activates the brake light when you press the pedal. If the switch is broken, the brake light won’t turn on. You might need to replace the switch.
When To Seek Professional Help
Some brake light issues may be too complex for a DIY fix. If you have checked the bulb, fuse, wiring, and switch, and the light still doesn’t work, it’s time to seek professional help. Electrical problems can be tricky. A professional mechanic has the right tools and knowledge to diagnose and fix the issue.
If you are uncomfortable working with your car’s electrical system, consult a professional. Safety is crucial. Incorrect repairs can cause further damage or create hazards. Always prioritize your safety and the proper functioning of your vehicle.
In case you suspect a deeper issue within the car’s electrical system, seek professional assistance. Some problems might be related to the car’s computer system. These require specialized diagnostic tools. A professional can accurately identify and resolve such issues.
Credit: www.yourmechanic.com
Frequently Asked Questions
What Tools Do I Need To Replace A Brake Light?
You need a screwdriver, replacement bulb, and gloves. Check your car manual for specifics.
How Long Does It Take To Replace A Brake Light?
It usually takes around 15-30 minutes. Make sure to gather all tools beforehand.
Can I Replace A Brake Light Myself?
Yes, you can. It’s a simple task. Follow the steps in your car manual.
How Do I Know If My Brake Light Is Out?
Check for warning lights on your dashboard. Or ask someone to observe while you press the brake pedal.
Is It Illegal To Drive With A Broken Brake Light?
Yes, it is. Driving with a broken brake light can lead to fines or accidents. Fix it promptly.
Conclusion
Replacing a brake light is simple and essential for safety. Follow the steps carefully. Gather your tools, remove the old bulb, and insert the new one. Test the light to ensure it works. Regularly check your brake lights to avoid accidents.
This small task can prevent larger issues. Keep your vehicle in top shape. Save time and money by learning this basic skill. Stay safe on the road.


