To troubleshoot a Harley starter problem, first check the battery and connections. Ensure the starter motor and relay are functioning properly.
Riding a Harley-Davidson is a unique experience, blending power, freedom, and an iconic roar that turns heads. Yet, like any mechanical beast, it can encounter issues, one of the most frustrating being starter problems. This can put a damper on any rider’s spirit, as it directly impacts the motorcycle’s ability to start and perform reliably.
Understanding the common causes and how to troubleshoot them efficiently is crucial for any Harley enthusiast. By focusing on key areas such as the battery, connections, starter motor, and relay, riders can often diagnose and resolve issues themselves, ensuring their Harley is always ready for the road ahead. This guide aims to simplify the troubleshooting process, making it accessible for both seasoned riders and those new to the Harley-Davidson world.
Identifying Common Harley Starter Issues
Your Harley’s starter is key to a good ride. Sometimes, it may fail. Knowing common starter issues helps fix them fast.
Symptoms Of A Faulty Starter
Several signs point to starter troubles. Spotting these early can save time and stress.
- Clicking noise when you turn the key
- Engine won’t turn over, despite a charged battery
- Starter engages but doesn’t spin the engine
- Intermittent issues with starting the bike
Troubleshooting The Starter Relay
A bad starter relay often causes starter problems. Follow these steps to check it:
- Locate the starter relay. It’s usually near the battery.
- Check for corrosion or damage on the relay.
- Ensure all connections are tight and clean.
- Use a multimeter to test for continuity. No continuity suggests a bad relay.
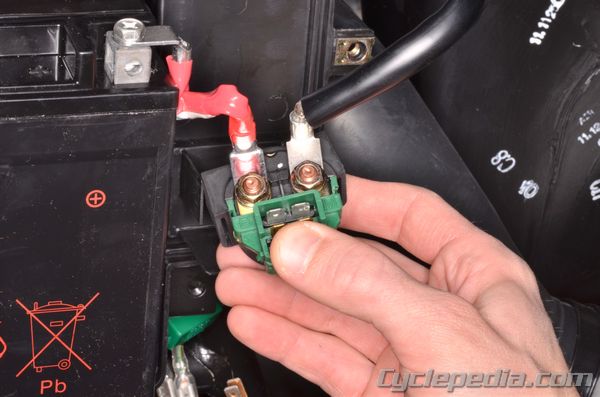
Credit: www.cyclepedia.com
Initial Inspection Steps
When your Harley refuses to start, it’s crucial to begin with a systematic inspection. The right approach can save time and avoid further issues. Let’s walk through the initial inspection steps to diagnose a Harley starter problem efficiently.
Safety Precautions
Before diving into troubleshooting, safety comes first. Ensure the motorcycle is on a stable surface. Turn off the ignition, and if possible, remove the battery’s negative cable. Wear protective gear, like gloves and goggles, to shield against accidental sparks or debris.
Basic Visual Inspection
A quick look at your Harley’s starter system can reveal obvious faults. Check for loose wires and corroded connections. Examine the battery, noting any cracks or leaks. Ensure all cables are secure and intact.
- Inspect the starter motor for damage.
- Look for blown fuses or tripped breakers.
- Check the battery’s charge level with a voltmeter.
Spotting these issues early can prevent more complex problems. If everything looks good visually, proceed with deeper diagnostic steps.
Battery Health And Connections
When your Harley refuses to start, the battery is often the culprit. Proper battery health and secure connections are crucial. Let’s dive into troubleshooting with a focus on these aspects.
Testing Battery Voltage
A healthy battery is key to a smooth start. Begin by testing the battery voltage. A multimeter is your best friend here. Aim for a reading above 12.6 volts for a fully charged battery. Below this, the battery may need charging or replacement. Here’s a quick guide:
- Turn off your bike.
- Set your multimeter to voltage.
- Connect the red lead to the positive terminal.
- Attach the black lead to the negative terminal.
- Read the voltage on the display.
Cleaning And Securing Connections
Dirty or loose connections can cause starting problems. Ensure all battery connections are clean and secure. Follow these steps:
- Disconnect the battery terminals.
- Clean any corrosion with a brush.
- Reconnect and tighten the terminals.
- Apply a corrosion-resistant spray.
Remember, a secure connection prevents power loss. Clean terminals ensure a strong electrical flow. Regular maintenance prevents starting issues.
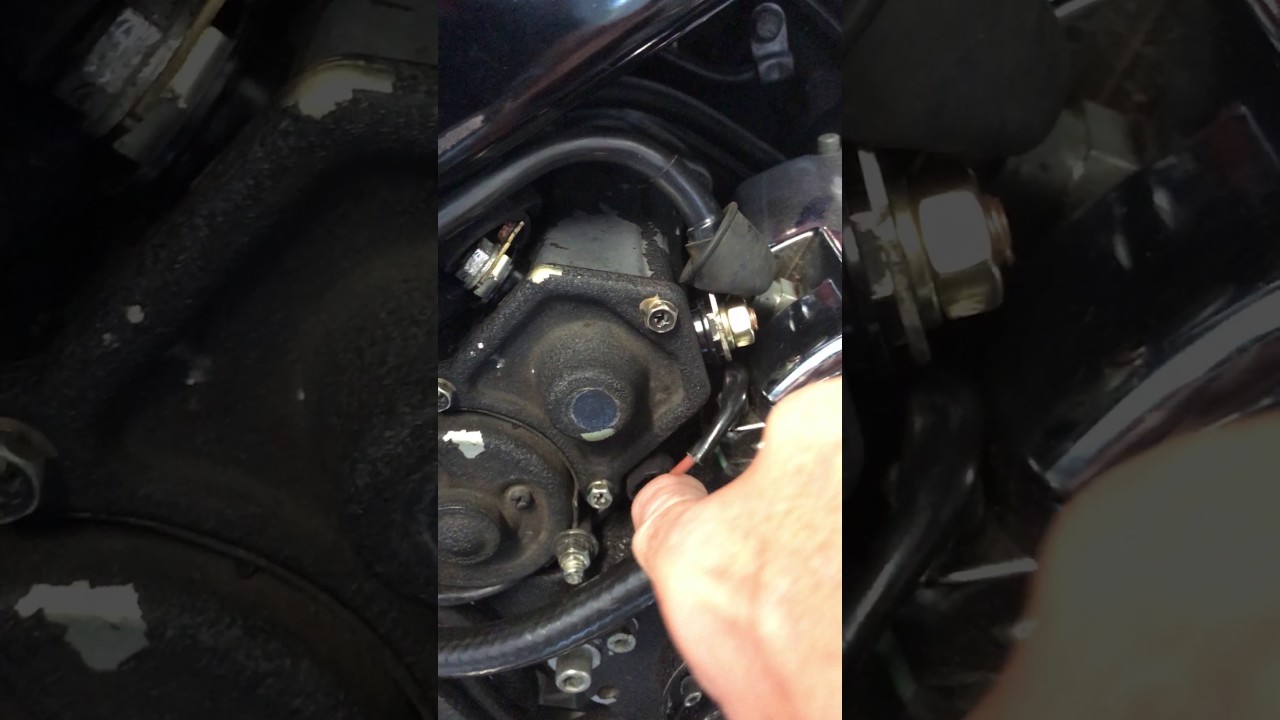
Credit: m.youtube.com
Starter Solenoid Quick Checks
Having trouble with your Harley’s starter? The solenoid could be the culprit. These quick checks can diagnose common issues. No special tools needed. Just follow these simple tests to troubleshoot your starter solenoid.
Solenoid Functionality Test
A proper solenoid test ensures your Harley starts smoothly. Below are steps to test solenoid functionality:
- Locate the solenoid near the Harley’s battery.
- Check for clean, tight connections.
- Use a multimeter to measure voltage.
- Test for continuity between terminals.
- Listen for a click when the ignition is turned.
If the solenoid doesn’t click, it may need replacement.
Bypass Techniques
Bypassing the solenoid can identify deeper issues. Here’s how to bypass safely:
- Turn off the bike and remove keys.
- Locate the two large terminals on the solenoid.
- Use insulated pliers to bridge terminals.
- Watch for the engine to turn over.
If the engine starts, the solenoid may be faulty. Replace if needed.
Bold the most important keywords and divide long paragraphs into multiple paragraphs.
Use tables, bullet-points, ordered list, unordered list, code, bold etc as needed.
Ensure the content is presented in HTML format.
Make sure each sentence is readable to 9 years kids.
All sentences should not contain more than 12 words.
Ensure all content is semantically related and adds value to the main topic.
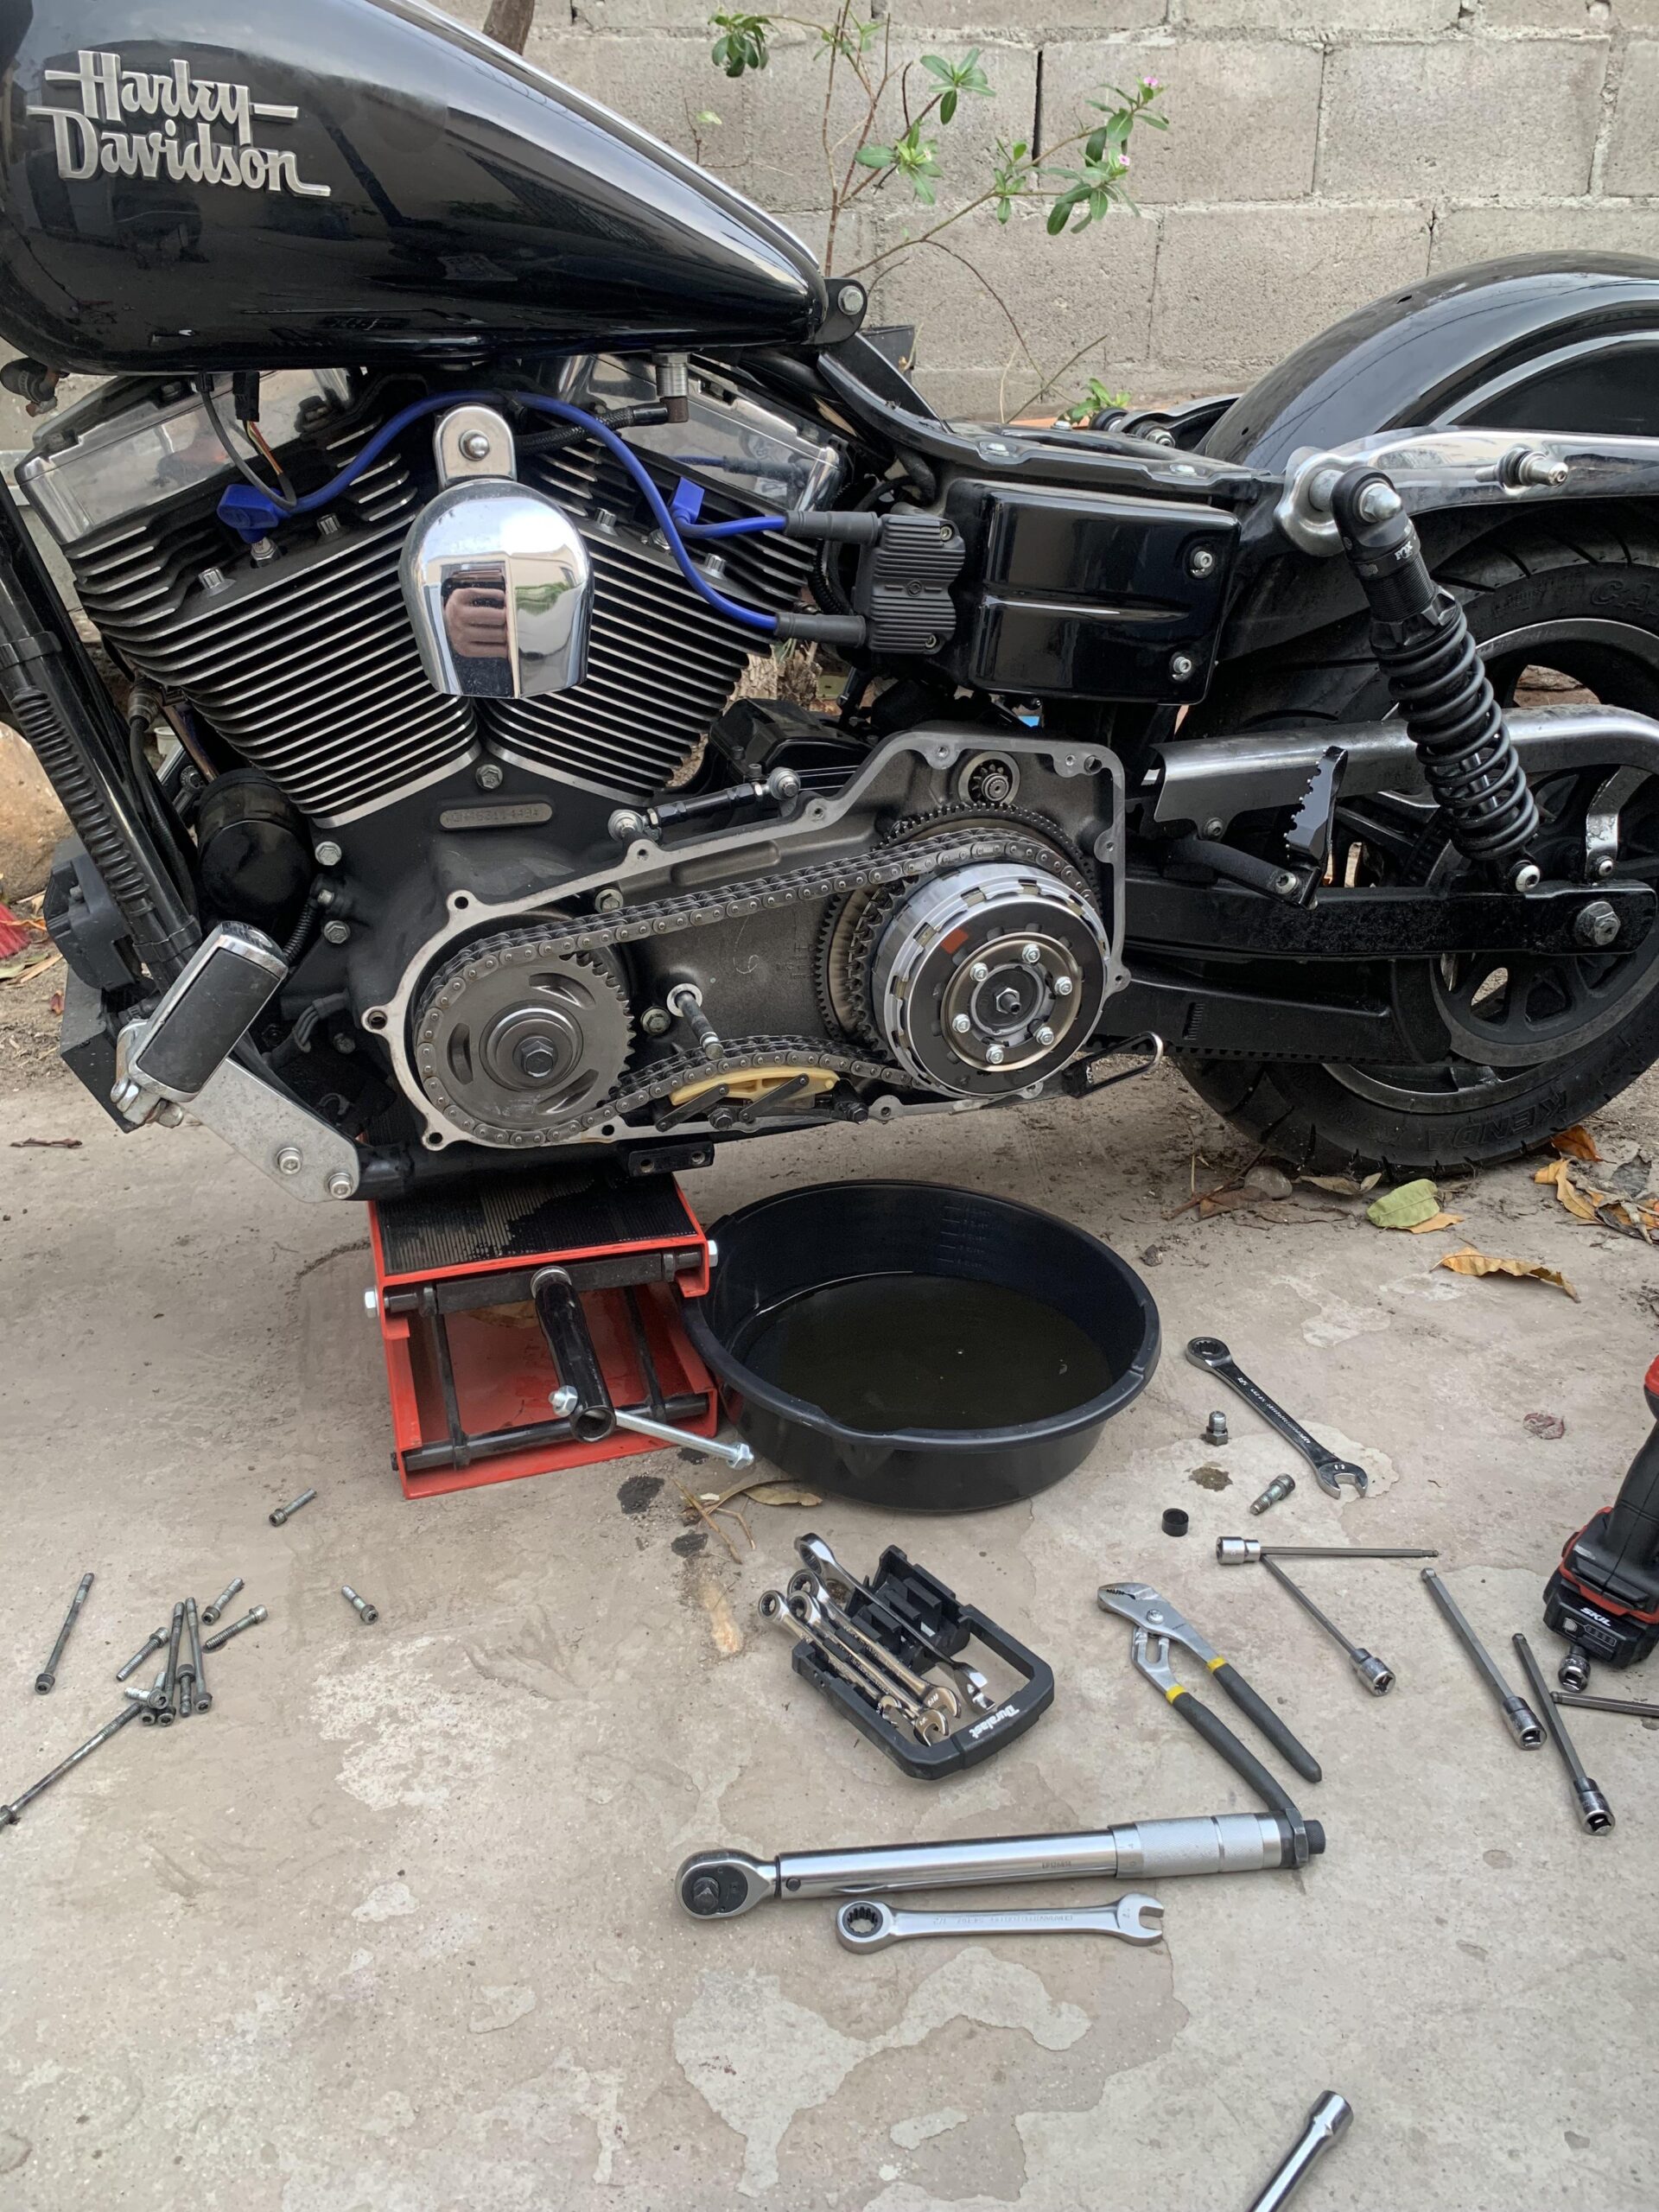
Starter Motor Examination
Let’s dive into the heart of your Harley’s ignition woes: the starter motor. A meticulous examination can save the day. We’ll cover common issues and fixes.
Assessing The Starter Motor
Begin with a visual inspection. Check for loose connections and wear. Ensure wires are snug and clean.
- Inspect the starter solenoid.
- Test for power reaching the motor.
- Listen for a click when the ignition is engaged.
A silent starter often signals a deeper issue.
Brushes And Commutator Issues
The starter’s brushes and commutator demand attention.
| Component | Check For |
|---|---|
| Brushes | Wear and tear, firm seating |
| Commutator | Cleanliness, smooth surface |
Dirty or worn brushes lead to weak starts or none at all.
- Remove the starter to access brushes.
- Clean with a soft cloth.
- Replace if they are too short.
A rough commutator needs smoothing. Use fine sandpaper for a quick fix.
Electrical Circuit Troubleshooting
When a Harley won’t start, the electrical circuit may be at fault. Proper troubleshooting is key to getting back on the road. This guide helps diagnose common electrical issues, focusing on the starter system.
Inspecting The Wiring Harness
Begin with the wiring harness. Look for signs of wear, tear, or damage. Loose or corroded connections can disrupt the electrical flow. A multimeter can test for continuity. Ensure all connections are secure and free of corrosion.
Steps to inspect the wiring harness:
- Visual Check: Examine wires for fraying or breaks.
- Connection Test: Wiggle connectors to test for loose fits.
- Multimeter Use: Set to continuity mode, check each wire.
Checking The Ignition Switch
The ignition switch is critical for starting your Harley. A faulty switch can prevent the engine from turning over. Use a multimeter to test the switch’s functionality. Replace if readings are inconsistent or if there is no continuity.
| Step | Action | Expected Result |
|---|---|---|
| 1 | Locate ignition switch | Access for testing |
| 2 | Disconnect the switch | Safety to test |
| 3 | Set multimeter to ohms | Prepare for measurement |
| 4 | Test each terminal | Identify faults |
| 5 | Check reading against manual | Verify functionality |
If the switch fails the test, replace it. Ensure the new switch matches your Harley model. A correct fit and connection are essential for function and safety.
Mechanical Failures And Solutions
Harley riders love the road. But starter problems can stop a ride quickly. Let’s solve these issues.
Gear Engagement Problems
Harleys may face gear engagement troubles. This affects how the bike starts.
Signs include a grinding noise or a starter that spins without engaging.
Common causes:
- Worn out gears
- Weak battery
- Dirty or damaged starter motor
Solutions to fix gear issues:
- Inspect gears for wear. Replace if needed.
- Test the battery. Charge or replace it.
- Clean the starter motor. Repair or replace if dirty or damaged.
Bendix Drive Replacement
The Bendix drive is key for starting a Harley. It can fail over time.
Signs of a failing Bendix drive:
- Starter motor runs but doesn’t engage
- Loud clicking when starting
Steps to replace a Bendix drive:
- Disconnect the battery.
- Remove the old Bendix drive unit.
- Install a new Bendix drive.
- Reconnect the battery and test.
Use quality parts for longevity.
Credit: harleydavidsonblog.com
Professional Help And Resources
Having trouble with your Harley’s starter can be stressful. You want your ride smooth and reliable. Sometimes, problems may be beyond basic troubleshooting. That’s when professional help and resources come into play.
When To Seek A Mechanic’s Assistance
Several signs suggest a mechanic’s expertise is necessary:
- Unusual noises when starting the engine
- Starter doesn’t engage or turn over
- Repeated failures despite new batteries or chargers
A skilled mechanic will diagnose and fix these issues. They have the right tools and experience. A professional can save you time and money in the long run.
Online Resources And Forums
Online platforms are great for support and advice. Here are some resources:
| Resource Type | Description |
|---|---|
| Forums | Riders share experiences and solutions. |
| Tutorials | Step-by-step guides for DIY fixes. |
| Parts Catalogs | Find the right parts for your Harley. |
Remember to check for credible sources. Look for high user engagement and expert contributions. These communities can provide valuable insights.
Frequently Asked Questions
What Are Common Starter Problems?
Common starter problems include a clicking sound on ignition, the engine not cranking, intermittent starting issues, and a whining noise after turning the key. Faulty starter components or electrical connections often cause these problems.
What Would Cause A Harley Not To Start?
Several factors can prevent a Harley from starting, including a dead battery, faulty spark plugs, a clogged fuel filter, or a malfunctioning starter motor. Checking these components often resolves the issue.
How Do I Know If My Motorcycle Starter Relay Is Bad?
To determine if your motorcycle starter relay is faulty, listen for a clicking sound without engine start, check for burnt smells, or inspect for visible damage. Testing with a multimeter for continuity can also confirm its condition. Always ensure your battery is fully charged before diagnosing.
How To Jump A Harley Starter Solenoid?
To jump a Harley starter solenoid, first, turn off the motorcycle and locate the solenoid. Use a screwdriver to bridge the large terminals. Ensure a good connection but avoid prolonged contact to prevent damage. Start the bike while maintaining the bridge.
Always wear protective gear for safety.
Why Does My Harley Not Start?
A dead battery or faulty ignition switch can prevent your Harley from starting. It’s essential to check electrical connections for corrosion or loose wires.
Conclusion
Tackling Harley starter issues doesn’t have to leave you stranded. Armed with the right knowledge, you can quickly identify and solve common problems. Remember, regular maintenance is key to preventing future headaches. By staying informed and proactive, you ensure your Harley remains ready for the road.
Ride on with confidence, knowing you’re equipped to handle any starter snags.


