Harley Davidson clutch issues often stem from wear or improper adjustment. Identifying the problem early can prevent further damage.
Riding a Harley Davidson is an unmatched experience, combining power, freedom, and the unmistakable rumble that turns heads on every street. Yet, even the most rugged machines like Harley Davidson motorcycles can encounter issues, particularly with the clutch system. This vital component demands attention and care to ensure your ride remains smooth and responsive.
Clutch problems can range from simple adjustments to more complex repairs, each affecting your bike’s performance and your safety. Understanding the common signs of clutch troubles, such as slipping, sticking, or difficulty in shifting, is crucial for every Harley enthusiast. By tackling these issues promptly, riders can maintain the legendary performance and reliability that Harleys are known for, ensuring every journey is as exhilarating as the first.
Introduction To Harley Davidson Clutch Issues
The clutch is a vital part of your Harley Davidson. It helps you shift gears smoothly and maintain control. Clutch problems can lead to unsafe riding conditions. It’s essential to know the signs of a failing clutch.
Common Signs Of Clutch Problems
- Hard gear shifts: Gears won’t change easily.
- Slipping clutch: Bike moves slowly at high revs.
- Sticky feeling: Clutch lever is hard to pull.
- Strange noises: Squealing or grinding during use.
Importance Of Timely Troubleshooting
Addressing clutch issues early prevents more damage. It saves you money and keeps you safe. Regular checks ensure a smooth ride. Don’t ignore the signs of clutch problems.
Tools And Preparations
Embarking on a Harley Davidson clutch repair is a thrilling challenge. Proper tools and safety measures are vital. Before diving in, let’s gear up for success.
Essential Tools For Clutch Repair
Having the right tools is key to a smooth repair. Here’s what you’ll need:
- Socket Set: For bolt removal.
- Torque Wrench: To tighten bolts correctly.
- Clutch Hub Holder: Holds the hub while working.
- Feeler Gauge: Measures gap sizes.
- Screwdrivers: For various screws.
- Allen Wrenches: For hex bolts.
- Oil Drain Pan: Catches old fluid.
- Clean Rags: For cleaning parts.
- New Clutch Kit: Includes necessary parts.
Safety Measures Before Starting
Stay safe with these precautions:
- Workspace: Clean and organize it.
- Motorcycle: Ensure it’s stable.
- Tools: Place them within reach.
- Protective Gear: Wear gloves and glasses.
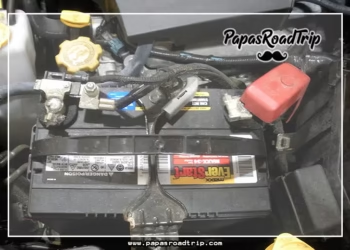
- Battery: Disconnect it first.
- Fluids: Drain them to prevent spills.
Initial Assessment
When your Harley Davidson starts acting up, the clutch is often a prime suspect. A thorough initial assessment can save you time and money. It helps pinpoint issues before they escalate. Let’s dive into the first steps of troubleshooting your Harley’s clutch.
Visual Inspection Guidelines
Start with a careful look at the clutch components. Check for any visible signs of wear or damage. Ensure the clutch cable is free of kinks and frays. Look for leaks around the clutch housing. Make sure the clutch fluid is at the proper level.
Identifying Strange Noises And Sensations
Listen for any unusual sounds when you engage the clutch. Feel for vibrations or changes in resistance. These signs can indicate clutch issues. A slipping clutch might make a high-pitched squeal. A dragging clutch could cause a grinding noise.

Credit: m.youtube.com
Adjusting The Clutch Cable
Mastering clutch cable adjustment ensures a smooth ride on your Harley Davidson. This process increases performance and comfort. Let’s dive into the steps to adjust the clutch cable.
Steps For Proper Cable Adjustment
- Locate the clutch cable adjuster on your bike.
- Release the adjuster locknut with the right tools.
- Turn the adjuster to create slack in the cable.
- Squeeze the clutch lever to assess initial tension.
- Tighten the adjuster until you feel slight resistance.
- Check clutch operation and adjust as needed.
- Secure the adjuster locknut post-adjustment.
- Test ride to confirm correct clutch feel.
Tips For Ensuring Correct Tension
- Measure free play at the lever for accuracy.
- Refer to your manual for specific tension specs.
- Use quality tools to prevent damage.
- Be patient and make small adjustments.
- Double-check the locknut to avoid slippage.
- Inspect the cable for wear before adjusting.
- Avoid over-tightening to prevent cable strain.
Hydraulic Clutch System Checks
Hydraulic Clutch System Checks are crucial for smooth Harley Davidson rides. A well-functioning clutch lets you shift gears with ease. Regular checks prevent issues and maintain clutch health.
Inspecting The Hydraulic System
Start by checking the reservoir. Look for leaks and ensure the fluid is clean. Fluid should be at the right level. Dirty fluid can cause clutch problems.
- Check for leaks: Inspect hoses and fittings.
- Fluid quality: It should be clear, not cloudy or dark.
- Reservoir level: Top up if needed with recommended fluid.
Bleeding And Refilling Techniques
Bleeding removes air from the hydraulic system. Air can make the clutch feel spongy. Follow these steps:
- Locate the bleed valve on the slave cylinder.
- Connect a hose to the valve and place the end in a container.
- Pump the clutch lever and open the valve to release fluid and air.
- Close the valve before releasing the lever.
- Repeat until only fluid comes out.
Refilling is next. Use these steps:
- Fill the reservoir with new fluid.
- Ensure no air enters the system while refilling.
- Check the fluid level and test the clutch action.
Clutch Plate Inspection
Every Harley Davidson rider knows a smooth ride hinges on a well-functioning clutch. Regular inspection of your clutch plates ensures your motorcycle performs at its best. Let’s dive into the details of clutch plate inspection.
When To Check Clutch Plates
Recognizing the right time to inspect clutch plates is crucial for maintenance. Here are signs to watch for:
- Slippage: The bike struggles to accelerate.
- Sticking: Shifting gears feels tough.
- Noise: Unusual sounds come from the clutch.
If you notice these issues, check your clutch plates soon.
Replacing Worn Clutch Plates
Worn clutch plates can lead to poor performance. Follow these steps to replace them:
- Turn off your motorcycle and let it cool.
- Remove the clutch cover carefully.
- Inspect each plate for wear and damage.
Replace plates that show signs of wear. This maintains optimal clutch function.
| Check Point | Good Condition | Needs Replacement |
|---|---|---|
| Surface Wear | Minimal | Significant |
| Cracks or Warping | None | Visible |
| Thickness | Within Specs | Below Minimum |
Use this checklist to guide your inspection. Remember to consult your Harley Davidson manual for specifics.
Troubleshooting The Clutch Basket
Motorcycle enthusiasts often face clutch issues. The clutch basket is a common culprit. It’s vital to identify and address problems early. Let’s dive into the signs of damage and discuss repair versus replacement.
Signs Of A Damaged Clutch Basket
A failing clutch basket presents clear symptoms. Riders should be alert for these indicators:
- Unusual noises: Rattling or grinding sounds during engagement.
- Poor performance: Jerky starts or difficulty shifting.
- Visible wear: Notches or grooves on the basket’s fingers.
Repair Vs. Replacement
Deciding between repair and replacement depends on damage extent. Consider the following:
| Option | Consideration |
|---|---|
| Repair | Cost-effective for minor wear. |
| Replacement | Recommended for severe damage. |
Professional assessment can guide the best choice. Riders should opt for quality parts for longevity and performance.
Solving Clutch Slippage
Harley Davidson motorcycles symbolize freedom and power. But, a clutch issue can leave riders grounded. Clutch slippage is one such problem. It happens when the clutch fails to engage the transmission properly. This means less power to the wheels. Let’s dive into solving this annoying issue.
Causes Of Clutch Slippage
Several factors lead to clutch slippage. Knowing them helps in quick fixes.
- Worn-out clutch plates: These need enough grip to transfer engine power.
- Oil on clutch plates: Oil can make them too slippery to function.
- Weak springs: Springs press the plates together. Weak springs mean less pressure.
- Improper adjustments: Clutches need correct settings to work well.
Fixing The Slippage Issue
To fix slippage, follow these steps. They can restore your ride’s performance.
- Inspect clutch plates: Replace them if they look worn.
- Clean oil contamination: Use a degreaser if oil is the culprit.
- Replace springs: New springs bring back the needed tension.
- Adjust clutch settings: Ensure proper engagement and disengagement.
Regular maintenance prevents future clutch issues. Always use quality parts for replacements. Safe and smooth rides depend on a well-functioning clutch.
Addressing Clutch Drag
Harley Davidson motorcycles symbolize freedom and raw power. Yet, even the mightiest machines need care. A common issue riders face is clutch drag. This can affect your ride’s performance. Let’s dive into troubleshooting this problem.
Understanding Clutch Drag
Clutch drag occurs when the clutch disk fails to disengage from the flywheel. This makes shifting gears tough. It can even cause the bike to lurch forward when starting.
- A sign of clutch drag is gear shifting feels stiff.
- The bike may creep forward even with the clutch lever pulled.
- Riders may also notice a distinct lack of smoothness in gear transition.
Regular maintenance is key to avoid clutch drag. Ensure your clutch system is always well-lubricated.
Quick Fixes For Clutch Drag
Addressing clutch drag is important for a smooth ride. Here are some steps you can take:
- Adjust the clutch cable – Ensure there’s proper free play.
- Check the clutch plates – Look for wear and replace if needed.
- Inspect the springs – Weak springs can cause drag. Replace them if necessary.
These quick fixes can make a big difference. Your Harley’s clutch should operate smoothly afterwards.
| Problem | Possible Cause | Solution |
|---|---|---|
| Stiff Shifting | Inadequate lubrication | Lubricate clutch system |
| Creeping Forward | Worn clutch plates | Replace clutch plates |
| Lack of Smoothness | Weak springs | Replace springs |
With these tips, riders can enjoy a smooth journey. Keep your Harley in top shape and the road will feel like home.
Final Checks And Test Ride
Now that your Harley Davidson clutch is fixed, let’s move to the final steps. These ensure your bike is safe to ride. We’ll check everything and then take a test ride.
Post-repair Inspection Checklist
Before hitting the road, we must inspect the bike. This keeps you safe. Follow this checklist:
- Clutch operation: Make sure it feels smooth and responsive.
- Fluid levels: Check if the hydraulic fluid is at the right level.
- Leaks: Look around the clutch area for any oil leaks.
- Clutch cable: If your bike uses a cable, check for frays or damage.
- Bolt tightness: Ensure all bolts are tight and secure.
Conducting A Safe Test Ride
A test ride checks if the repair was successful. Follow these steps for a safe test:
- Wear safety gear: Always wear your helmet, gloves, and jacket.
- Start slowly: Begin at a slow pace to feel the clutch’s response.
- Increase gradually: Slowly increase your speed, checking clutch engagement.
- Shift through gears: Ensure each gear shifts smoothly without slipping.
- Listen for noises: No strange noises should come from the clutch.
- Return and recheck: After the ride, inspect the clutch area again.
These steps help you make sure your Harley is ready for the road. Safe riding!
Preventive Maintenance Tips
Preventive Maintenance Tips keep your Harley Davidson clutch in top shape. Regular care avoids big repairs. Let’s dive into how to keep your clutch happy for miles.
Routine Maintenance Schedule
Sticking to a routine schedule is key. It prevents sudden clutch issues. Here’s a quick guide:
- Check the clutch fluid level monthly.
- Inspect the clutch cable for wear every 3,000 miles.
- Adjust the clutch every 5,000 miles.
- Replace the fluid every two years.
Long-term Clutch Care
For long-term health, consider these tips:
- Use high-quality clutch fluid.
- Avoid hard starts and stops.
- Practice smooth gear changes.
Remember, gentle handling extends clutch life. Keep your Harley running smoothly with these practices.
Credit: www.ebay.com

Credit: www.reddit.com
Frequently Asked Questions
How Do I Tell If My Harley Clutch Is Bad?
To determine if your Harley clutch is bad, notice symptoms like slipping gears, hard gear shifts, and unusual noises when engaging the clutch. These signs suggest the clutch may require inspection or replacement for optimal performance.
Why Is My Harley Clutch So Hard To Pull?
Your Harley clutch may feel hard to pull due to a few reasons, such as a need for lubrication, cable adjustment, or cable damage. Regular maintenance can help prevent this issue, ensuring smoother operation.
Why Is My Clutch Not Fully Engaging?
A clutch may not fully engage due to low fluid levels, air in the hydraulic line, worn components, or misalignment. Regular maintenance can prevent these issues.
Why Is My Clutch Lever Not Disengaging The Clutch?
A clutch lever may not disengage the clutch due to cable damage, improper adjustment, hydraulic system issues, or internal clutch malfunctions. Check for wear and fluid levels, and adjust or replace components as needed.
How To Diagnose Harley Clutch Issues?
Identifying Harley clutch problems typically involves checking for unusual noises, difficulty in shifting gears, or slippage during acceleration.
Conclusion
Troubleshooting your Harley Davidson clutch can seem daunting, but with the right approach, it’s manageable. Remember, regular maintenance is key to avoiding common issues. If problems persist, seeking professional help is advisable. By understanding the basics covered in this post, you’re well on your way to smoother rides and more enjoyable journeys.
Ride safely!


