Experiencing coolant leaks after replacing a water pump can be frustrating. It’s a common issue many car owners face.
Replacing a water pump is supposed to solve cooling problems, not create new ones. Yet, finding coolant on your driveway after this repair can be alarming. In this blog, we’ll explore why this happens and how to address it. Understanding the potential causes is crucial to ensuring your vehicle runs smoothly.
From installation errors to faulty parts, several factors might be at play. Stay with us to learn more about troubleshooting and fixing coolant leaks after a water pump replacement.
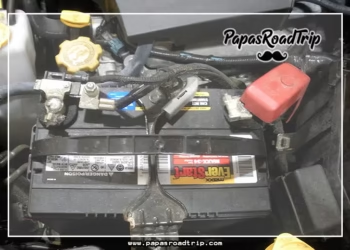
Credit: www.ct200hforum.com
Common Causes Of Coolant Leaks
Coolant leaks after replacing a water pump can be frustrating. Understanding the causes can help you fix the issue. This section will explore some common reasons for these leaks.
Faulty Installation
One common cause is faulty installation. If the water pump is not installed correctly, it can lead to leaks. Even a small mistake during installation can create gaps. These gaps allow coolant to escape. Always ensure that the water pump is installed properly.
Damaged Gaskets
Another cause is damaged gaskets. Gaskets seal the space between the water pump and the engine. If these gaskets are damaged, coolant can leak out. Gaskets can get damaged during installation. They can also wear out over time. Always check gaskets for damage when replacing a water pump.
Identifying The Leak Source
After replacing your water pump, you might notice coolant leaking. Identifying the leak source is crucial to prevent engine damage. Let’s explore how to pinpoint the exact leak location.
Visual Inspection
Start with a visual inspection. Look for any visible signs of coolant around the water pump. Check hoses, clamps, and connections. A flashlight can help you see in tight spaces.
Here are some areas to inspect:
- Water pump gasket
- Hose connections
- Radiator
- Thermostat housing
If you see any wet spots or drips, note their location. Clean the area with a cloth and see if the leak reappears.
Pressure Testing
Pressure testing helps to find leaks not visible during a visual inspection. Use a radiator pressure tester to pressurize the cooling system.
Here’s how to perform a pressure test:
- Ensure the engine is cool.
- Remove the radiator cap.
- Attach the pressure tester to the radiator.
- Pump the tester to the recommended pressure (usually 15 psi).
- Observe the gauge and check for drops in pressure.
- Inspect the engine for leaks while the system is pressurized.
If the pressure drops and you see coolant, you’ve found a leak. Common leak points include the water pump seal and hose connections.
Repeat the test if necessary to confirm the leak location.
By performing these steps, you can accurately identify the source of a coolant leak. Prompt repairs can save you from costly engine damage.
Signs Of A Faulty Water Pump
Noticing coolant leaking after replacing the water pump can be frustrating. Understanding the signs of a faulty water pump helps identify the problem early. This section will guide you through common indicators that your water pump may be malfunctioning.
Unusual Sounds
A faulty water pump often produces strange noises. Squeaking or grinding sounds are common. These noises usually come from the pump’s bearings. If you hear these sounds, it’s a clear sign of trouble. The bearings may be worn out or damaged.
Overheating Engine
An overheating engine is another sign of a bad water pump. The water pump’s job is to circulate coolant. If it fails, the engine can overheat quickly. Check the temperature gauge on your dashboard. If it shows high temperatures, the water pump might be at fault.
Inspecting Hoses And Connections
After replacing your water pump, you might notice coolant leaking. This can be frustrating. One of the most common causes is issues with hoses and connections. Inspecting these areas can help identify the source of the leak.
Check For Cracks
First, examine all hoses connected to the water pump. Look for cracks or splits. Even small cracks can lead to leaks. Replace any damaged hoses. Cracked hoses can cause coolant to escape, leading to engine overheating.
Ensure Tight Fittings
Next, check the fittings of the hoses. Ensure they are tightly secured. Loose connections can allow coolant to leak. Use a wrench to tighten any loose clamps. Make sure the hoses fit snugly on their connections. A good seal is crucial for preventing leaks.
By carefully inspecting hoses and connections, you can often find and fix the source of coolant leaks. This simple check can save you from more serious engine problems.
Examining The Radiator
When coolant leaks after replacing the water pump, the radiator may be the culprit. The radiator is vital for cooling the engine. It circulates coolant and releases heat. Any issues with the radiator can cause leaks. Let’s dive into the steps for examining the radiator.
Look For Corrosion
Corrosion is a common problem. It can damage the radiator and cause leaks. Use a flashlight to inspect the radiator. Look for rust or white powdery deposits. These are signs of corrosion. If you see any, the radiator may need replacement.
Check For Blockages
Blockages can prevent the coolant from flowing properly. This can lead to overheating and leaks. Check the radiator fins for dirt or debris. Use a soft brush to clean them. Be gentle to avoid damage. Also, inspect the radiator cap. A faulty cap can cause pressure issues. Replace the cap if needed.

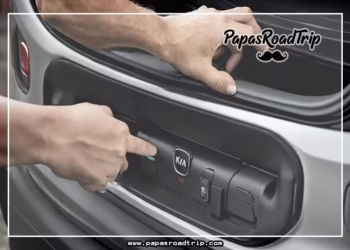
Credit: www.reddit.com
Evaluating The Thermostat
After replacing the water pump, you may notice coolant leaking. This could be due to an issue with the thermostat. Evaluating the thermostat is essential to ensure your car’s cooling system works properly.
Thermostat Function
The thermostat controls the flow of coolant in your engine. It opens to let coolant in when the engine heats up. When the engine cools down, it closes. This process keeps the engine at an optimal temperature.
Signs Of Failure
A faulty thermostat can cause various issues. One common sign is overheating. If the thermostat stays closed, coolant can’t flow, leading to high temperatures.
Another sign is erratic temperature readings. If your gauge moves up and down quickly, the thermostat might be stuck open. This can lead to coolant leaking as the system can’t regulate temperature well.
Check the thermostat if you see these signs. A simple test can confirm if it works correctly. If it fails, replacing it might solve your coolant leak problem.
Proper Coolant Usage
After replacing a water pump, it’s crucial to use the right coolant. Improper coolant usage can lead to leaks and engine damage. Let’s explore the key aspects of proper coolant usage.
Choosing The Right Coolant
Choosing the right coolant is vital for your engine’s health. Different engines require different coolants. Always check your vehicle’s manual to see the recommended type.
Coolants come in various colors like green, orange, and red. Each color signifies different properties and compositions. Using the wrong type can cause corrosion or deposits.
| Color | Type | Recommended For |
|---|---|---|
| Green | Inorganic Acid Technology (IAT) | Older vehicles |
| Orange | Organic Acid Technology (OAT) | Modern vehicles |
| Red | Hybrid Organic Acid Technology (HOAT) | Heavy-duty applications |
Mixing Ratios
Proper mixing ratios are essential for coolant effectiveness. Most coolants mix with water at a 50:50 ratio. This means equal parts of coolant and water.
In extreme climates, adjust the ratio accordingly. A 70:30 mix offers better protection in very cold weather. Always use distilled water for mixing. Tap water may contain minerals that can harm your engine.
- 50:50 Mix: Standard protection
- 60:40 Mix: Better for hot climates
- 70:30 Mix: Best for cold climates
Improper mixing can reduce the coolant’s effectiveness. It may cause overheating or freezing. Always follow the manufacturer’s guidelines.
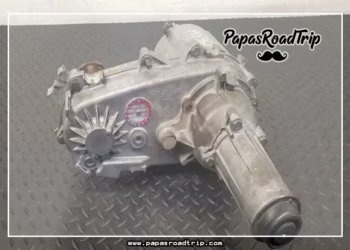
Credit: www.landroverworld.org
Preventive Maintenance Tips
Coolant leaks after replacing a water pump can be frustrating. Regular maintenance can prevent these issues. Here are some essential tips to keep your car in top shape.
Regular Inspections
Conducting regular inspections is crucial for maintaining your vehicle. Check the coolant levels monthly. Look under the car for any signs of leaks. Inspect the radiator and hoses for wear and tear. Early detection of problems can save you from bigger issues later.
| Inspection Item | Frequency |
|---|---|
| Coolant Level | Monthly |
| Radiator | Every 6 months |
| Hoses | Every 6 months |
Timely Replacements
Replacing parts on time is essential. Always use high-quality parts. Change the coolant as per the manufacturer’s guidelines. Replace the water pump every 60,000 to 90,000 miles. Do not wait for a part to fail completely. Preventive replacements are cheaper and safer.
Here is a quick checklist:
- Coolant: Replace every 30,000 to 50,000 miles.
- Water Pump: Replace every 60,000 to 90,000 miles.
- Thermostat: Inspect every 30,000 miles.
Following these tips can help you avoid coolant leaks. Keep your vehicle running smoothly with regular maintenance and timely replacements.
Frequently Asked Questions
Why Is Coolant Leaking After Replacing Water Pump?
Coolant may leak due to improper gasket installation or damaged seals. Check for loose bolts too.
How Can I Fix Coolant Leak After Water Pump Replacement?
Inspect the gasket and seals. Tighten bolts and ensure all connections are secure. Replace damaged parts.
Could A Faulty Water Pump Cause Coolant Leak?
Yes, a faulty or improperly installed water pump can cause coolant leaks. Verify the installation and part condition.
Is It Safe To Drive With A Coolant Leak?
No, driving with a coolant leak can cause engine overheating. Fix the leak before driving to avoid damage.
What Are Signs Of A Coolant Leak?
Look for puddles under the car, low coolant levels, and engine overheating. Check hoses and connections.
Conclusion
Fixing a coolant leak after replacing the water pump is crucial. Ensure all connections are tight. Check hoses and clamps for wear. Regular maintenance can prevent leaks. Use high-quality parts for replacements. Keep an eye on fluid levels often. Early detection saves money and stress.
If problems persist, consult a professional. Your car’s health depends on it. Stay proactive for a smooth ride. Reliable transportation starts with proper care.


