Thinking about giving your Raptor Liner a fresh look or a glossy finish? You might be wondering, can you actually paint over Raptor Liner without ruining its toughness?
The answer is yes—but it’s not as simple as slapping on a coat of paint. If you want your new paint to stick properly and look great, you need to prepare the surface the right way. You’ll discover exactly how to paint over Raptor Liner, step-by-step, so your project turns out flawless.
Keep reading to avoid costly mistakes and get the professional finish you want!
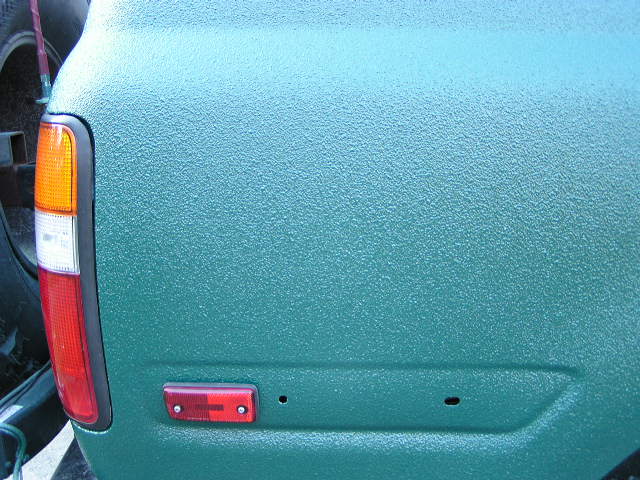
Credit: www.ssindustries.com.au
Painting Over Raptor Liner
Painting over Raptor Liner is a topic many vehicle owners ask about. This textured coating protects truck beds and other surfaces from damage. Sometimes, changing the color or finish becomes necessary. Painting over Raptor Liner can give a fresh look or restore the surface. It takes proper preparation for paint to stick well. Understanding the process helps achieve a smooth, lasting finish.
Is It Possible?
Yes, painting over Raptor Liner is possible. The surface needs thorough preparation first. The liner is rough and textured, which makes paint adhesion tricky. Sanding the surface creates a dull, rough finish for better grip. Cleaning removes dust and oils that block paint. Using the right primer helps the paint bond strongly. With these steps, paint can cover Raptor Liner successfully.
Reasons To Paint Over
People paint over Raptor Liner for several reasons. Fading or discoloration can make the liner look old. Painting restores color and improves appearance. Some want a glossy or different finish than the original texture. Damage or scratches may call for repainting to protect the surface. Customizing a vehicle’s look is another common reason. Painting over Raptor Liner updates the style without removing the coating.
Surface Preparation
Proper surface preparation is essential before painting over Raptor Liner. The coating is tough and textured, so paint will not stick well without the right steps. Preparing the surface ensures better adhesion and a smooth finish. Follow these simple steps to get the best results.
Cleaning The Surface
Start by cleaning the Raptor Liner thoroughly. Use soap and water to remove dirt and grime. Rinse well and let it dry completely. A clean surface helps paint bond properly and prevents peeling later.
Sanding Techniques
Lightly sand the Raptor Liner with fine-grit sandpaper or a sanding pad. This dulls the shiny texture and creates a rough surface for the paint to grip. Avoid sanding too deep to keep the liner intact. Sand evenly across the entire area.
Removing Grease And Dust
After sanding, wipe the surface with a grease remover or rubbing alcohol. This step removes oils and dust left behind from sanding. Use a clean cloth and do not skip this step. A grease-free surface ensures the primer and paint stick well.
Choosing The Right Primer
Choosing the right primer is crucial before painting over Raptor Liner. The primer acts as a bonding layer between the rough liner surface and the new paint. It helps the paint stick better and last longer. Without the correct primer, paint may peel or chip off quickly.
Not all primers work well with Raptor Liner. The surface is tough and textured, so the primer must be designed to grip such surfaces. Selecting the right primer ensures smooth application and durable results.
Primer Types For Raptor Liner
There are a few primer types suitable for Raptor Liner. Epoxy primers are excellent for strong adhesion and corrosion resistance. They seal the surface and create a solid base for topcoats.
Another option is urethane primers. These offer good flexibility and smooth out the texture slightly. They work well under many automotive paints.
Self-etching primers can also be used. They slightly etch the liner surface to improve paint bonding. These are best for metal surfaces coated with Raptor Liner.
Application Tips
Start by cleaning the surface to remove dirt and oils. Use a fine abrasive pad to dull the shiny texture. This helps the primer stick better.
Apply the primer in thin, even coats. Avoid heavy layers that can run or drip. Allow each coat to dry fully before adding another.
Use a spray gun or aerosol primer for smooth coverage. Brush or roller application may leave uneven texture.
Follow the primer manufacturer’s drying time instructions. Proper drying ensures the paint bonds well and lasts longer.
Selecting Topcoat Paint
Choosing the right topcoat paint over Raptor Liner is key for a durable finish. The paint must stick well to the textured surface. Proper selection helps avoid peeling or cracking later.
Topcoat paint adds color and protects the liner from wear and UV damage. It also improves the look of your vehicle or project. Understanding paint types and color matching helps achieve the best results.
Compatible Paint Systems
Use paint systems made for rough or flexible surfaces. Acrylic urethane paints work well over Raptor Liner. They offer good adhesion and durability. Avoid standard enamel paints, which may peel off.
Check that the primer and paint are compatible. Use a flexible primer to prevent cracking. Two-part urethane paints create a hard, protective topcoat. They resist chips and chemicals effectively.
Consult product labels or manufacturers for compatibility information. Test a small area first to ensure proper adhesion.
Color Matching And Tinting
Matching the topcoat color to your desired shade is important. Raptor Liner usually has a matte, textured finish that can affect color perception. Choose a paint with high opacity for better coverage.
Tinting paint may change the final shade. Use a professional tinting system for accuracy. Some topcoats allow custom colors to match vehicle paint or design themes.
Keep in mind that textured surfaces can make colors look darker or duller. Multiple thin coats help achieve an even, vibrant finish.
Painting Process
Painting over Raptor Liner requires a careful process to ensure good adhesion and a smooth finish. The surface must be prepared properly before any paint is applied. This process involves applying a primer, then the topcoat, and finally achieving the desired finish.
Each step is important to prevent peeling or chipping. Following the right painting process helps the paint last longer and look better on the Raptor Liner surface.
Applying Primer
Start by sanding the Raptor Liner surface with fine abrasive paper. This makes the surface less shiny and rough enough for paint to stick. Clean off all dust and grease before priming.
Use a primer that matches the topcoat paint type. Spray or brush the primer evenly over the surface. Let it dry completely before moving on. Primer helps paint bond well and improves durability.
Applying Topcoat
Choose a topcoat paint suited for the project, such as automotive or acrylic paint. Apply it in thin, even layers to avoid runs or drips. Allow each coat to dry before applying the next.
Multiple thin coats build a stronger and smoother finish than one thick coat. Keep the painting area dust-free to prevent particles from sticking to the wet paint.
Achieving A Glossy Finish
For a shiny look, use a clear coat over the topcoat paint. Apply the clear coat in light, even sprays for best results. Let it dry fully in a clean environment.
Lightly wet sand and polish the clear coat after it dries for extra gloss and smoothness. This step is optional but enhances the final appearance greatly.
Drying And Curing
Understanding the drying and curing process of Raptor Liner is crucial before painting over it. Proper drying ensures the liner has hardened enough to handle additional layers. Curing strengthens the coating, making it durable and long-lasting. Skipping these steps can lead to poor paint adhesion and surface issues.
Recommended Drying Times
Allow Raptor Liner to dry for at least 2 to 4 hours before any light handling. This drying period lets the surface form a stable film. For painting, wait a minimum of 24 hours to ensure the liner is dry enough. Temperature and humidity affect drying times significantly. Cooler or humid conditions will extend the drying time needed.
Curing For Durability
Curing is the chemical process that hardens the liner completely. It takes about 5 to 7 days at room temperature for full curing. During this time, avoid heavy use or painting. Full curing provides maximum impact resistance and paint adhesion. Patience in curing results in a stronger, longer-lasting finish.
Common Mistakes To Avoid
Painting over Raptor Liner requires care and the right steps. Avoiding common mistakes helps the paint stick well and last longer. Many people rush or skip important tasks. This leads to peeling, bubbling, or uneven finish. Taking time to prepare the surface is key. Below are common errors to watch out for.
Skipping Surface Preparation
Raptor Liner has a rough, textured surface. Paint will not stick well without sanding. Skipping this step causes poor adhesion and peeling. Use a fine abrasive pad to dull the surface. Clean dust and grease before painting. This helps paint bond firmly to the liner.
Using The Wrong Primer
Not all primers work with Raptor Liner. Using the wrong primer leads to poor paint adhesion. Choose a primer made for plastic or textured surfaces. This forms a strong base for your paint. Applying no primer or a cheap one causes flaking and uneven color.
Painting On A Dirty Or Oily Surface
Grease, oil, or dirt block paint from sticking. Always clean the surface thoroughly after sanding. Use soap and water or a degreaser. Let the surface dry fully before priming. Painting on a dirty surface causes bubbles and peeling.
Applying Paint Too Thickly
Thick paint layers dry unevenly. This causes runs, drips, and cracking. Apply thin, even coats instead. Let each coat dry before adding the next. Patience here results in a smooth, lasting finish.
Ignoring Drying And Curing Times
Rushing the drying process leads to poor results. Paint or primer not fully dry can peel or bubble. Follow manufacturer drying times strictly. Wait before handling or adding more coats. Proper curing ensures a strong, durable surface.
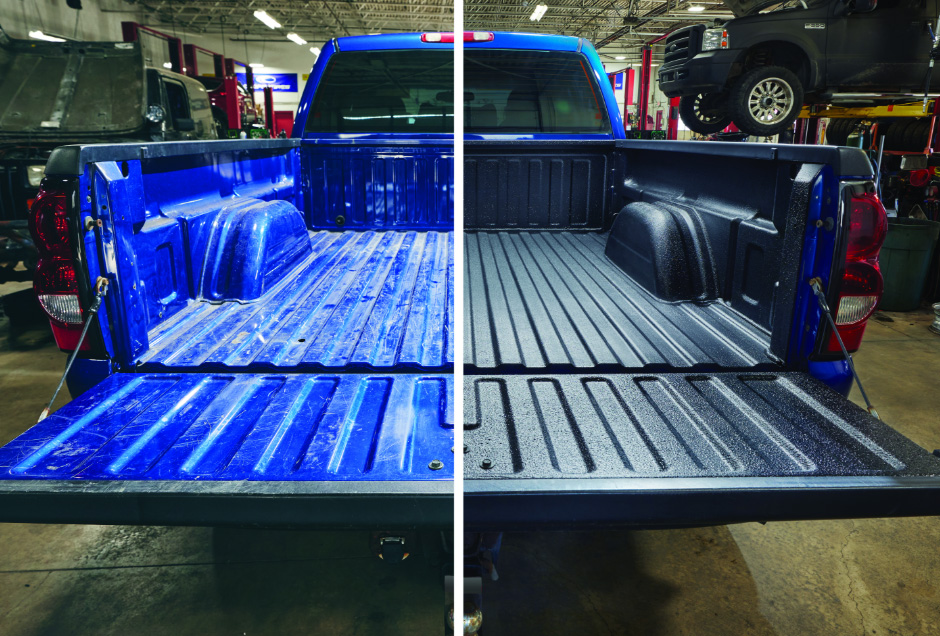
Credit: raptorcoatings.com
Maintaining Painted Raptor Liner
Maintaining painted Raptor Liner keeps your vehicle looking sharp and protects the surface. The textured coating is tough but needs care to stay in good condition. Proper cleaning and touch-ups extend the life of the paint and liner. Follow simple steps to keep the finish fresh and durable.
Cleaning Tips
Use mild soap and water to clean the painted Raptor Liner. Avoid harsh chemicals that can damage the paint or liner. Rinse thoroughly to remove all soap residue. Use a soft brush or cloth to prevent scratching the surface. Clean regularly to stop dirt buildup and maintain shine.
Touch-up Techniques
Small chips or scratches can be fixed without repainting the entire surface. Lightly sand the damaged area with fine sandpaper to smooth edges. Clean the area well to remove dust and oils. Apply matching touch-up paint in thin layers. Let each layer dry before adding another for the best result.
Alternatives To Painting
Painting over Raptor Liner is possible, but some prefer alternatives. These options keep the protective qualities of the liner. They also avoid the hassle of sanding and priming. Here are two popular alternatives to painting over Raptor Liner.
Clear Coating
Clear coating adds shine without changing color. It protects the liner from UV rays and dirt. The finish looks smooth and glossy. Applying a clear coat is simple and fast. It does not require heavy surface prep. Make sure the liner is clean and dry before application. Use a clear coat compatible with Raptor Liner for best results.
Reapplying Raptor Liner
Reapplying Raptor Liner refreshes the surface and restores texture. It adds another strong layer of protection. This method keeps the rugged look of the liner. Light sanding can help the new layer stick better. Clean the surface thoroughly before reapplication. Follow the manufacturer’s instructions for mixing and spraying. This option is great for repairing worn or damaged areas.

Credit: www.youtube.com
Frequently Asked Questions
Can You Paint Over Raptor Lining?
Yes, you can paint over RAPTOR liner. First, sand the surface to create a matte finish. Clean thoroughly, apply a suitable primer, then paint with your chosen topcoat. Proper preparation ensures strong paint adhesion and a durable, attractive finish.
Will Paint Stick To Bedliner?
Yes, paint can stick to bedliner if you properly abrade the surface, clean it well, and apply a suitable primer before painting.
How To Get Rid Of Raptor Liner?
Remove RAPTOR liner by sanding it thoroughly with coarse grit sandpaper. Use chemical paint strippers for stubborn areas. Clean the surface well before repainting or recoating.
How Long To Paint Over A Raptor Liner?
Wait at least 24 hours for the RAPTOR liner to fully cure before painting. Proper surface prep ensures paint adhesion.
Can You Paint Over Raptor Liner Directly?
No, you must first sand and clean the surface for paint to stick well.
Conclusion
Painting over Raptor Liner is possible with proper surface prep. Sand the liner well to make it rough and clean it thoroughly. Apply a quality primer to help the paint stick better. Choose the right paint for your project and apply it carefully.
Taking these steps ensures a smooth and lasting finish. This way, you can change the look without losing durability. Painting over Raptor Liner gives new life to your vehicle or gear. Just be patient and follow each step for the best results.


