If you own a C3 Corvette and love that classic vintage vibe, converting your rubber bumpers to chrome is a game-changer you don’t want to miss. Imagine your Corvette turning heads with that shining, timeless chrome finish—bringing back the style and elegance of earlier models.
You might wonder if the process is complicated or if it fits your car perfectly. This guide will walk you through everything you need to know about the C3 Corvette chrome bumper conversion, making it easier for you to decide and get started.
Ready to give your Corvette a stunning makeover that stands out on every road? Keep reading to discover how this upgrade can transform your ride.
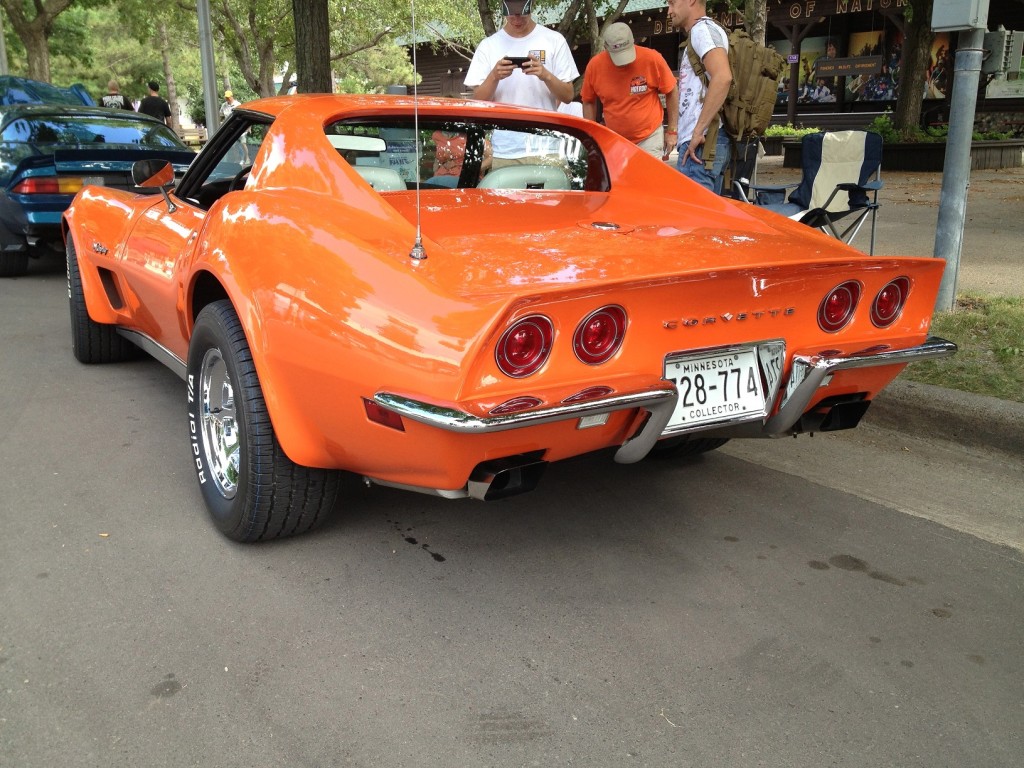
Credit: customimagecorvettes.com
Why Choose Chrome Bumpers
Choosing chrome bumpers for your C3 Corvette brings many benefits. Chrome bumpers highlight the car’s vintage charm and enhance its overall look. They also add value and create a unique style that stands out.
Classic Style Appeal
Chrome bumpers give the C3 Corvette a timeless look. They reflect the design trends of the 1960s and 1970s. This style connects your car to its heritage. The shiny finish adds elegance and a sense of nostalgia. It helps your Corvette keep its original character.
Value Enhancement
Chrome bumpers increase the car’s market value. Collectors and enthusiasts prefer the classic chrome look. It shows attention to detail and respect for the original design. Restoring chrome bumpers can make your Corvette more desirable. This upgrade often results in a higher resale price.
Improved Aesthetics
Chrome bumpers create a striking contrast with the car’s body paint. The reflective surface catches light and draws attention. It adds depth and shine to the car’s appearance. Chrome bumpers also hide minor scratches better than painted ones. This keeps your Corvette looking clean and polished.
C3 Corvette Bumper Types
The C3 Corvette features two main bumper styles. Each style reflects a different era in Corvette design. Both have distinct looks and functions. Understanding these types helps you choose the right bumper for your car.
The change from chrome to rubber bumpers marked a big shift. It affected the car’s appearance and safety features. Many owners prefer the classic chrome look today. Others appreciate the modern feel of rubber bumpers.
Rubber Bumpers Overview
Rubber bumpers appeared on C3 Corvettes from 1973 to 1982. They replaced the earlier chrome bumpers for safety reasons. These bumpers absorb impacts better during minor collisions. The design is larger and bulkier. They give the car a more aggressive look. Rubber bumpers also require less maintenance than chrome. However, they can look less elegant and hide the car’s lines.
Chrome Bumpers Features
Chrome bumpers were standard on C3 Corvettes from 1968 to 1972. They have a shiny, polished finish. These bumpers show the classic Corvette style clearly. Chrome bumpers are made of metal and require regular care. They add a vintage charm to the car’s front and rear. Many collectors seek to restore these bumpers to keep the car original. Chrome can dent or rust but looks striking when well-maintained.
Differences Between Bumpers
Chrome bumpers offer a timeless, shiny appearance. Rubber bumpers focus more on safety and impact absorption. Chrome is heavier and needs polishing. Rubber is lighter and needs less upkeep. The shape of chrome bumpers is slim and smooth. Rubber bumpers are thicker and more angular. Choosing between them depends on style and function. Chrome suits classic restoration. Rubber fits better for modern driving safety.
Conversion Kit Options
The C3 Corvette chrome bumper conversion offers several kit choices. Each kit varies in installation method and complexity.
Some kits allow simple bolt-on installation, while others require welding and bodywork. Choose based on your skill and tools.
Below are common types of conversion kits and popular brands to consider.
Bolt-on Kits
Bolt-on kits fit directly onto the car without cutting or welding. These kits save time and reduce effort.
They use existing mounting points for easy installation. Perfect for beginners or quick upgrades.
These kits often include chrome bumpers, brackets, and hardware. No major body changes needed.
Welding And Bodywork Kits
Welding kits require cutting and shaping the body panels. They offer a more authentic and custom look.
These kits include new metal panels, tail lamp sections, and mounting brackets. Professional skills are helpful here.
Ideal for restoration projects aiming for original factory appearance.
Popular Brands And Suppliers
Custom Image Corvettes leads in bolt-on chrome bumper kits. They offer high-quality parts and support.
Moss Motors carries both bolt-on and welding kits. They provide detailed instructions and reliable shipping.
Glassworks and Digital Corvettes also supply well-reviewed conversion kits. These brands focus on fit and finish.
Step-by-step Conversion Process
Converting your C3 Corvette from rubber to chrome bumpers brings back the classic style. This process requires careful steps to ensure a clean and durable finish. Follow this simple guide to achieve a professional look.
Removing Rubber Bumpers
Start by carefully detaching the rubber bumpers. Use the correct tools to avoid damaging the body. Remove all bolts and brackets that hold the bumpers in place. Keep track of all hardware for possible reuse or replacement. Clean the area thoroughly after removal.
Preparing The Body
Inspect the exposed body for any rust or damage. Sand down rough spots to create a smooth surface. Apply rust inhibitor to prevent future corrosion. Align the mounting points to fit the chrome bumpers accurately. Make any necessary adjustments to ensure proper fitment.
Installing Chrome Bumpers
Position the chrome bumpers carefully on the mounting points. Secure them using the supplied bolts and brackets. Tighten all fasteners evenly to avoid misalignment. Check the bumper gaps and adjust as needed. Ensure the bumpers sit flush with the body.
Painting And Finishing Touches
Mask off the chrome bumpers to protect them during painting. Paint the surrounding body panels to match the original color. Allow the paint to dry completely before removing the masking. Polish the chrome bumpers to enhance their shine. Reinstall any removed trim or lights for a finished look.
Common Challenges
Converting a C3 Corvette to chrome bumpers brings a classic look back to life. The process is rewarding but comes with common challenges. These issues require careful attention to detail and patience. Understanding these challenges helps avoid frustration and ensures a smoother project.
Alignment Issues
Aligning the chrome bumpers perfectly is tricky. The original mounting points may not match the new bumper brackets. Even small misalignments affect the car’s appearance and fit. Adjustments often need trial and error. Proper tools and a helper can make this easier. Taking time to check every angle avoids gaps and uneven surfaces.
Rust And Corrosion Repair
Rust is a common problem on older C3 Corvettes. Removing the rubber bumpers exposes hidden corrosion areas. Rust spots must be cleaned and repaired before fitting chrome parts. Ignoring rust leads to poor adhesion and weak structure. Sanding, priming, and sealing the metal creates a strong base. This step improves the car’s longevity and safety.
Tail Lamp Panel Modifications
The tail lamp panel often needs modification during conversion. Chrome bumper kits may not fit perfectly with the original panel shape. Cutting and reshaping the panel ensures a flush fit with the new bumper. This process demands precision and patience. Using proper measuring tools reduces mistakes. A well-modified panel improves the overall finish and classic look.
Maintenance Tips For Chrome Bumpers
Maintaining chrome bumpers on your C3 Corvette conversion keeps them shining bright. Proper care prevents dullness and corrosion. Follow these simple tips to preserve their classic look and extend their life.
Cleaning Techniques
Clean chrome bumpers regularly with mild soap and water. Use a soft cloth or sponge to avoid scratches. Rinse thoroughly to remove soap residue. Dry the bumper with a clean, soft towel to prevent water spots. Avoid harsh chemicals or abrasive materials that damage the chrome surface.
Protective Coatings
Apply a thin layer of automotive wax to protect chrome bumpers. Wax acts as a barrier against dirt and moisture. Use a wax designed for metal surfaces for best results. Reapply wax every few months to maintain protection. This simple step keeps bumpers looking polished and new.
Preventing Rust
Rust can ruin chrome bumpers quickly. Inspect bumpers often for chips or scratches that expose metal. Touch up damaged areas with chrome-safe paint or sealant. Store the Corvette in a dry, covered place to reduce moisture exposure. Use rust inhibitors on vulnerable spots to stop corrosion early.
Cost Breakdown
Understanding the cost of a C3 Corvette chrome bumper conversion helps plan your budget. This process involves several expenses beyond just the parts. Knowing these costs avoids surprises and keeps your project on track.
The main costs include parts and kits, labor for installation, and any extra upgrades you choose. Each plays a role in the total price and the quality of the final look.
Parts And Kits Pricing
The chrome bumper conversion kit is the core part of the project. Prices usually range from $1,200 to $1,800 depending on the brand and quality. Kits often include front and rear bumpers, mounting hardware, and sometimes fender panels.
Some kits offer bolt-on options, which reduce the need for welding and bodywork. These kits may cost a bit more but save time and labor expenses. It is important to choose high-quality chrome pieces to ensure durability and shine.
Labor And Installation Expenses
Installing chrome bumpers requires skilled labor. Shops charge between $500 and $1,500 depending on the complexity. Welding, fitting, and aligning the bumpers take time and expertise.
Labor costs vary by location and shop reputation. Custom paint work or body repairs during installation add to the price. Expect a few days of work to complete the conversion properly.
Additional Upgrades Costs
Many owners add upgrades like new grille inserts, chrome trim, or tail light panels. These extras enhance the classic look but increase costs. Prices for upgrades can range from $200 to over $1,000.
Upgrading suspension or brakes to match the restored style is common. These improvements improve safety and performance but add to the budget. Planning for extra costs ensures a smooth project without surprises.
Where To Buy Kits In Austin, Texas
Finding quality C3 Corvette chrome bumper conversion kits in Austin, Texas, is simple with several good options. Austin offers local suppliers, online retailers, and custom shops to meet your needs. Each source provides different benefits depending on your preferences and project requirements.
Local Suppliers
Austin has a few auto parts stores specializing in classic car accessories. These shops often stock or can order chrome bumper kits specifically for C3 Corvettes. Visiting local suppliers lets you see parts in person and get expert advice. Staff members usually have knowledge about restoration projects and can help you choose the right kit. Supporting local businesses also helps the Austin car community grow.
Online Retailers
Many online stores ship chrome bumper conversion kits directly to Austin. These retailers offer a wide range of options and competitive pricing. Shopping online allows comparison of multiple brands and kits from your home. Trusted websites provide detailed product descriptions and customer reviews. This helps make informed decisions and find the best value for your Corvette project.
Custom Shops And Services
Austin hosts several custom shops that specialize in Corvette restorations. These shops can supply chrome bumper kits and perform professional installations. Custom services ensure precise fit and finish, saving time and effort. They also offer advice on matching bumpers with other upgrades. Choosing a custom shop is ideal for those wanting expert craftsmanship and a hassle-free conversion.
Enhancing With Pro-touring Upgrades
Enhancing a C3 Corvette Chrome Bumper Conversion with Pro-Touring upgrades blends classic style with modern performance. These upgrades improve handling, comfort, and the car’s overall appearance. The Pro-Touring approach keeps the vintage look while adding parts designed for today’s driving demands.
Adding Pro-Touring features transforms the Corvette into a more aggressive and capable machine. It gives the car a wider stance and better traction. Each upgrade complements the chrome bumper’s timeless charm with functional benefits.
Front And Rear Flares
Front and rear flares widen the car’s track for improved stability. They provide extra space for larger wheels and tires. This change enhances grip during cornering and braking. Flares also give the Corvette a more muscular and aggressive look. They blend smoothly with the chrome bumper conversion for a seamless design.
These flares often come as bolt-on parts, making installation simpler. They maintain the car’s classic lines while updating its stance. The wider body helps the car handle better on both street and track.
Performance And Style Add-ons
Performance add-ons include upgraded brakes, suspension, and exhaust systems. These parts improve acceleration, stopping power, and ride quality. Modern shocks and sway bars reduce body roll and increase control. Bigger brakes help stop the car faster and more safely.
Style add-ons match the car’s classic look with fresh details. New wheels, custom paint, and subtle trim pieces enhance appearance. Lighting upgrades improve visibility and add a modern touch. These elements work together to create a balanced, Pro-Touring Corvette that looks great and drives even better.

Credit: www.corvetteforum.com

Credit: www.corvetteforum.com
Frequently Asked Questions
What Is A C3 Corvette Chrome Bumper Conversion?
A C3 Corvette chrome bumper conversion replaces rubber bumpers with classic chrome ones. It restores the vintage look of early C3 models. This upgrade enhances aesthetics and value while maintaining structural integrity. It’s popular among Corvette enthusiasts wanting a retro appearance.
How Difficult Is The Chrome Bumper Conversion Process?
The conversion requires moderate skills, including welding and bodywork. Kits simplify the process but professional help is recommended. Proper alignment and fitting are crucial for safety and appearance. Enthusiasts often seek expert installation for best results.
What Parts Are Included In A Conversion Kit?
Conversion kits typically include front and rear chrome bumpers, mounting brackets, and hardware. Some kits also provide front and rear fender flares and taillamp panels. These components ensure a complete transformation from rubber to chrome bumpers.
Does The Conversion Affect Corvette Safety Or Performance?
When properly installed, the chrome bumper conversion does not compromise safety or performance. The chrome bumpers meet original factory specifications. However, professional installation is essential to maintain structural integrity and crash protection.
Conclusion
A C3 Corvette chrome bumper conversion adds classic style and charm. It changes the look from modern to vintage with ease. The process may need some welding and care. Still, the result brings a unique, timeless appeal. Many kits are available to fit different needs.
This upgrade keeps your Corvette looking sharp and true to its roots. Choose quality parts for the best finish and durability. Enjoy the blend of old-school design with modern reliability. Your Corvette will stand out on the road and at shows.
A chrome bumper conversion is a smart way to honor history.


