Car troubles can be frustrating, especially when your brake light stops working. Yet, your tail light functions perfectly fine.
This issue can be confusing and even dangerous. Understanding why your brake light fails while your tail light works is crucial. It could be a simple fix or point to a more serious problem. Knowing the difference helps ensure your safety on the road.
In this blog post, we’ll explore common reasons behind this issue. We will also guide you through possible solutions. Keep reading to find out how to troubleshoot this problem and get your brake light working again. Your safety is important, so let’s dive in and solve this mystery together.
Common Causes
Having a brake light not working but the tail light functioning can be confusing. This issue can make driving unsafe and lead to legal trouble. Understanding the common causes can help you fix the problem quickly and easily.
Faulty Bulb
A faulty bulb is a common reason for brake light issues. Brake lights and tail lights use different filaments. This means one can work while the other doesn’t. Check the brake light bulb first. If it looks burnt or broken, replace it with a new one.
Blown Fuse
A blown fuse is another cause of brake light failure. Fuses protect the electrical circuits in your car. When a fuse blows, it cuts off the power to the brake light. Find the fuse box in your vehicle. Look for the fuse labeled for the brake lights. If it is blown, replace it with a fuse of the same rating.
Credit: www.4runners.com
Inspecting The Bulb
If your brake light is not working but your tail light works, the problem might be with the bulb. Inspecting the bulb can help you determine if it needs to be replaced. This process is simple and can save you time and money. Follow these steps to inspect the bulb correctly.
Removing The Bulb
First, you need to remove the bulb. Open the trunk or the back of your vehicle. Find the cover that houses the brake light. Use a screwdriver to unscrew it. Once open, locate the bulb.
Gently twist the bulb counterclockwise to remove it from the socket. Be careful not to break it. If the bulb is stuck, you might need to use a bit more force. Ensure your hands are dry to avoid slipping.
Checking For Damage
After removing the bulb, check for damage. Look at the filament inside the bulb. If it’s broken or burnt out, the bulb is faulty. Also, examine the base for any signs of corrosion or rust.
If the bulb looks fine, clean the socket with a dry cloth. Sometimes, dust or debris can affect the connection. If the socket is damaged, it may need to be replaced.
| Step | Description |
|---|---|
| 1 | Open the trunk and find the cover |
| 2 | Use a screwdriver to unscrew the cover |
| 3 | Gently twist the bulb counterclockwise |
| 4 | Check the filament and base for damage |
Checking The Fuse
Experiencing a brake light issue while the tail light works can be confusing. One possible cause is a blown fuse. This section guides you through checking the fuse. It includes locating and testing the fuse in your vehicle.
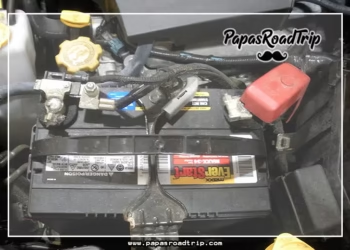
Locating The Fuse Box
The first step is to find the fuse box. It can be inside the car or under the hood. Check your vehicle manual for the exact location. Usually, it is near the dashboard or under the steering wheel. In some cars, it can be in the engine compartment. Look for a small plastic box with a cover. The cover often has a diagram of the fuses.
Testing The Fuse
Once you locate the fuse box, you need to test the fuse. Use a fuse puller or a pair of pliers to remove the fuse. Check if the metal strip inside the fuse is broken. A broken strip means the fuse is blown. You can also use a multimeter to test the fuse. Set the multimeter to the continuity setting. Place the probes on each end of the fuse. If the multimeter beeps, the fuse is good. If not, the fuse needs replacing. Replace the blown fuse with one of the same rating.
Examining The Brake Light Switch
If your brake light is not working but the tail light works, the brake light switch might be the issue. This small component is crucial for your safety. It signals the brake lights to turn on when you press the brake pedal.
Identifying The Switch
The brake light switch is usually located near the brake pedal. Look for a small device connected to the pedal arm. It may have wires attached to it. This switch activates the brake lights when you press the pedal.
| Component | Location |
|---|---|
| Brake Light Switch | Near brake pedal arm |
Testing The Switch
Testing the brake light switch is simple. Follow these steps:
- Press the brake pedal with your hand.
- Observe if the brake lights turn on.
- If the lights do not turn on, the switch might be faulty.
Use a multimeter to further test the switch. Set the multimeter to continuity mode. Touch the probes to the switch terminals. Press the brake pedal. If there is no continuity, the switch needs replacement.
- Set multimeter to continuity mode
- Touch probes to switch terminals
- Press brake pedal
- Check for continuity
Inspecting The Wiring
Experiencing issues with a brake light that doesn’t work, while the tail light functions perfectly, can be confusing. One of the key steps in diagnosing this problem involves inspecting the wiring. Faulty or damaged wiring can be the root cause. This section will guide you through the inspection process.
Visual Inspection
Start by looking at the wiring visually. Check for any visible damage, such as frayed wires or loose connections. Inspect the wires leading to the brake light. Sometimes, wires can get pinched or broken. This can interrupt the electrical flow. Ensure all connections are secure and free from corrosion. Corrosion can interfere with the connection, causing the brake light to fail.
Using A Multimeter
A multimeter can help you check for continuity in the wiring. Set the multimeter to the continuity setting. Touch the probes to the wires leading to the brake light. The multimeter will beep if the wiring is good. If there’s no beep, there might be a break in the wire. You can also check for voltage. Set the multimeter to the voltage setting. Test the wires while the brake pedal is pressed. There should be a voltage reading. If there’s no voltage, the issue might be upstream. This could be a fuse or switch problem.
Credit: www.toyota-4runner.org
Testing The Brake Light Circuit
If your brake light is not working but the tail light is, the issue might be with the brake light circuit. Testing the brake light circuit can help you identify the problem. This process involves using a test light and checking the voltage. Let’s dive into the details.
Using A Test Light
A test light is a simple tool that helps you check the brake light circuit. Follow these steps:
- Turn on the ignition but don’t start the engine.
- Connect the test light clip to a ground point on the vehicle.
- Touch the test light probe to the brake light socket.
If the test light illuminates, power is reaching the socket. If not, there might be a wiring issue.
Checking Voltage
Using a multimeter, you can check the voltage in the brake light circuit. Here’s how:
- Set the multimeter to DC voltage mode.
- Place the red probe on the brake light socket’s positive terminal.
- Place the black probe on a ground point.
The reading should be around 12 volts. If it is lower, there might be a problem with the power supply or a bad connection.
Replacing Faulty Components
Experiencing a brake light malfunction while the tail light functions can be confusing. This usually points to a faulty bulb or fuse. Replacing these components can quickly resolve the issue.
Replacing faulty brake light components is essential for vehicle safety. You need to understand the right parts to replace and how to do it correctly. This section will guide you through choosing the right parts and the step-by-step replacement process.Choosing The Right Parts
First, identify the brake light bulb type for your vehicle. Consult your car manual or check with an auto parts store. Ensure you get the correct bulb size and type. Using the wrong parts can cause further issues. Next, buy quality bulbs from reputable brands. High-quality parts last longer and perform better. You may also need tools like a screwdriver or socket wrench.Step-by-step Replacement
Begin by opening your car’s trunk or hatch. Locate the brake light housing. You may need to remove screws or clips holding the housing in place. Carefully remove the housing and access the bulb. Twist the old bulb counterclockwise to remove it. Dispose of the old bulb properly. Insert the new bulb by twisting it clockwise. Ensure it fits snugly. Reattach the brake light housing and secure any screws or clips. Test the new brake light by pressing the brake pedal. Ensure the light works correctly. If not, double-check the bulb installation. Regularly check your brake lights for proper function. Replace any faulty components promptly to maintain vehicle safety. “`Credit: www.subaruoutback.org
Preventative Maintenance
Preventative maintenance helps keep your vehicle’s lights working properly. Regular check-ups ensure safety and avoid unexpected failures. This practice can save you from potential hazards and fines. Let’s delve into some essential preventative measures for your brake lights.
Regular Inspections
Regular inspections help identify issues early. Check your brake lights at least once a month. Turn on your car and have someone observe the lights. Ensure all lights function correctly. Pay attention to any dimming or flickering. These signs may indicate potential problems. Fixing small issues prevents bigger problems later.
Keeping Spare Parts
Keeping spare parts makes quick repairs easier. Store extra bulbs and fuses in your car. Having these items saves time if a light fails. You can replace the faulty part immediately. This practice ensures your brake lights always work. Check your spare parts regularly. Replace any expired or damaged items. Preparedness keeps you safe on the road.
Frequently Asked Questions
Why Does My Brake Light Not Work But The Tail Light Does?
A common issue. It could be a faulty brake light switch or blown brake light bulb.
How Can I Fix A Brake Light That’s Not Working?
Check the brake light bulb and replace if needed. Inspect the brake light switch.
Can A Blown Fuse Cause Brake Lights To Stop Working?
Yes, a blown fuse can stop brake lights from working. Check and replace the fuse.
Is It Safe To Drive With A Non-working Brake Light?
Not safe. Other drivers can’t see when you brake. Fix it as soon as possible.
Can A Bad Brake Light Switch Affect The Tail Light?
No, a bad brake light switch typically only affects the brake light, not the tail light.
Conclusion
Fixing a brake light issue can be straightforward with proper guidance. First, check the bulb and fuse. These often cause the problem. Next, inspect the wiring for any damage. Replacing a faulty brake light switch might also help. Always ensure your car’s brake lights work correctly.
This keeps you safe on the road. Remember, regular maintenance prevents such issues. Keep an eye on your vehicle’s lights. Safe driving!


