Are you looking to add personality and style to your vehicle’s interior? Attaching patches to your headliner is a simple and creative way to do just that.
Whether you want to showcase your favorite designs, represent your hobbies, or add a custom touch, knowing how to securely attach patches will make all the difference. In this guide, you’ll discover easy and effective methods to stick patches on your headliner without damaging it.
From using Velcro strips for easy removal to more permanent options like adhesive or pins, you’ll learn exactly what works best for your needs. Keep reading to transform your headliner into a unique canvas that reflects your personality!
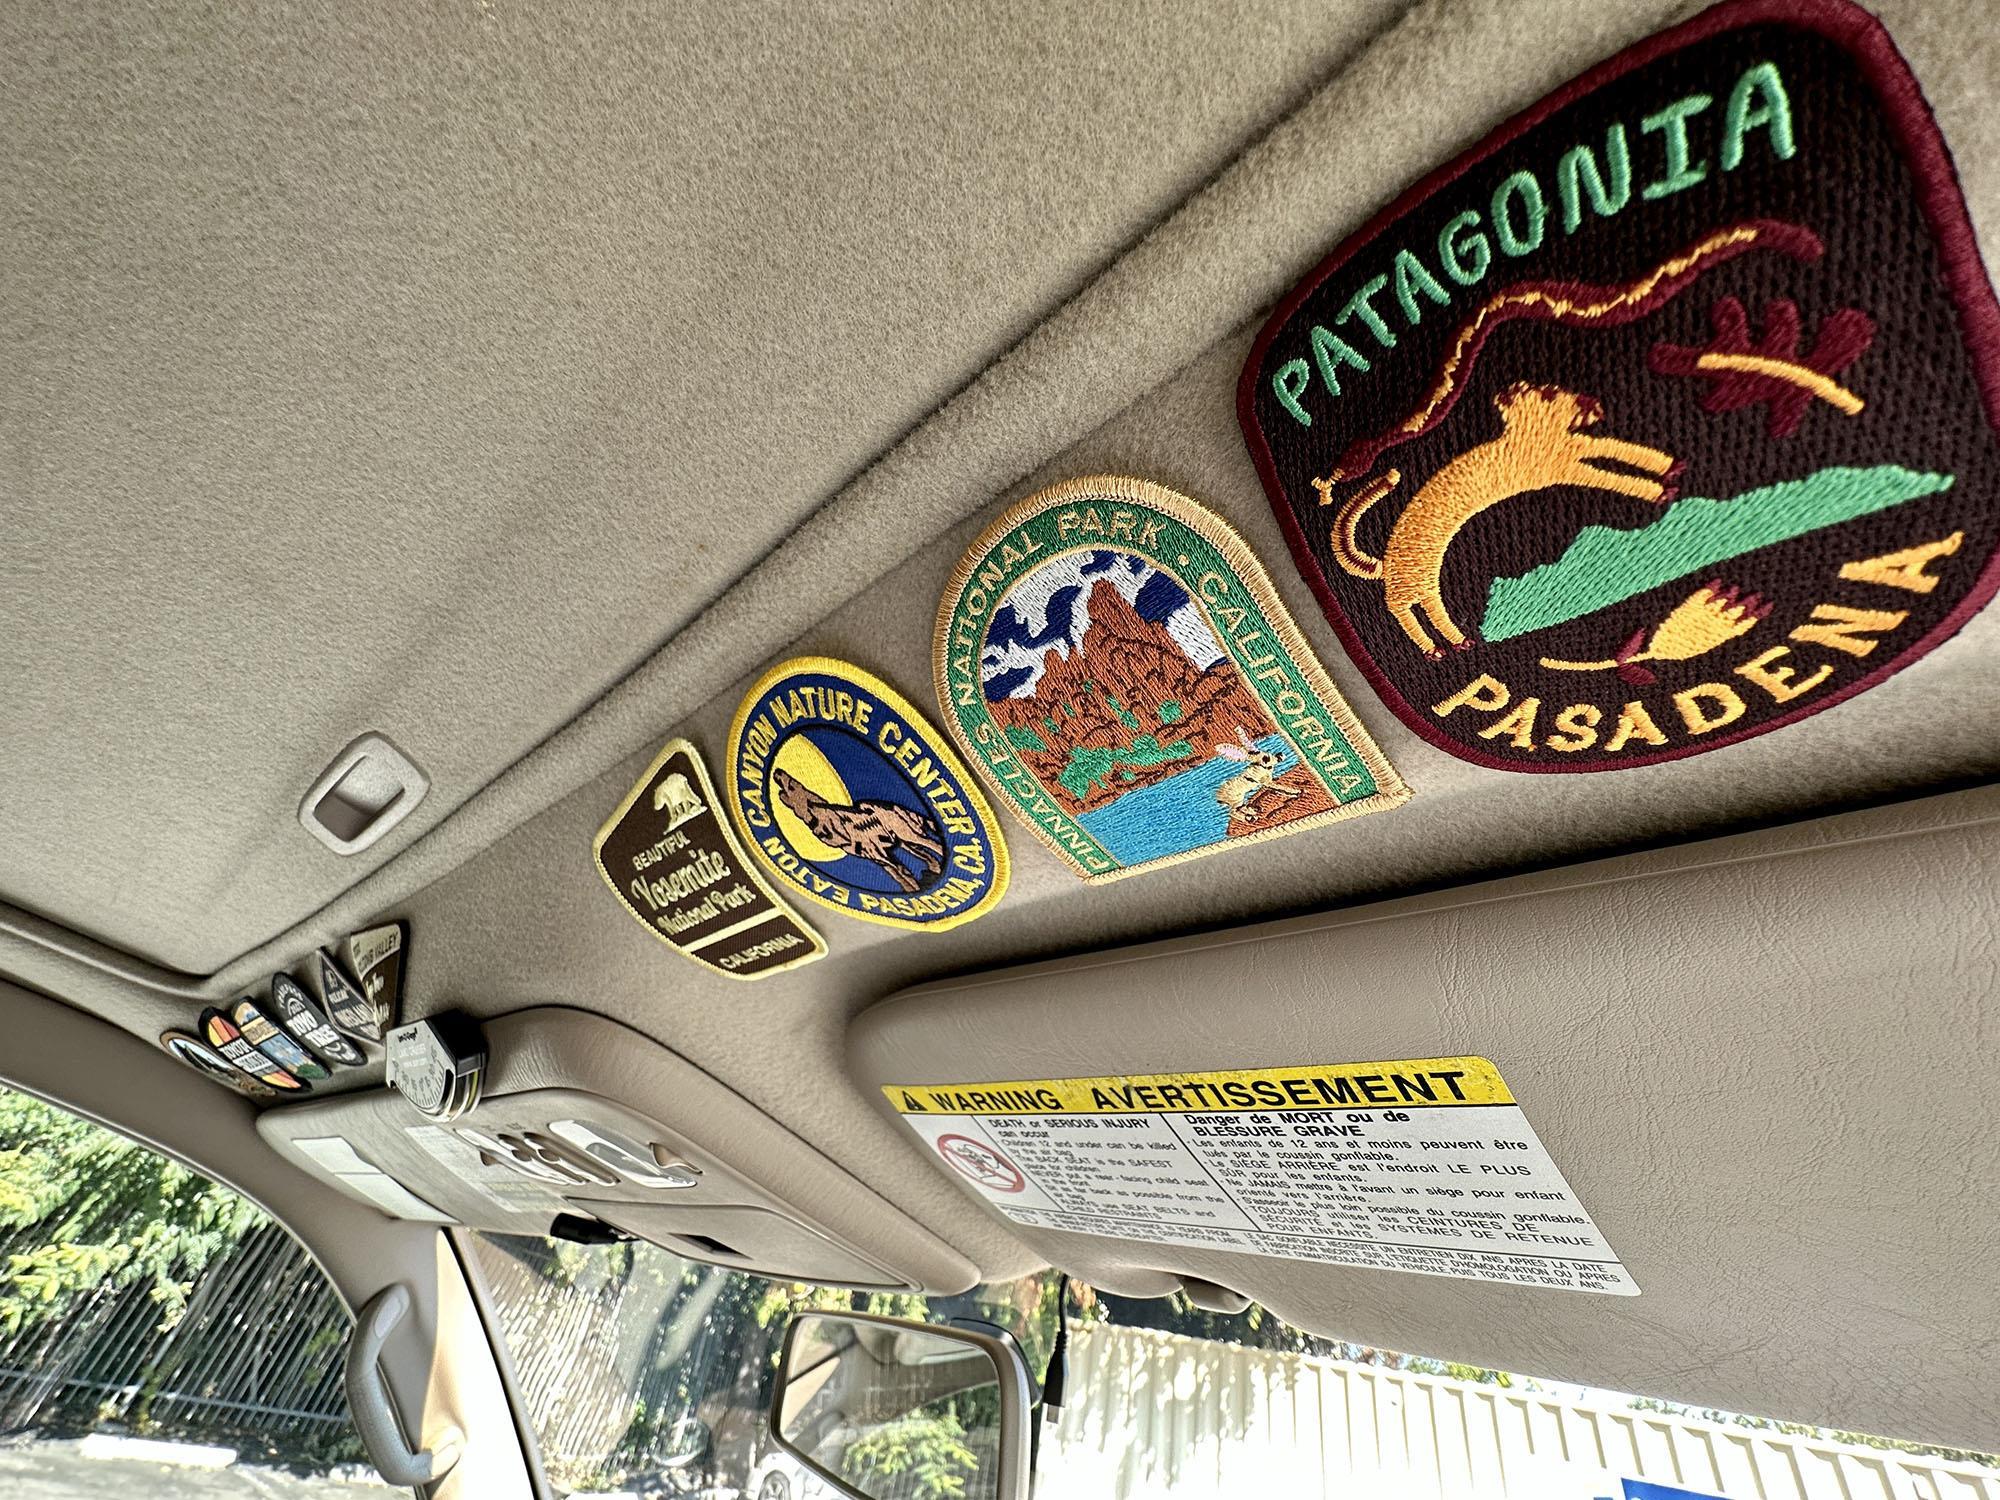
Credit: www.ovrmag.com
Choosing Patch Attachment Methods
Attaching patches to a headliner requires selecting the right method. Each option offers different benefits based on patch type and permanence.
Consider how often you want to remove or reposition patches. Choose a method that fits your needs for security and flexibility.
Velcro Strips For Flexibility
Velcro strips allow easy removal and rearrangement of patches. Attach the hook side to the patch and the loop side to the headliner.
This method is ideal for people who want to change patches frequently. Make sure to use strong adhesive Velcro for a secure hold.
Adhesive Options
Adhesives provide a more permanent bond between patches and headliners. Fabric glue and contact cement are common choices.
Apply adhesive evenly to avoid lumps or damage. Allow sufficient drying time before handling the patch to ensure firmness.
Using Pins For Extra Security
Push pins or thumbtacks offer extra security for heavier or thicker patches. They keep patches firmly in place without adhesive.
Place pins at patch edges for a neat look. Use caution to avoid damaging the headliner fabric or padding underneath.

Credit: www.ovrmag.com
Preparing Your Patches
Preparing your patches is the first step to attach them neatly to your headliner. Proper preparation ensures they stay in place and look great. It also helps avoid damage to the headliner fabric.
Different methods suit different patch types and headliner materials. Choose the right tools and materials for a secure fit. Here are key points to prepare your patches for attachment.
Selecting The Right Velcro
Velcro is a popular choice for attaching patches. It allows easy removal and repositioning. Use self-adhesive Velcro strips with a strong hook side. Cut strips to fit the patch size exactly. For heavy patches, pick heavy-duty Velcro for better hold.
Applying Adhesive Backing
Some patches come with adhesive backing already. If not, apply fabric glue or contact cement to the patch back. Spread glue evenly to avoid lumps. Let the adhesive dry until tacky before attaching. This creates a firm bond without damaging fabric.
Choosing Suitable Pins
Push pins work well for a temporary hold. Select pins with flat heads to avoid snagging. Avoid sharp pins that can tear the headliner. Place pins at patch edges for balanced support. Pins help keep patches steady before using Velcro or glue.
Attaching Patches With Velcro
Attaching patches with Velcro offers a clean and flexible way to customize your vehicle’s headliner. This method lets you easily add or remove patches without damage. Velcro provides a strong hold and keeps patches in place even on textured surfaces like headliners.
Using Velcro means less mess and quick changes. You can switch patches to match your style or mood anytime. The key is to prepare and apply the Velcro properly for a secure fit that lasts.
Cutting And Applying Hook Side
Start by cutting the hook side of the Velcro to fit your patch size. Trim it carefully so it covers most of the patch’s back. Remove the paper backing from the Velcro strip.
Press the sticky side of the hook Velcro firmly onto the back of the patch. Make sure it sticks well and lies flat without bubbles or wrinkles. For heavier patches, use a stronger adhesive Velcro.
Pressing Patches Onto Headliner
Once the Velcro is attached to the patch, press the patch onto the headliner’s loop fabric. Apply steady pressure with your fingers to secure it. Check that the patch sits flat and does not peel off easily.
Rearrange patches by simply pulling them off and repositioning. This keeps your headliner neat and personalized without damage.
Using Tools For A Secure Fit
For a firmer hold, use a roller or flat tool to press the patch against the headliner. Roll gently over the patch to help the Velcro grip better. This step improves adhesion and prevents patches from falling off.
Tools also help remove air pockets and ensure the patch stays attached during movement or vibrations.
Using Adhesives On Headliners
Using adhesives on headliners offers a secure way to attach patches. This method works well for both fabric and foam headliners. Choosing the right adhesive ensures patches stay in place without damage. Proper application and technique improve the bond’s strength and durability.
Applying Fabric Glue Or Contact Cement
Start with clean, dry surfaces on both the patch and headliner. Apply fabric glue or contact cement evenly on the patch back. Avoid using too much glue to prevent seepage. Allow the adhesive to become tacky before placing the patch. This step helps create a stronger bond.
Pressing And Holding Techniques
Press the patch firmly onto the headliner. Use steady pressure for at least 30 seconds. Hold the patch in place to avoid slipping or shifting. For larger patches, press from the center outward. This removes air bubbles and ensures full contact.
Ensuring Long-lasting Bond
Let the adhesive dry fully before using the vehicle. Avoid touching or moving the patch during this time. Keep the headliner dry to maintain adhesion. Check the patch periodically and reapply glue if needed. Proper care extends the life of the bond and patch.
Securing Patches With Pins
Pins provide a simple and effective way to attach patches to your headliner. They hold the patch firmly in place without causing damage. This method allows easy removal or repositioning of patches as needed. Using the right pins and technique ensures your patches stay secure and look neat.
Choosing Quilting And Safety Pins
Select pins that fit the patch size and headliner material. Quilting pins are thin and sharp, ideal for delicate fabrics. Safety pins offer extra security with their locking mechanism. Choose rust-resistant pins to prevent stains and damage over time.
Inserting Pins At Proper Angle
Insert pins at a shallow angle to avoid piercing the patch too deeply. This prevents fabric tearing and keeps the patch flat. Push the pin through both the patch and headliner gently. Secure the pin by closing it firmly but without bending the fabric.
Balancing Security And Appearance
Place pins near patch edges to hold it without showing pins too much. Use fewer pins on smaller patches to keep a clean look. For larger patches, add more pins but space them evenly. Check that pins do not distort or wrinkle the patch surface.
Tips For Different Headliner Materials
Attaching patches to a headliner requires different approaches based on the material. Understanding how to work with fabric, plastic, or other surfaces helps ensure a secure fit. Follow these tips for the best results.
Velcro On Fabric Vs. Plastic
Velcro sticks well on fabric headliners due to the texture. The hooks grip the fibers firmly. On plastic headliners, Velcro may not hold as tightly. Use heavy-duty Velcro or add a strong adhesive backing. Test a small area first to avoid marks.
Adhesive Compatibility
Select adhesives that match the headliner material. Fabric glue works well on cloth surfaces. For plastic, use contact cement or specialized plastic glue. Avoid general-purpose glues that can fail or damage the headliner. Always check the glue’s instructions before use.
Avoiding Damage To Headliner
Apply patches gently to prevent tears or dents. Avoid sharp pins that can leave holes. Use pressure rollers to attach patches evenly. Remove patches slowly if repositioning is needed. Regularly check patch edges for peeling or damage.
Styling Ideas For Patch Placement
Styling patches on your headliner can transform your vehicle’s interior. It adds personality and a unique touch. Simple placement ideas bring fun and creativity to your space.
Explore different ways to arrange patches. Mix sizes and shapes for visual interest. Match patches to seasons or themes for a fresh look.
Arranging Patches Creatively
Group patches by color or theme for a unified look. Scatter them randomly for a casual style. Create patterns like circles or lines to catch the eye. Leave some space around patches to avoid clutter.
Mixing Patch Sizes And Shapes
Combine large and small patches to add depth. Use round and square shapes for contrast. Layer smaller patches over bigger ones for a 3D effect. This mix keeps your headliner lively and interesting.
Seasonal And Themed Displays
Change patches based on seasons like summer or winter. Use holiday-themed patches for special occasions. Create a travel theme with patches from places you visited. Rotating patches keeps your headliner fresh and personal.
Maintaining And Removing Patches
Maintaining and removing patches from your headliner keeps your vehicle looking neat. Proper care helps patches last longer and prevents damage to the headliner surface. Knowing how to clean around patches, remove Velcro safely, and replace patches is essential for easy customization.
Cleaning Around Patches
Use a soft cloth or brush to clean around patches gently. Avoid harsh chemicals that may weaken adhesive or fabric. Lightly dampen the cloth with water or mild soap solution. Pat dry with a clean towel to prevent moisture buildup. Regular cleaning stops dirt and dust from accumulating near patches.
Removing Velcro Without Damage
Slowly peel Velcro patches off the headliner to avoid damage. Pull at a low angle, not straight up, to reduce stress on the fabric. Use a hairdryer on low heat to warm the adhesive before removal. This softens glue and makes the process easier. Avoid sharp tools that can tear or puncture the headliner.
Replacing Or Updating Patches
Remove old patches completely before adding new ones. Clean the area to remove any leftover adhesive or dirt. Attach new Velcro strips firmly to the patch back for a strong hold. Press patches firmly onto the headliner for best results. Update patches to refresh your style or show new designs easily.

Credit: www.youtube.com
Frequently Asked Questions
How To Get Patches To Stick To Headliner?
Use self-adhesive Velcro strips on patch backs for easy attachment. Press patches firmly onto the headliner. For permanence, apply fabric glue or secure with push pins at a shallow angle.
Will Velcro Stick To Car Headliner?
Velcro can stick to a car headliner if you use self-adhesive Velcro strips on patches. Press firmly for better hold.
Does Gorilla Glue Work On Headliner?
Gorilla Glue can bond headliners but may cause stiffness or damage. Use fabric glue or Velcro for safer, flexible results.
How To Reattach Fabric To The Roof Of A Car?
Clean the roof fabric surface thoroughly. Apply fabric adhesive evenly on the back of the fabric. Press the fabric firmly onto the roof, smoothing out wrinkles. Use clamps or weights to hold it in place until dry. Avoid stretching the fabric during reattachment.
How Do I Attach Patches To A Car Headliner?
Use Velcro strips or fabric glue to stick patches securely to the headliner surface.
Conclusion
Attaching patches to your headliner is simple and fun. Use Velcro for easy removal and repositioning. Strong adhesives work well for a lasting hold. Pins add extra security, especially on rough surfaces. Take your time to place patches neatly. This small project can personalize your space quickly.
Enjoy customizing your headliner with patches today!


