Changing a headlight may seem intimidating. Yet, it’s a simple task with the right guidance.
Driving at night with a broken headlight is dangerous. It can lead to accidents or fines. Replacing a headlight is a necessary skill for all drivers. This task is easier than you might think, and you can do it yourself.
With a few basic tools and a bit of patience, you can change your headlight. This blog post will guide you through the process. You’ll save money and increase your confidence. Let’s get started on making your vehicle safer and more reliable.

Credit: www.youtube.com
Safety Precautions
Changing a headlight might seem simple. But, safety should always come first. Ensuring your vehicle and personal safety can prevent accidents. Follow these steps for a smooth and safe headlight change.
Preparing Your Vehicle
Before you start, make sure your car is off and the keys are out. This prevents accidental electrical shocks or the car moving unexpectedly. Also, engage the parking brake. If you’re working in a garage, ensure it’s well-lit and ventilated.
Here’s a checklist to prepare your vehicle:
- Turn off the engine
- Remove the keys from the ignition
- Engage the parking brake
- Ensure adequate lighting in your workspace
- Open the hood and secure it properly
Personal Safety Tips
Wear gloves to protect your hands from sharp edges. Safety goggles are essential to keep debris or chemicals out of your eyes. Avoid wearing loose clothing or jewelry that could get caught in engine parts.
Remember these personal safety tips:
- Use gloves to protect hands
- Wear safety goggles
- Avoid loose clothing and jewelry
- Keep hair tied back
- Work in a well-ventilated area
Keep a fire extinguisher nearby. It’s rare, but electrical work can cause sparks. Always have a fire extinguisher ready just in case.
Stay alert and focused. Avoid distractions to ensure you don’t miss any steps. Your safety is the top priority.
Locate The Headlight Assembly
Locating the headlight assembly is the first step in changing your car’s headlight. This task might seem daunting, but with a few simple steps, you can easily find it. This guide will help you through the process.
Consulting The Owner’s Manual
The first step is to consult the owner’s manual. The manual provides detailed information about your car. Look for the section on headlights. It will tell you where the headlight assembly is located.
Here are the steps to follow:
- Open the owner’s manual.
- Navigate to the section on lights or headlights.
- Read the instructions carefully.
The manual is your best guide. It offers specific details about your car model. This information is crucial for locating the headlight assembly.
Identifying The Headlight Housing
Next, you need to identify the headlight housing. This is where the headlight bulb is stored. To find the housing, open the hood of your car. Look for a plastic or metal casing near the front of the vehicle.
Here are some quick tips:
- Open the car hood.
- Locate the front of the vehicle.
- Find a plastic or metal casing.
The headlight housing is usually easy to spot. It is located at the front, near the grille. You might see wires connected to it. This is where you will replace the headlight bulb.
Remember to handle the housing carefully. It might be fragile. Use gentle force to avoid damaging any parts.
Remove The Old Headlight
Changing a headlight might sound daunting. But it’s simple if you follow the steps. First, you need to remove the old headlight. This involves a few key steps: accessing the headlight housing and disconnecting the bulb. Let’s break it down.
Accessing The Headlight Housing
First, open the hood of your car. Locate the back of the headlight assembly. You might need a screwdriver to remove the housing cover. Check your car’s manual if you’re unsure. Some cars have clips or screws holding the housing in place. Unscrew or unclip these carefully. Now, you should see the headlight bulb inside the housing.
Disconnecting The Bulb
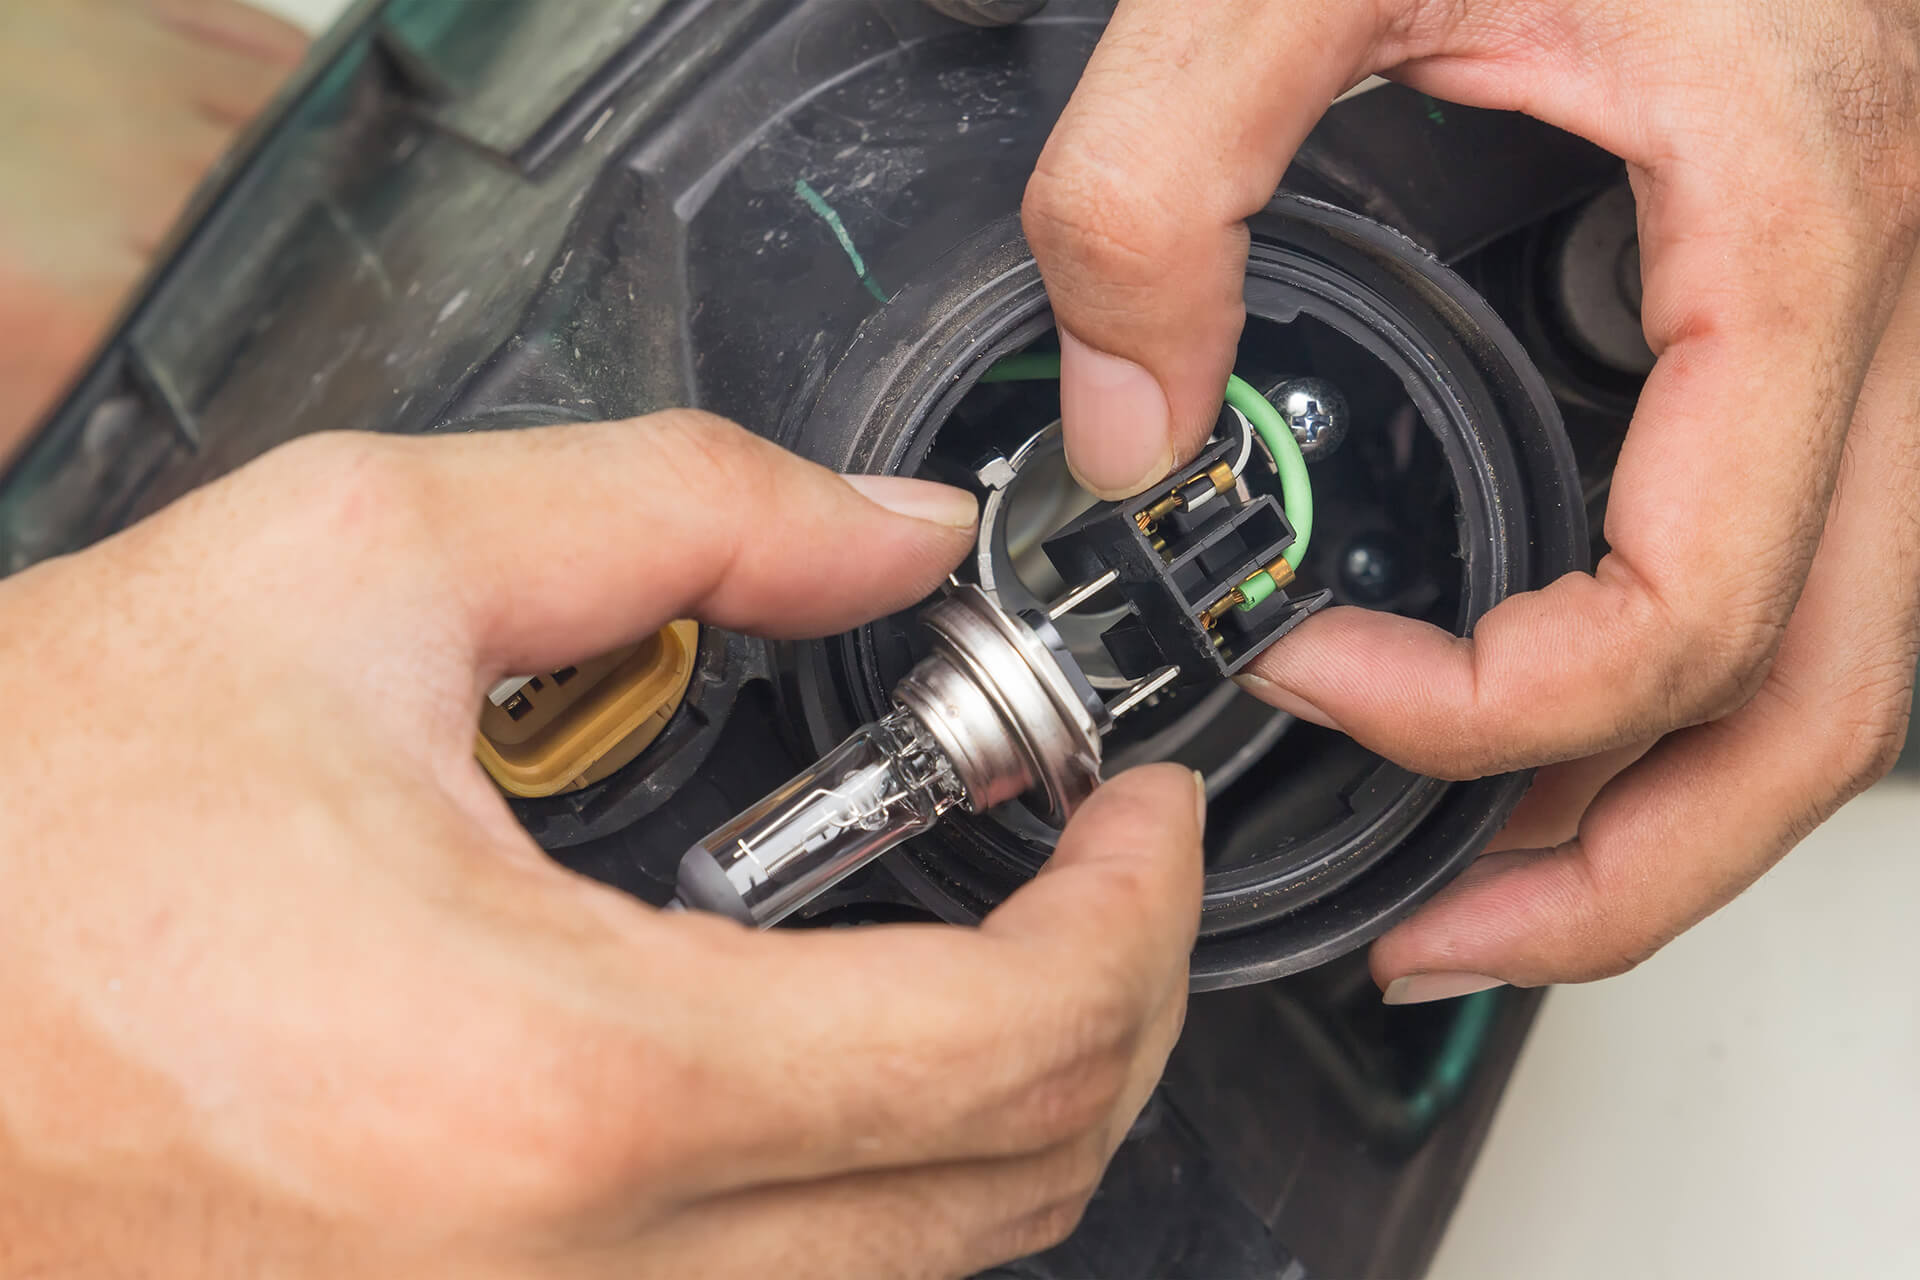
Next, you need to disconnect the old bulb. Find the electrical connector attached to the bulb. It usually looks like a plastic plug. Gently press the release tab on the connector. Pull the connector away from the bulb. Be careful not to force it. You don’t want to damage the wiring. Once the connector is off, twist the bulb counterclockwise. This should release the bulb from the housing. Carefully remove the old bulb and set it aside.
Now you’ve successfully removed the old headlight. You’re ready to install the new one. Remember, always handle bulbs with clean hands. Dirt or oil can damage them.

Credit: www.hella-bulbs.com
Install The New Headlight
Changing a headlight can seem daunting. But with a bit of guidance, it’s manageable. Installing the new headlight is a key step. Follow these simple instructions to ensure it’s done correctly.
Handling The New Bulb
First, it’s crucial to handle the new bulb with care. Avoid touching the glass part of the bulb with your fingers. Oils from your skin can cause the bulb to overheat and fail. Use a clean cloth or gloves to handle the bulb.
Next, check the bulb for any damage. Ensure it is the correct type for your vehicle. Refer to your vehicle’s manual if unsure.
Securing The New Bulb In Place
Carefully insert the new bulb into the headlight housing. Align it properly to avoid damage. Twist the bulb clockwise until it locks into place.
Once secure, reconnect the power wires. Make sure the connections are tight. Loose connections can cause the headlight to malfunction.
Finally, test the new headlight. Turn on your car and check if the headlight works. Adjust the headlight if necessary to ensure proper alignment.
| Step | Description |
|---|---|
| 1 | Handle the bulb with gloves or a clean cloth |
| 2 | Check the bulb for damage |
| 3 | Insert the bulb into the housing |
| 4 | Twist the bulb to secure it |
| 5 | Reconnect the power wires |
| 6 | Test the headlight |
Test The New Headlight
After installing a new headlight, testing it is crucial. This step ensures your headlight works properly and is safe for driving. Follow these steps to test your new headlight effectively.
Turning On The Headlights
First, turn on your car’s headlights. Check both the low and high beams. Make sure the new headlight turns on correctly and matches the other headlight in brightness.
Checking Alignment And Brightness
Next, check the alignment and brightness of the new headlight. Park your car on a level surface, facing a wall or garage door. The distance should be about 25 feet.
| Step | Description |
|---|---|
| 1 | Turn on the headlights and mark the center of each beam on the wall with tape. |
| 2 | Check if both marks are at the same height. Adjust if needed. |
| 3 | The light should be bright but not blinding. Compare with the other headlight. |
If the headlight is not aligned, you may need to adjust it. Refer to your car’s manual for specific instructions. Ensuring proper alignment and brightness helps maintain road safety and visibility.

Credit: payneautogroup.com
Final Steps
You’ve reached the final steps in changing your headlight. Your efforts are almost complete. Just a few more tasks to ensure everything functions properly. Let’s get started!
Reassembling The Headlight Housing
First, align the headlight bulb with its socket. Carefully insert it, ensuring it fits snugly. Next, reattach the clip or fastener to secure the bulb in place.
Now, position the headlight housing back into the car. Align it with the mounting points. Use a screwdriver to tighten the screws. Make sure they are secure but not over-tightened.
Reconnect the electrical connector. Push it until you hear a click. This ensures a proper connection. Finally, check the alignment. Adjust if necessary to ensure the beam points correctly.
Cleaning Up
After reassembling, it’s time to clean up. Remove any tools or leftover parts. Store them properly for future use.
Wipe down the headlight cover. Use a clean cloth to remove any smudges or fingerprints. This keeps your headlight looking new.
Turn on your headlights to test. Ensure both are working properly. Adjust if needed. You’re done! Enjoy your newly installed headlight.
Troubleshooting
Changing a headlight can sometimes be tricky. Problems may arise that you did not expect. Understanding common issues and knowing when to seek help can save you time and effort.
Common Issues
One common issue is the headlight not turning on. This could be due to a blown fuse. Check the fuse box and replace any blown fuses. Another issue could be a faulty bulb. Ensure the new bulb is not damaged. A loose connection can also cause problems. Make sure all connections are tight and secure.
When To Seek Professional Help
If the headlight still does not work, it may be time to seek help. A car mechanic can diagnose and fix the problem. If you notice flickering lights, get professional help. This could be a sign of an electrical issue. Do not attempt to fix complex problems yourself. It is safer to get an expert’s opinion.
Maintenance Tips
Maintaining your vehicle’s headlights is crucial for safe driving. Well-maintained headlights ensure better visibility at night and during bad weather. Here are some maintenance tips to help you keep your headlights in top condition.
Extending Headlight Life
To extend the life of your headlights, clean them regularly. Use a soft cloth and a mild cleaner. Avoid harsh chemicals that can damage the lens. Check for any signs of wear and tear.
Moisture inside the headlight can cause damage. Ensure the seals are tight. Replace worn-out seals to prevent water from getting in. Also, turn off your headlights when not needed. This simple step can save energy and prolong their life.
Regular Headlight Inspections
Regular inspections can prevent sudden headlight failure. Check your headlights at least once a month. Look for cracks, fogging, or discoloration. These can reduce the effectiveness of your headlights.
If you notice any issues, address them immediately. Replace the bulb if it is dimming. Adjust the alignment if the light beam is off. Properly aligned headlights improve visibility and ensure oncoming drivers are not blinded.
Frequently Asked Questions
How Do I Change My Car’s Headlight?
First, turn off the car. Then, open the hood. Remove the old bulb. Insert the new one.
What Tools Do I Need To Change A Headlight?
You may need a screwdriver and gloves. Check your car’s manual for specific tools.
Can I Change A Headlight Myself?
Yes, it’s usually a simple task. Follow your car’s manual for instructions.
How Often Should I Replace My Headlights?
Replace them every two years or when they dim. Check them regularly for signs of wear.
What Type Of Headlight Bulb Do I Need?
Check your car’s manual. It will list the correct bulb type for your vehicle.
Conclusion
Changing a headlight can be quick and simple. Follow the steps carefully. Ensure you have the right tools and a new bulb. Safety first—always disconnect the car battery. With practice, you will get faster at it. Bright headlights are essential for night driving.
They keep you and others safe. Don’t ignore a dim or burnt-out bulb. Regular checks can prevent sudden issues. Remember, your car’s manual is a great guide. Happy driving and stay safe on the road!


