Drive belts are essential components in many machines. They ensure smooth operation and efficiency.
If you notice squealing or slipping in your machinery, it’s time to replace the drive belts. This crucial maintenance task can prevent costly breakdowns and extend the life of your equipment. Drive belts wear out over time due to friction and tension.
Regular inspection helps spot signs of wear early. Replacing a drive belt may seem daunting, but it’s straightforward with the right guidance. In this blog, we will walk you through the steps to replace drive belts safely and effectively. Understanding this process will save you time and money. Let’s get started on keeping your machines running smoothly.
Importance Of Drive Belts
The drive belt in a vehicle is vital. It keeps the engine running smoothly. Without it, many parts of the car would not work properly. This simple component has a big job. Learn why it is essential to understand its importance.
Role In Vehicle Performance
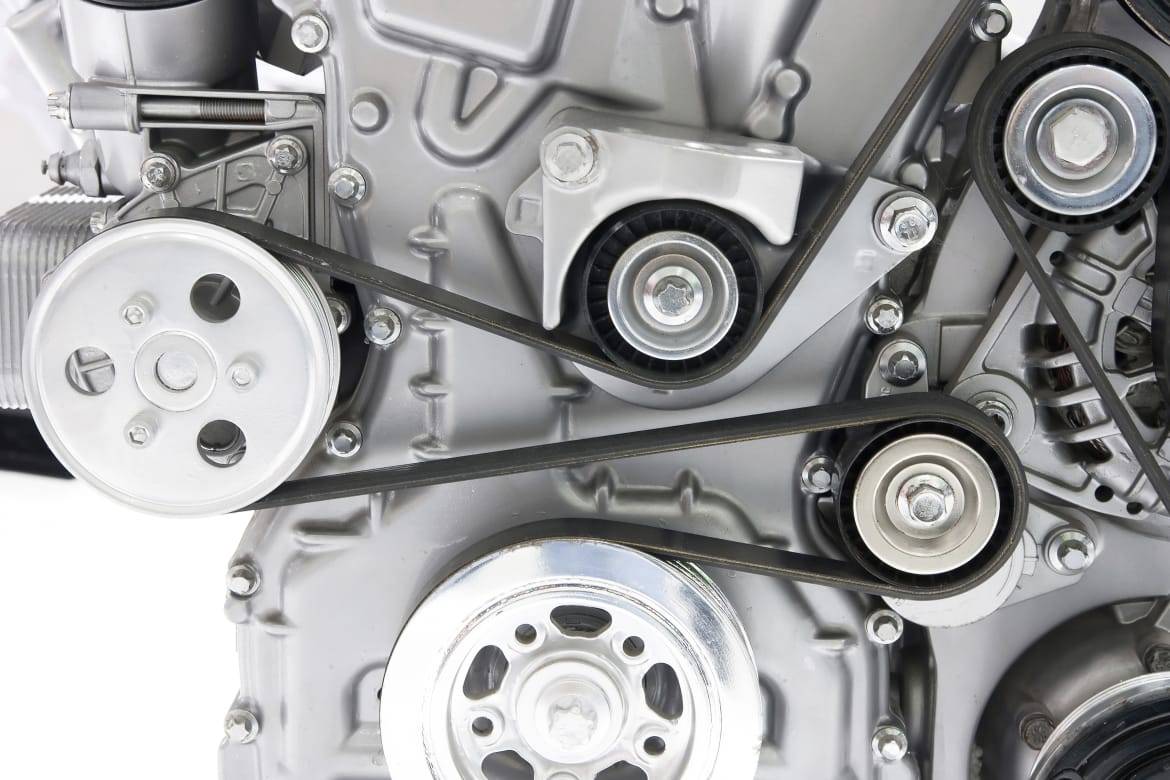
Drive belts connect various engine components. They power the alternator, water pump, and air conditioning. This ensures the car runs efficiently. A well-functioning drive belt maintains engine performance. It also helps in fuel efficiency. When a drive belt wears out, the car’s performance drops. Regular checks can prevent this.
Signs Of Wear And Tear
Drive belts are made of rubber. Over time, they can crack or fray. Listen for squealing noises from the engine. This is a common sign of wear. Check for visible cracks on the belt. If the belt looks shiny or glazed, it may need replacement. Another sign is poor vehicle performance. If the car overheats or the battery dies quickly, inspect the drive belt. Regular maintenance can catch these issues early.
Types Of Drive Belts
Understanding the different types of drive belts is crucial for vehicle maintenance. Each type has a specific function and importance. Knowing these differences can help you identify issues and perform timely replacements.
Serpentine Belts
The serpentine belt is a long, continuous belt. It winds through several components in the engine. It powers the alternator, power steering pump, and air conditioning compressor. This belt is made from durable rubber. It often lasts between 60,000 to 100,000 miles. A worn serpentine belt can cause engine overheating and battery issues. Regular inspections are essential to avoid sudden breakdowns.
Timing Belts
The timing belt synchronizes the engine’s camshaft and crankshaft. It ensures the engine’s valves open and close at the right times. Timing belts are usually made from reinforced rubber. They require replacement every 60,000 to 100,000 miles. A broken timing belt can cause severe engine damage. Checking it regularly can prevent costly repairs.
Tools And Materials Needed
Replacing drive belts is a crucial maintenance task for many machines. To perform this task efficiently, having the right tools and materials is essential. This section will guide you through the basic tools and specific belt replacement kits needed for this job.
Basic Tools
To replace drive belts, you need some basic tools that are likely already in your toolbox. These tools make the process smoother and ensure safety.
- Wrench Set: A set of wrenches is vital. It helps in loosening and tightening bolts.
- Screwdrivers: Both flathead and Phillips screwdrivers are necessary. They help to remove covers and panels.
- Pliers: Pliers are useful for gripping and pulling the belt. They also help in removing clips and pins.
- Socket Set: A socket set is handy for removing nuts and bolts of different sizes.
- Torque Wrench: A torque wrench ensures bolts are tightened to the correct specification. This prevents over-tightening or under-tightening.
- Safety Gear: Always wear gloves and safety glasses. They protect your hands and eyes from potential injuries.
Specific Belt Replacement Kits
Specific belt replacement kits contain all the necessary components for a smooth replacement process. These kits are designed for particular machines, ensuring compatibility and efficiency.
| Kit Type | Includes |
|---|---|
| Automotive Belt Kit |
|
| Appliance Belt Kit |
|
| Industrial Machine Belt Kit |
|
Ensure you have the right kit for your specific machine. This saves time and avoids compatibility issues. Having these tools and materials at hand will make the drive belt replacement process straightforward and efficient.
Credit: www.napaonline.com
Preparing Your Vehicle
Replacing the drive belt in your vehicle is essential maintenance. Proper preparation ensures a smooth process. This section will guide you through the necessary steps to prepare your vehicle for drive belt replacement. Follow the instructions carefully to ensure safety and efficiency.
Safety Precautions
Before starting, ensure you have a safe working environment. Park your vehicle on a flat surface. Engage the parking brake and turn off the engine. Disconnect the battery to avoid any electrical accidents. Wear protective gloves and safety glasses.
Make sure you have all the necessary tools. These might include a wrench set, socket set, and a belt tensioner tool. A well-lit workspace is crucial. Use a flashlight or work light if needed.
Locating The Drive Belt
Open the hood and secure it. Locate the drive belt. It is usually near the front of the engine. Refer to your vehicle’s manual for the exact location. The manual will also provide a diagram of the belt’s routing.
Inspect the belt’s condition. Look for signs of wear and tear like cracks or fraying. If the belt is damaged, it’s time for a replacement. Also, check the pulleys and tensioner for any issues. Ensure they are in good condition.
Take a photo or make a sketch of the belt’s routing. This will be helpful when installing the new belt. It ensures you place the new belt correctly.
Removing The Old Belt
Replacing your drive belt is essential for your vehicle’s performance. The first step is to remove the old belt. This process involves a few key actions. Understanding each step will help you complete the task smoothly.
Loosening Tensioners
Locate the tensioner pulley. It keeps the belt tight. Use a wrench to rotate the tensioner. This will release the tension on the belt. Be careful as the tensioner is spring-loaded.
Hold the wrench firmly. Slowly reduce tension. This will prevent the belt from snapping back. Once the tension is loose, the belt will have some slack. You can now proceed to remove it.
Taking Off The Belt
With the tensioner loose, you can take off the belt. Carefully slide the belt off the pulleys. Note the belt’s path. This will help when you install the new belt. Take your time to ensure you remove it gently.
Inspect the pulleys after removing the belt. They should be clean and free of debris. This ensures the new belt runs smoothly. Removing the old belt is a critical step. It sets the stage for installing the new one.

Credit: www.youtube.com
Installing The New Belt
Installing the new belt is a crucial step in maintaining your vehicle’s performance. A correctly installed belt ensures smooth operation and prevents unexpected breakdowns. Follow these steps to position and adjust the new belt properly.
Positioning The Belt
Start by comparing the new belt with the old one. Ensure they are the same length and type. Carefully place the new belt over the pulleys. Make sure it fits into the grooves correctly. Double-check the belt’s alignment with the pulley tracks. Proper positioning is key to avoiding slippage.
Adjusting Tension
After positioning, adjust the belt tension. Use a tension gauge or follow the manufacturer’s guidelines. Too tight, and you risk damage to the pulleys. Too loose, and the belt may slip or squeak. Tighten the adjustment bolt gradually. Check the tension by pressing down on the belt. It should move about half an inch. Readjust if necessary.
Post-installation Checks
After installing new drive belts, it’s essential to perform post-installation checks. These checks ensure the belts function properly and last long. Let’s dive into some critical steps.
Ensuring Proper Alignment
First, examine the alignment of the belts. Misaligned belts can cause excessive wear and tear. Use a straightedge tool to check alignment. Place the tool along the pulleys. Ensure there is no gap between the tool and the belt. Even a slight misalignment can lead to issues. Adjust the pulleys if necessary.
Testing Belt Tension
Next, test the tension of the belts. Proper tension ensures the belts run smoothly. Use a belt tension gauge for accuracy. Place the gauge on the belt. Apply pressure and note the reading. Compare it with the manufacturer’s specifications. Adjust the tension if it’s too tight or too loose. A well-tensioned belt increases efficiency and reduces wear.
Credit: www.cars.com
Maintenance Tips
Regular maintenance of drive belts ensures smooth operation of your machinery. Neglecting drive belts can lead to costly repairs and downtime. Follow these simple tips to keep your drive belts in top condition.
Regular Inspections
Check drive belts for wear and tear every few months. Look for cracks, frays, or glazing on the belt surface. These signs indicate the belt is nearing the end of its life. Ensure the belt tension is correct; too loose or too tight can cause problems.
When To Replace Again
Replace drive belts every 30,000 to 50,000 miles. Always follow the manufacturer’s recommendation. If the belt shows significant wear before this range, replace it sooner. Keeping a spare drive belt on hand is a good practice. This prevents unexpected downtime.
Frequently Asked Questions
How Often Should Drive Belts Be Replaced?
Drive belts should be replaced every 60,000 to 100,000 miles. Check your owner’s manual for specific recommendations.
What Are The Signs Of A Bad Drive Belt?
Signs include squeaking noises, visible cracks, fraying, or a loose belt. Inspect regularly to avoid problems.
Can I Replace A Drive Belt Myself?
Yes, with basic tools and a guide, you can replace a drive belt. Ensure you follow the correct steps.
What Happens If A Drive Belt Breaks?
If a drive belt breaks, it can cause the engine to overheat and damage other components. Replace it promptly.
How Much Does It Cost To Replace A Drive Belt?
The cost ranges from $25 to $75 for the belt, plus labor. Prices vary by vehicle and location.
Conclusion
Regularly replacing drive belts ensures your vehicle runs smoothly. Ignoring worn belts can lead to breakdowns. Save time and money with timely replacements. Check your belts often and look for signs of wear. A small effort now prevents bigger problems later.
Keep your vehicle in top shape with proper maintenance. Drive safe and enjoy peace of mind. Your car will thank you.


