To fix Ninebot scooter charging problems, first check the charger and power outlet. Ensure the charging port is clean and free from debris.
Dealing with a Ninebot scooter that refuses to charge can be frustrating. Owners often face this issue unexpectedly, leaving them puzzled about what to do next. The key to resolving charging problems lies in a systematic approach. Start by examining the charger itself, as it could be faulty or not properly connected.
A common oversight involves the charging port, which might be obstructed or dirty, preventing a good connection. Regular maintenance and care are crucial for avoiding such issues. This guide aims to provide straightforward solutions, helping you get back on the road swiftly. Remember, addressing small issues early can prevent more significant problems down the line, ensuring a smoother ride and extending the lifespan of your scooter.

Credit: www.reddit.com
Introduction To Ninebot Scooter Charging Issues
Troubleshoot your Ninebot scooter’s charging dilemmas with our expert guide. Discover practical solutions to get your ride powered up and ready to go.
Ninebot scooters have gained popularity for their convenience and eco-friendliness. Like all electronic devices, they may face charging issues. Understanding these problems is crucial for a smooth ride.
Common Symptoms Of Charging Problems
- Scooter won’t charge: No response when plugged in.
- Slow charging: Battery takes longer than usual to fill up.
- Partial charge: Battery stops charging before full.
- Indicator lights malfunction: Incorrect charging signals displayed.
Importance Of Addressing Charging Issues Promptly
Immediate action prevents further damage. It ensures continued scooter use. It also saves time and money on repairs. Regular maintenance keeps charging problems at bay.
Initial Troubleshooting Steps
Are you facing issues with your Ninebot scooter not charging? Start with these initial troubleshooting steps to find a solution. Simple checks can often solve common charging problems.
Checking The Power Source
Ensure your scooter’s power source is active. A faulty outlet could be the culprit. Use these steps:
- Verify outlet power: Plug in a different device to test the outlet.
- Check for outages: Confirm there are no power outages in your area.
- Try another outlet: If the first outlet fails, try charging with another one.
Inspecting The Charger And Ports
Chargers and ports can fail too. Look for these signs:
- Examine the charger: Look for damage or wear on your charger.
- Check the port: Make sure the charging port on your scooter is clean and intact.
- Test with another charger: If possible, try charging with a different compatible charger.
Battery Health And Maintenance
Battery Health and Maintenance is key to a long-lasting Ninebot scooter. Proper care ensures your ride stays powered up. Neglect leads to charging issues.
Routine Battery Care Tips
- Keep it clean: Wipe the battery case with a dry cloth.
- Avoid extreme temperatures: Store your scooter in a cool, dry place.
- Regular use: Frequent rides keep the battery in good shape.
- Full cycles: Charge fully and use until about 20% remains.
Signs Of A Failing Battery
- Shorter rides: Your scooter doesn’t go as far as it used to.
- Long charge times: Charging takes longer than usual.
- Won’t charge: The battery does not charge at all.
- Power cuts: The scooter turns off during use.
Credit: ninebot.my.site.com
Charger Functionality Tests
Having trouble charging your Ninebot scooter? It’s time to check the charger. Charger Functionality Tests are key. They tell us if the problem is the charger or the scooter.
How To Test Your Charger
Testing your charger is simple. Follow these steps:
- Check the Power Source. Make sure it works. Try plugging in another device.
- Inspect the Charger. Look for any damage. Check the cable and plug.
- Connect the Charger. Plug it into your scooter.
- Look for the Light. Chargers have a light. It shows if it’s working.
If the light doesn’t turn on, your charger might be broken.
When To Replace Your Charger
Not sure when to get a new charger? Here are signs:
- No Light: Means it’s not getting power.
- Physical Damage: Cracks or exposed wires are bad.
- Overheating: Warm is okay. Hot is not.
- Old Age: Chargers wear out over time.
If you see these signs, it’s time for a new charger.
Scooter’s Electrical System Check
Is your Ninebot scooter refusing to charge? You’re not alone. A common culprit could be the scooter’s electrical system. Let’s start with some basic troubleshooting steps.
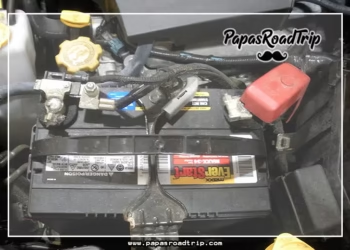
Examining The Fuse And Wiring
Check the fuse first. A blown fuse can stop the charge flow. Find the fuse on your scooter’s battery. If it’s darkened or broken, it needs replacement.
- Locate the scooter’s fuse
- Inspect for visible damage
- Replace if necessary
Wiring issues can also cause problems. Look for any loose or damaged wires. Secure all connections tightly.
| Check Point | What to Do |
|---|---|
| Loose wires | Reconnect securely |
| Damaged wires | Consider professional repair |
Troubleshooting The Circuit Board
The circuit board is the scooter’s brain. A fault here can halt charging.
- Inspect the board for burn marks
- Seek a professional for complex issues
Use a multimeter to test the board’s functionality. Look for readings that match the scooter’s specifications.
- Set multimeter to correct settings
- Test various points on the board
Ensure the scooter is powered off before checking. Safety comes first!
Credit: www.reddit.com
Professional Repair Vs. Diy
Dealing with a Ninebot scooter that won’t charge can be stressful. You might wonder whether to fix it yourself or seek professional help. This section will guide you through both options.
When To Seek Professional Help
Professional repair is the safest choice for complex issues. Here are signs you need an expert:
- No response when you connect the charger.
- Visible damage on the battery or electronics.
- Error messages that won’t clear after troubleshooting.
- Warranty coverage that could be voided by DIY repairs.
Diy Repair Tips For Common Issues
Some charging problems can be fixed at home. Follow these tips:
- Check the charger and cord for damage.
- Ensure the power outlet is working properly.
- Inspect the scooter’s charging port for debris or damage.
- Try a reset if the scooter has this function.
Remember: Always consult the user manual before attempting repairs. Use the right tools to avoid damaging your scooter.
Preventing Future Charging Problems
Addressing Ninebot scooter charging issues early can safeguard against future hassles. Learn effective strategies to maintain optimal charging performance and enjoy uninterrupted rides.
To keep your Ninebot scooter ready for the road, prevent charging issues before they happen. Smart storage and regular maintenance are key. Let’s dive into how to protect your scooter’s battery life and ensure long-term performance.
Best Practices For Scooter Storage
- Keep it dry: Store your scooter in a moisture-free area.
- Avoid temperature extremes: Extreme heat or cold can harm the battery.
- Partial charge for long-term storage: Charge the battery to 40-60% if storing for a while.
Proper storage ensures a healthy battery. It helps avoid common problems that lead to charging issues.
Routine Maintenance Schedule
A consistent maintenance routine keeps your scooter running smoothly. It also extends the battery’s life. Use this schedule as a guide:
| Frequency | Maintenance Task |
|---|---|
| Weekly | Check tire pressure and brakes. |
| Monthly | Clean battery contacts and inspect charging port. |
| Quarterly | Test battery health and check for software updates. |
Stick to this schedule to prevent future charging problems. Enjoy a reliable ride every time you hit the power button!
Upgrading Your Ninebot Scooter
Enhancing your Ninebot scooter can boost its performance. A key upgrade involves the charging system. An upgraded charger may offer faster, more efficient charging. Let’s explore the benefits of such chargers and how to choose compatible accessories.
Benefits Of Upgraded Chargers
- Faster charging times: Spend less time waiting for a full charge.
- Extended scooter range: Enjoy longer rides without frequent stops.
- Improved battery health: Proper charging can prolong battery life.
- Convenient features: Some chargers have indicators for charge levels.
Selecting Compatible Accessories
Finding the right accessories is crucial. Always check for compatibility with your scooter model.
| Accessory Type | Compatibility Check |
|---|---|
| Chargers | Voltage and plug type must match. |
| Batteries | Size and connection should fit perfectly. |
| Additional Items | Read product descriptions carefully. |
Choose only certified accessories to ensure safety and functionality. Look for reviews and ratings before buying.
Faqs On Ninebot Scooter Charging
Got questions on how to charge your Ninebot scooter? You’re in the right place! Our FAQ section provides quick solutions to common charging issues. Let’s dive in and get your scooter powered up again!
Troubleshooting Quick Answers
Not charging? Check the power outlet and charger. Ensure the scooter’s port is clean. Try a reset if necessary.
Charging slowly? Inspect the battery and charger. Use only the original charger. Avoid extreme temperatures.
Light indicators? Red means charging. Green indicates a full battery. Blinking lights may signal a problem.
Where To Find Replacement Parts
- Official Ninebot store for guaranteed compatibility.
- Authorized dealers for genuine parts.
- Online marketplaces, but ensure parts are authentic.
Frequently Asked Questions
Why Won’t My Ninebot Scooter Charge?
The Ninebot scooter may not charge due to a faulty charger, damaged battery, or loose connection. Check these components to troubleshoot.
Can Weather Affect Ninebot Scooter Charging?
Extreme temperatures can impact the charging process of a Ninebot scooter, potentially slowing down or preventing charging altogether.
What Do Ninebot Scooter Charging Indicators Mean?
Charging indicators on a Ninebot scooter display battery level and charging status; a solid red or green light typically signifies charging or full charge.
How To Reset A Ninebot Scooter Battery?
To reset a Ninebot scooter battery, disconnect the battery and hold the power button for 10 seconds before reconnecting and attempting to charge again.
Is It Possible To Overcharge A Ninebot Scooter?
Modern Ninebot scooters are designed with overcharge protection, but it’s still best to unplug the scooter once it reaches a full charge to maintain battery health.
Conclusion
Tackling charging issues with your Ninebot scooter needn’t be daunting. With the tips shared, you’re equipped to diagnose and solve power problems swiftly. Remember, maintaining connections clean and using the correct charger are key steps. For ongoing smooth rides, keep these solutions handy and enjoy the convenience your scooter brings to every journey.


